hiphinge

Holiday Poem

Holiday Poem

Lori Szalay
Date

Written by Lori Szalay, Gokhale Method Teacher


Here’s a little story I’d like to tell,

Some of you may know it well…..


Twas the day of the Foundations Course and all through the room,

Backs, necks, shoulders and much more were aching and there was a feeling of doom.

The stretchsit cushions were attached on the chairs with care,

A Posture Poised Teacher was there with knowledge to share.


The students knew they would learn to stretchlie to be comfortable in their beds,

As visions of a pain-free life continued to dance in their heads!

With compressed spines, slouchy shoulders and many with rounded backs,

Each had their own concern yet all eager to learn the posture modification facts.


When they lengthened their spines and used the stretchsit cushion for traction,

They sighed with relief from such a simple therapeutic action! 

Next was the shoulder roll…forward, up, back and down,

There was a sound of a crackle, a pec stretch….. but not a single frown!  


Onto the feet, to reshape them like a “Kidney Bean,”

It lines up your knees and hips….if you’ve done it you know what I mean!

With the illusion of helium filling up in their heads,

Their necks elongated, going from pressed down to much taller instead.   


With their inner corset engaged and ribs anchored in,

Standing up proved to give a feeling of being a bit thin.

With feet shaped just right and weight shifted back on their heels,

Each stood so straight…. it really was a big deal! 


As they anteverted their pelvis, tipping forward a slight,

Their ‘bum’ floated back and up…. and landed just right!

Keeping their upper body strong… shoulders back, neck straight,

Each knew healthy posture was part of their fate!


As they learned to bend using a technique call ‘hip-hinge,’

Having flexible hamstrings and hip-rotators is how to avoid any muscle twinge!

Checking the ‘groove’ assuring their back stays tall,

Realizing each hinge is a bend…. no matter how big or small!


Next onto Glidewalking, a four part check list straight from the book,

Now using their muscles with every step they took!

To the sound of music and courses they came, 

They walked and practiced each part by name….

“Keep your heel down, leg straight and extended back,

Squeeze your glutes, land with a soft knee…..Relax!


There is so much more to learn and much more to tell,

If you are student of the Gokhale Method you know all this too well!

If you are thinking about taking the course, do not fret or hesitate,

Log onto the website, register to take the course and begin your Posture Fate!


One more thing to leave you as I go…. Happy Holidays to all and a "BIG HO-HO-HO!!"

How to Choose a Bike Seat for Good Posture (Part 2)

How to Choose a Bike Seat for Good Posture (Part 2)

Esther Gokhale
Date

In our part 1 blog post on the topic of bikes, we went over how to find the right frame for you. The next important step is to find the right seat for your body and your bike, since without a decent seat you may be uncomfortable, or may find it challenging to have healthy posture. Your seat should distribute your weight across regions comfortably; it should have padding, but not so much that it lacks support and stability; it should be set at an angle that allows your pelvis to antevert (that is, tip forward relative to the angle of your spine.) A good seat is crucial whether you prefer to be upright and stacksit, or if you prefer a racing style with a hiphinge. Here’s what you need to know about bike seats to find the right one for you:


Seat shape and angle: On most bike seats, it’s possible to change not just the height, but the horizontal position and the tilt of the seat. Make these adjustments carefully on any bike you plan to ride regularly. A small difference in the seat position can have a big difference on your posture as well as your comfort.

The angle of your bike seat—because it makes anteversion uncomfortable or because it tilts you too far forward or backward—may be causing you to tilt your pelvis in a direction that doesn’t allow for good back positioning. Many people prefer bike seats that carry most of their weight on their sitz bones (further back) rather than on the tissues under the pubic bone (further forward), because there are fewer sensitive nerves endings around your sitz bones. So if the front of your seat is tilted too far up (as in the image above left), this can encourage you to tuck your pelvis in an effort to relieve pressure on the pubic bone. And if the seat is really tilted too far up, it forces you into a tuck because of the backward slope of the seat—picture this as the opposite of the wedge you would use to facilitate stacksitting. If you try to sit on your bike with an anteverted pelvis (more angled than the angle of the hiphinge you need to reach your handlebars), and your seat causes you discomfort, you may need to angle the front of the seat downward.

Too much downward tilt is also problematic. If your seat makes you feel as though you are slipping forward off it when you antevert your pelvis, you will need to tip it back more so that you stay comfortably in place without having to brace all your weight against your handlebars. If your seat is tilted forward so that it doesn’t sufficiently ‘cradle’ your pelvis at the right angle, you may also be tucking in an effort to get your bottom further back on the seat.

It is possible that after playing with your seat to find a comfortable middle-ground, you will discover you need a new seat altogether. You should look for one that accommodates the shape and size of your sitz bones and carries your weight in the least-sensitive areas when you are properly hiphinging on your bike. Some seats are wider and may cause chafing against your thigh; you may need a cutout in your seat to relieve pressure under your public bone. To find a seat that matches your body, you may need to do a lot of testing!

Note that many newer “comfort” seats have a huge amount of padding and can amount to sitting on a small mound, rather than distributing your weight and ‘cradling’ your bottom. This extreme amount of padding can actually make it harder to comfortably antevert your pelvis:


Because these seats fall away from a padded peak, your weight is not well distributed; to find a comfortable spot for the pressure to land, you may end up tucking your pelvis so your sitz bones take all the force.

Older “saddle” style bike seats may appear too firm, but they can cradle your pelvis, distribute your weight comfortably, and promote stacking.


The slightly bowl-shaped curve of these seats provides lift in the back like a wedge, but catches your from sliding forward with the projection in the front.

Firmness and fabric covering on the seat will also make a difference in your riding experience. A slippery fabric may cause you to always be sliding around; a squishy seat may feel most comfortable at first, but end up chafing or lacking support. Finding the ideal seat is best accomplished through a lot of testing and laps around the block, so we recommend you find a very patient bike shop attendant to help you with this selection. You may need to purchase several seats so you can test them out on longer rides over several days before returning the rejects.

In addition to the more standard styles found in most bike shops, there are also many kinds of specialty seats available online which may work best for your needs and preferences:


Both of these seats provide a nice bowl shape that can support anteversion and comfortably distribute weight. Personal preference will dictate whether these fit your body, and enable a proper range of movement and a stable seat while on your bicycle.

Getting moving: When it’s time to actually get on your bike, how should you do it? The most gentle way to mount your bike will be to start by straddling the frame in front of the seat. Try doing this next to a railing or wall where you can brace yourself for balance, and move slowly while engaging your inner corset.


This young girl shows the ideal way to start your ride—straddle the frame and tallstand to align your pelvis and spine.

If you are not adept at swinging one leg through the air, or your balance isn’t what it used to be, a bike frame that dips very low in front (like comfort bikes) may be necessary to make getting on and off your bicycle easy. Make sure you can easily step over your frame without hurting your back or losing balance.


This comfort cruiser is ideal for maintaining a relaxed upright posture, and has a low bar in the front that makes getting on and off the bike a breeze!

Before you get up your seat, perform a shoulder roll and slowly reach your arms to your handlebars, to make sure you maintain good shoulder positioning with your elbows close to your sides, and no slump in the upper back. Keeping your shoulders in position may deepen the amount of bend you need to sit with, which will dictate how anteverted your pelvis should be.

When you get up onto your seat, you will have to perform an advanced hiphinge/stacksit, one that is done by bringing your hips back and up, rather than your torso down (while moving and balancing!). As you stand up on your pedals, make sure you start with a straight back, engage your rib anchor, and then slowly deepen your hiphinge as you move your hips back and up onto the seat, keeping your sitz bones out behind you.


Start hiphinging as you stand up on your pedals, before moving your bottom onto your seat.

The motion is similar to hiphinging before lowering down onto a chair for stacksitting:


As your lift yourself into your bike seat, you will need to hiphinge to some degree, more or less depending on the style of your bike and how upright it allows you to be.

If you need to adjust while you are on the move, you can make sure you are properly anteverted by lifting your bottom up a little and repositioning your sitz bones even farther behind you.

As you ride, you can lessen the work of your back, shoulder, forearm, and wrist muscles by keeping as much weight in your seat as possible, rather than supporting yourself on your handlebars. If you have experienced wrist or arm pain, you should consider a frame and seat that allows you to stacksit, since being fully upright will save your wrists from unnecessary stress.

Engaging your inner corset as you ride will also protect you from bumps and jostling. Because you will be in motion, manually checking your position or looking in a mirror is likely impossible, so you will have to rely on your proprioception and your body’s comfort levels to judge how well you are maintaining your posture. But like with everything else, practice makes perfect; with some repetition and regular breaks, you can soon master the Gokhale Method on two wheels!

Do you have any experiences to share about bike seats?


How to Ride a Bike with Good Posture (Part 1)

How to Ride a Bike with Good Posture (Part 1)

Esther Gokhale
Date

Most people, when they ride a bike, tuck their pelvis so the rear portion of their sitz bones rests on the seat. Then they lean over to reach the handlebars causing a lot of spine curvature. With the additional tension created from pushing the pedals and holding the handlebars, and the bouncing and jostling from the road, riding a bike this way can be a painful and harmful activity.


Many modern bike riders look like Mr. Bean when they ride a bike, sitting with an unnaturally curved spine.


Each of these modern-day bikers has a rounded spine and craned neck. Image courtesy John Matrix at bikelist.org.

With a few adjustments, riding a bike can be a harmonious and healthful activity. By using hiphinging and stacksitting, and by making sure you have the right bike and the right settings, you can enjoy this way of exercising and getting around. Here are the key things to look for in a bike frame:

Bike style: In some areas, road bikes and touring bikes—styles that require a deep bend to reach the handlebars—are very common. In other places, cruisers, hybrids, and flat-foot ‘comfort bikes’ are the norm. Pick a style that works best for you, but if you experience back pain, an upright model will likely more comfortable and conducive to good posture.

An additional advantage of an upright bike is that you won’t need much hamstring flexibility and back strength to maintain a J-spine. An upright bike allows you to stacksit on your seat with an easily maintained healthy neck position.


This comfort cruiser is ideal for maintaining a relaxed upright posture. It also has a low bar in the front that makes getting on and off the bike easy.


Shailene Woodley rides a bike with close-swooping handle bars, which make it easy to ride upright with the shoulders back.


This woman from yesteryear demonstrates an excellent J-spine on a ‘comfort’ frame that allows her to stacksit and easily keep her shoulders back. 


Here Kim Kardashian rides an upright with cruiser handlebars. With a slight hiphinge, she is able to maintain healthy spine and neck alignment. This position doesn’t require great hamstring flexibility; it does requires slightly more work than stacksitting.

For those who prefer a more aerodynamic racing style, you will need to do a deep hiphinge. It can be challenging to find a seat that allows for appropriate and comfortable pelvic anteversion. I will write more about bike seats in an upcoming sequel post.


To get closer to a racing position with your torso more horizontal, you will need a pronounced hiphinge to maintain a straight spine. This woman hiphinges quite a bit, but stops short of ideal and therefore has a slightly rounded lumbar spine. Ideally, you pivot your head upwards on the neck rather than crane the neck to look ahead (more on this in a future post). 

Frame size: For good bicycling posture, you will need an appropriately sized bike frame that allows you to maintain a relaxed shoulder and neck position, and allows you to touch your feet to the ground from your seat. The handlebars need to be within reach without your shoulders pulling forward. 


With a little effort, you can find just the right size and style frame to keep you straight and pain-free!

With With good posture and a good bike fit, biking is a pleasure to observe and experience.

The more upright you can be on your bike, the less work you will have to do to maintain your J-spine.

Children often maintain a J-spine on bikes without too much trouble. Children’s bikes are rarely designed for aerodynamic racing, but rather for ease of learning on.

A frame that is too small can cause you to scrunch up, tuck your pelvis, and round your spine. A frame that is too large can pull your shoulders too far forward to reach the handlebars. When your handlebars are in the wrong place and you rest a lot of weight on them, you may create shoulder and neck tension from bracing yourself continuously.


This rider’s bike is too small for him, resulting in a tucked pelvis and rounded spine.

If you are exceptionally tall, you may find it difficult to find a frame that is tall enough to fit you. If you need to lift your seat to its max to create enough legroom for yourself, consider also lifting your handlebars. There are extensions that can be attached to the stem of the handlebars, to bring them closer or farther away, as well as to add height. Your frame needs to be long enough to comfortably reach between seat and handlebars without hitting your knees or scrunching your torso.


This tall rider is having trouble fitting onto a too-small frame—the distance between the handlebars and seat is too short for his torso to fit without buckling at the spine.

For smaller-than-average adults, it is sometimes difficult to find a petite frame that allows you to lower the seat enough to reach the ground, without this causing the handlebars to be uncomfortably out of reach. Again, there are adjustable stems available for handlebars that are shorter than average, or can tilt the handlebars closer to you. With many bike seats, you can also adjust the seat position horizontally, and it may be easier to slide the seat closer to the handlebars than to bring the handlebars closer to the seat. Just make sure that your seat isn’t so far forward that pedaling becomes awkward or uncomfortable.

How well does your bike fit you? What has your experience been riding different kinds of bicycles? How good is your posture when you ride? Please do share!


Join us in an upcoming Free Workshop (online or in person).  

Find a Foundations Course in your area to get the full training on the Gokhale Method!  

We also offer in person or online Initial Consultations with any of our qualified Gokhale Method teachers.

How to Fix Muscle Imbalances - Do They Matter?

How to Fix Muscle Imbalances - Do They Matter?

Esther Gokhale
Date

Having some asymmetry in our bodies is natural and by no means a problem… for example, the majority of us are either strongly right- or left-handed, and if we play soccer we soon discover that we have a preferred foot, too! This study shows that pelvic obliquity (often caused by legs of a slightly different length) is present in equal measure in people both with and without Lower Back Pain, and doesn’t seem to be a contributing factor to the problem of back pain.

A famous example of someone who had a big leg length discrepancy was Bruce Lee. It didn't hold him back very much! To quote him, "I became a martial artist in spite of my limitations. My left leg is almost one inch shorter than the right.  That fact dictated the best stance for me – my right foot leading. Then I found because the right leg was longer, I had an advantage with certain types of kicks, since the uneven stomp gave me greater impetus.”


Bruce Lee, who had almost a 1" leg length discrepancy, managed to go far nonetheless.

It is a good bet that having a dominant side is not a significant problem for humans, or we would likely have evolved to be more ambidextrous!


Pete Sampras showing great form. Playing tennis is a very asymmetric activity, but amateurs and professionals alike don't suffer from it in any obvious way.


As long as our bones and joints stay well aligned and our postural muscles are strong, moderate amounts of muscular asymmetry doesn’t seem to be problematic. However, if our posture and movement patterns have been poor, we are much more likely to develop shears or twists in our bodies, and suffer injury or uneven wear in the joints. Joints or muscles that remain unused because of pain or weakness can degenerate or atrophy, hindering the development of a strong postural base.

Because of this, it is worth observing our everyday movements. If you favor one side to the extent that one side of you becomes strong and the other noticeably weaker, or one side is flexible and the other stiff or uncomfortable, applying the Gokhale Method can help redress the balance:

Stretchlying on a Different Side
If it is suitable for your back, give a little more attention to stretchlying on your less favored side, where it is likely that your back muscles are tighter and shorter.


Stretchlying on your less favored side can help even your body out. 
 

Fine-tune Your Hiphinge

Make sure that:

  1. Your weight is evenly distributed between your feet

  2. Each knee is bent the same amount

  3. Each thigh is externally rotated to the same degree

  4. Most importantly, check that your pelvis and torso remain central and that you are not listing to one side.


Be sure that as you bend, your knees point in the same direction as the feet, and that you don't list to one side.


Glidewalking
When practicing your glute squeezes for glidewalking, usually by raising a leg behind you, it can be helpful to complete more reps on your weaker side. Same with the inchworm exercises for gaining foot strength.


Try to even out unevenness in the strength of your feet by doing more reps on the weak side.
 

Steps and Stairs
Make sure you do not always climb up steps and stairs with the same leg first. Alternate which leg you start with, and focus on pushing off from behind with the foot.


Alternating which leg you begin climbing stairs with helps eliminate a possible cause of muscle imbalance.


You may also notice that a movement flows well in one direction, and feels awkward in the other direction (for example, opening a door with your non-dominant hand). Practice switching sides from time to time. Beginning with a blank slate will help you reexamine and improve your movement pattern. Being somewhat ambidexterous can improve your overall muscular strength and be helpful in sports and everyday life; it can also help chart new and helpufl neural pathways in your brain.

Do you have activities in your life that are very asymmetric? Have they caused you problems or have you navigated them just fine?

Join us in an upcoming Free Workshop (online or in person).  

Find a Foundations Course in your area to get the full training on the Gokhale Method!  

We also offer in person or online Initial Consultations with any of our qualified Gokhale Method teachers.


Airplane Seat Solutions

Airplane Seat Solutions

Esther Gokhale
Date


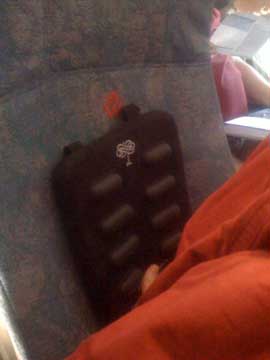
A Stretchsit cushion helps fill the unhealthy
C shape found in many airplane seats, or
even better, facilitates gently
stretching the spine.

The summer is upon us and many of us will be traveling in buses, boats, cars, and planes. I have spent a lot of time on planes and have observed people in discomfort all around me. The shape of airplane seats varies from airline to airline, but all of them have a curvature that forces the spine into an uncomfortable C-shape. In this season of airline travel, I’d like to share some simple tips to protect the spine and reduce muscle tension during an airplane flight. 

1) Fill the C

The concave shape of airline seats puts pressure on the spinal discs and is the starting point for muscle tension. Fill the lower part of your seat with pillows, blankets, sweaters, or ideally a Stretchsit® Cushion to create a flat plane along which you can lengthen your spine. 


A seated hip hinge helps bypass the poor
design of some airplane seats.


2) Hiphinge Forward

You can avoid the C-shape altogether by hiphinging forward. Use your hands to support your head with your elbows resting on the open tray. You can adjust the placement and height of your hands to provide a gentle stretch in the neck.


Another possible variation for keeping
your spine healthy 
during a flight.

3) Support Your Head

One of the best ways to rest or sleep on a flight is to lengthen your spine and support your head against the seat in front of you. If you are lucky enough to be in a window seat, you can find even more support in the corner between the seat in front of you and the wall of the airplane. This technique works especially well for taller individuals, who can adjust the placement of their heads to allow the spine to stretch and relax even in cramped spaces. Be sure to use a Stretchsit cushion, blanket, pillow, or sweater to cushion your head.

Here’s wishing you safe and comfortable travels.

Neck Pain Tips

Neck Pain Tips

Esther Gokhale
Date

A pain in the neck really can be a pain in the neck! Here are some tips on how to address this annoying problem:

1. Stretch it out.

  • When you lie on your back, stretch the back of your neck out as you lay your head on the pillow. This way the pillow can help lengthen any tense muscles in your neck.
  • When you drive, use the headrest to stretch the back of your neck out.


2. Know which way is up.

  • Grasp a good-sized clump of hair at the base of your skull and gently pull back and up allowing your chin to angle downward in a relaxed way.
  • Place a small pillow on the top of the head (on the slightly sensitive spot where your fontanel used to be) - this marks the axis along which to align your neck and back.


Notice the alignment of this girl's head with
her torso as she hip-hinges to pound her millet

3. Keep the spine aligned

  • When sleeping on your side at night, use one large or two small pillows so your head does not flop too far out of alignment with the rest of the spine.
  • When bending, do not lead with the head as this encourages a head-forward baseline position.

4. Check your base.

The root of many neck problems is in the pelvis, the foundation for your entire spine.

  • Sit with your tail out behind you instead of under you.
  • Stand with your tail behind you instead of between your legs. 

5. Roll your shoulders back.

Periodically throughout the day, and as preparation for driving and keyboarding, roll your shoulders back into a healthy position. Having your shoulders back and down helps your trapezius muscle keep a healthy baseline, which helps your neck. (Click here for a free download on how to do a shoulder roll from my book 8 Steps to a Pain Free Back)

6. Use your muscles, spare your joints.

  • When walking, engage your buttock (gluteus) muscles to soften your landing. You don’t want your neck (or any of your weight-bearing structures) to experience an earthquake with every step you take. Bonus: making every step a rep will give you a well-toned behind and will make your walk more graceful.
  • If you are jogging or riding in a bumpy bus, imagine you are carrying a significant weight on your head and push up against it. You will be engaging your longus colli muscle and sparing your neck discs and nerves unnecessary wear and tear.

Here's to a healthy neck!
Esther


Join us in an upcoming Free Workshop (online or in person).  

Find a Foundations Course in your area to get the full training on the Gokhale Method!  

We also offer in person or online Initial Consultations with any of our qualified Gokhale Method teachers.

Subscribe to hiphinge