inner corset

Home Exercises Part 2: Crunches

Home Exercises Part 2: Crunches

Esther Gokhale
Date

This is our second blog post in the series where we put popular exercises under scrutiny to examine how they stack up—or not—against the principles of healthy posture. Here we are looking at crunches, a common abdominal exercise.


Crunches are often seen as a better targeted and safer 
abdominal exercise than sit-ups—but there is still a downside.

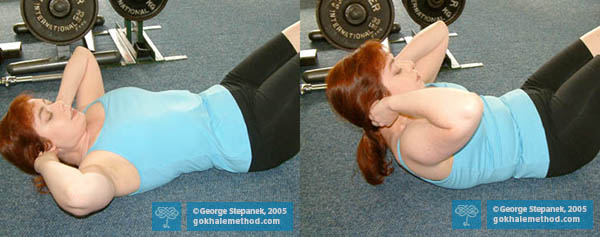
Crunches are done lying down on the floor, face up, knees bent with feet on the floor, and with the hands placed behind or to the side of the head. They involve using the muscles of the rectus abdominis and the obliques to repeatedly raise and lower the upper body. 

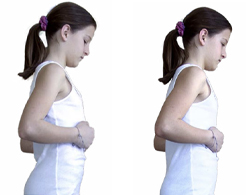
Crunches are well named—they crunch your discs and crunch your nerves. Lifting the weight of the head—which at around 11 lb. or 5 kg is the weight of an average bowling ball—can put considerable strain on your neck and threaten its delicate structures. It also encourages rounding of the back and shoulders, as you can see in the above photo. We recommend against this exercise.


Doing poorly designed exercises and overtraining the “six-pack” muscles will encourage a tucked pelvis
and a rounded upper spine. Freepik

Why are crunches so popular?

People in our culture are conditioned to feel more attractive when they have a flat stomach and an impressive six-pack, and so may turn to all manner of treatments, diet regimens, and abdominal exercises to target this area. People who have experienced an episode of debilitating back pain also want, quite understandably, to strengthen their abs and core in order to protect their back. 

Do most people need to strengthen their abs?

   
Parking the pelvis forward is a common postural habit that pushes into the groins and compresses the lower back. It indicates that the deep abdominal muscles are not engaged and prevents them from fulfilling their postural role. Freepik

Most people in our culture sit, stand, bend, and walk in ways that actually discourage their abdominal muscles from working in their day-to-day lives. Those who either arch or round their backs are holding themselves upright with their back muscles or stressing their joints. With these poor posture habits the “inner corset” (deep muscles of the abdomen and lower back) is not recruited to perform its natural role and becomes progressively weaker. 


This woman in Burkina Faso and man in Brazil use their inner corset in their everyday tasks.

Learning healthy posture as taught in our online Elements course and in-person Gokhale [Go-clay]Method Foundations Course holistically addresses this problem. In the courses we teach specific, well-chosen exercises designed to jump-start weak muscles and awaken your inner corset. Some of these are illustrated in Appendix 1 of my book 8 Steps to a Pain-Free Back

Are crunches a safer exercise than sit-ups?

Crunches are often regarded as a safer and better choice of abdominal exercise than sit-ups. And they are. The Canadian Armed Forces discontinued the use of sit-ups in training and physical-fitness tests due to the large numbers of injuries caused to their personnel. The U.S. military also has a plan to phase them out by 2021. Stuart McGill, Professor of Spine Biomechanics at the University of Waterloo in Canada and a leading researcher on the subject, points to numerous studies that show that repeated sit-ups, which load the discs in a particularly dangerous direction, cause bulging, sequestrated, and herniated discs as well as spinal nerve damage. 


Neither of these people doing crunches have healthy form. Their necks are doing too much, and the man is also tucking his pelvis. Crello

Gym instructors often prefer crunches over sit-ups because they are safer and result in less tension in the psoas (hip flexors). But are they safe enough? 

In our view, classic rounded crunches are still a risky, disc-compressing exercise which encourage tension in the groin, while also training the body in poor postural form (tucking the pelvis and rounding the upper back and neck).


Doing a crunch twisting the head towards the knee encourages the neck to do too much and the pelvis to tuck. Crello

Rounded crunches are sometimes done with a twist at the waist to work the abs more obliquely. This is often done by bringing up the entire upper body and reaching one elbow towards the knee of the opposite leg. 

Effective ab exercises that are healthy for your posture


There are healthy alternatives to crunches that give your abdominal muscles a good workout! 

Our healthy and posture-positive version of this exercise keeps the head supported in the hands. The arm on the side to which you are turning continues to be supported on the ground. You can watch Gokhale Method Fitness teacher Eric Fernandez performing the exercise in this video. You will see that he maintains his spinal alignment throughout the exercise, rather than tucking and rounding his torso. 

When doing this exercise:

  • Support your head in your hands and relax your neck 
  • Rest your upper arm on the floor as you turn towards it, lifting the opposite arm and shoulder from the floor
  • Do not pull your head forward
  • Do not tuck your pelvis
  • Aim for small, smooth, accurate movements

If your abdominal muscles are weak or you are currently or intermittently experiencing back pain, then we recommend that you start with a less challenging exercise. To correctly identify and safely bring your abdominal obliques and other upper abdominal muscles to a healthy baseline tone, we recommend first watching this Gokhale Method rib anchor exercise video, and then learning to use your inner corset. The inner corset is explained in detail in 8 Steps to a Pain-Free Back

Free Chapter of 8 Steps to a Pain-Free Back

As a special gift to newsletter subscribers who have confirmed their subscription, we would like to send you the Inner Corset chapter from Esther's book, 8 Steps to a Pain-Free Back.

Please enter your email address in the field below and you will be sent an email with your Inner Corset chapter. You may receive a confirmation email to sign up to the Positive Stance newsletter first.

Free Chapter of 8 Steps to a Pain-Free Back


If you are looking for a way to exercise regularly that is healthy for your back and improves your posture, sign up for our Gokhale Exercise Free Trial:


1-2-3 Move happens daily with Esther at 9:45 a.m. (Pacific Time)
Gokhale Fitness with Eric runs Mondays, Wednesdays, Fridays from 7–7:25 a.m.
(Pacific Time), and Tuesdays, Thursdays, Saturdays from 3–3:25 p.m. (Pacific Time)

Read our Home Exercises Part 1 blog post on Cobra here.

Gokhale Moving Meditation

Gokhale Moving Meditation

Clare Chapman
Date

In this blog post Gokhale Method teacher Clare Chapman interviews Roberta Cooks and Kathleen O’Donohue to find out more about their Gokhale Moving Meditation classes. Roberta and Kathleen have been Gokhale Method teachers for 11 and 5 years respectively—and longtime practitioners of Tai Chi Chih (Roberta), and Tai Chi Qigong (Kathleen).* 

*Please note that various traditions referred to in this newsletter use different spellings—so for example “Chi” can also be written “chi”, “ch’i”,  “qi” or “Qi," depending on the tradition. 


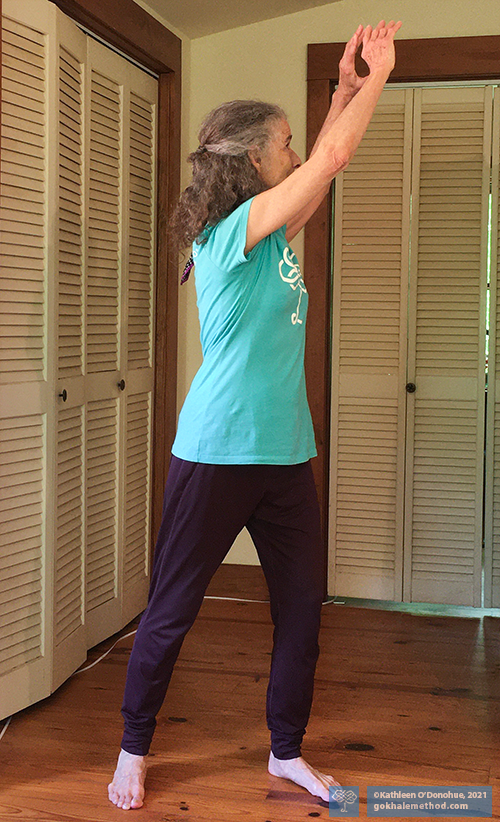
Kathleen keeps her ribs anchored 
as she lifts her arms for “Painting Rainbows."

1. Tai Chi and Qigong are practices many people have heard of, but perhaps don’t know much about. Can you explain the practice? 

Kathleen: Tai Chi and Qigong are centuries-old related mind body practices that originated in China, and can be translated as “life-energy cultivation." Both include postures and gentle movements to cultivate mental focus, breathing, and relaxation. Movements can be adapted for sitting, standing, and walking.

Roberta: Tai Chi Chih is a moving meditation practice that was developed by Justin Stone, a Tai Chi Chuan Master, who created a gentle practice that could be learned relatively easily by people of all ages and abilities. It is made up of 19 movements and a final pose. Each movement is repeated many times while focusing on relaxing the body, breathing, and feeling the flow. The goal of practice is to activate, balance, and circulate the chi, the life force that keeps us breathing, healthy, and vital. 

2. How did you each come to your practice and to teaching it? 

Kathleen: My Tai Chi and Qigong experience began in 1985 as a student of Professor Chi, Kwan Wen, a student of Chen Man-Ch’ing. In 1988, with the encouragement of Professor Chi, I became an instructor of Yang Style short and long form. In 2009, I became certified by the Tai Chi for Health Institute in Dr. Paul Lam's Tai Chi for Arthritis program. I have taught it and several other forms ever since.

Roberta: I was an Argentine Tango dancer for many years, which I found to be a very meditative dance. I also practiced many kinds of mindful meditation including Medical Qigong with Dr. Roger Jahnke and Wisdom Healing Qigong with Master Mingtong Gu. By chance, I found a Tai Chi Chih class at my local YMCA. I felt such joy and peacefulness without any of the effort of doing a sitting meditation practice. I continue to feel its physical, mental, emotional, and spiritual benefits in my own life. Teaching is always the deepest form of learning and shared practice in a group adds energy and depth for all involved. 


Moving Meditation incorporates many Gokhale Method skills, such as using your inner corset, keeping your neck tall, and externally rotating your feet and legs. 
Here Kathleen applies them in “Flying Dove Spreads its Wings." 

3. What do the Moving Meditation classes bring to the Gokhale Exercise program?

Kathleen: Tai Chi and Qigong teach us gentle, flowing movements that enhance relaxation. They can be done sitting and standing, at a pace and duration of one’s choice and ability in the moment. It is a relaxing situation in which you can be talked through and shown another activity in which you can apply your Gokhale Method posture skills, gaining fresh awareness and openness.

Roberta: We offer a way to practice the Gokhale Method which focuses on learning how to relax increasingly deeply into movement. We teach a limited number of moves that we repeat many times. There is a special kind of learning that happens when you become more familiar with a movement and can then focus on its finer points. You also have a chance to repeat the class material and delve deeply into it with our class video recordings.

4. What do your classes have in common with the Gokhale Method teaching on posture? 

Kathleen: Both of these teach healthy ways to move. Tai Chi Qigong teaches one to move with “beautiful upright posture." In my decades of being a student of Tai Chi Qigong, I’ve never been instructed to “tuck” my pelvis. Unfortunately, I’ve met students who have been taught this. I asked a Master Trainer directly about this and she stated that she does not teach tucking and believes it is a mistranslation.

Roberta: Although you can learn the 19 movements of Tai Chi Chih relatively quickly, they are subtle and must be practiced mindfully over and over to make them an effortless part of you. Learning the Gokhale Method is very similar. Students learn the elements of healthy posture in a short period of time, and then repetition integrates them into daily life. 

5. How do the movements you teach help Gokhale Method students?

Kathleen: It’s a new way for students to cultivate their kinesthetic and proprioceptive skills—becoming more aware of their posture and position in space. They are likely to be freer from old habitual patterns as they are doing sometime new with their bodies. Students can experience stress and tension before and during their postural change journey. This helps them let go of that.

The healthy posture principles taught in the Gokhale Method are woven into each 
Moving Meditation class, as Roberta shows in this video.

Roberta: The Moving Meditation is so compatible with what is taught in the Gokhale Method. For example, the grounding and flowing movements help students consolidate the principles of tallstanding and glidewalking. In my classes I weave in Gokhale posture principles throughout, reminding students how to use rib anchor, shoulder rolls, external rotation of the legs, and kidney bean feet, to make the movements flowing, relaxed, and comfortable. 

6. Can you say something about the meditational component of your classes. Do you find it resonates with the Gokhale Method?

Kathleen: I find both to be mindfulness practices. Each allows me to be present in my body in each moment and to find deeper levels of relaxation and wellbeing. They are great opportunities to let go, release, and return to the present.


Roberta demonstrating “Pulling Taffy." This is part of a sequence where, as the lower body 
moves from side to side, the stacked arms move apart as if pulling taffy (candy). 
Mindfulness builds better coordination of these different movements. 

Roberta: All moving meditation practices keep us in the present moment, mindfully focused on each part of our bodies moving through space. The Gokhale Method also takes us mindfully back into our bodies to relearn how to sit, stand, walk, bend, and sleep. I tell my students that the best way to integrate healthy posture into your life is to think of it as a mindfulness practice that you weave through your daily life for your physical health and total well-being.

7. In what ways has learning the Gokhale Method enhanced your Tai Chi Chih and Qigong practice?

Kathleen: The Gokhale Method enhanced my practice of Tai Chi and Qigong by adding excellent postural knowledge to apply to this activity that I love. 

Roberta: The Gokhale Method has given me a solid foundation for moving. Many others who teach and practice Tai Chi Chih do not have this same healthy posture foundation and without my Gokhale training I might have integrated unhealthy movements into my practice. My Gokhale Method training helps me to teach my Tai Chi Chih students to move in a healthy way. 

8. Do you find the Gokhale PostureTracker™ helps in Moving Meditation?

Kathleen: Yes, because the PostureTracker sensors and app monitor posture are ideal for use with slow moving activity. For example, the Upright and Relaxed setting can tell you if you are either swaying or rounding your spine. The Level Head setting gives real-time feedback that helps you keep your head well-balanced on a long neck rather than jutting forward. 

  
Using the PostureTracker allows you to catch any poor posture habits as they happen, 
correcting them using the Gokhale Method techniques. 

Roberta: I love the idea of using the PostureTracker to check and improve my posture practice. The PostureTracker can be especially useful if I want to work out the best way to execute particular Tai Chi Chih movements. When I am actually doing the practice of Qigong I want to be absorbed in my body, totally relaxed and feeling the flow of energy. At that point I integrate what I have learned by using the PostureTracker in my pre-practice work. 

9. Do you have a favorite Qigong movement or practice?

Kathleen teaching “Wave Hands in Clouds." As in the Gokhale Method, imagining specific actions can help bring particular qualities, such as lightness and smoothness, to your movement.

Kathleen: I generally don’t have favorites, but one movement brings especially fond memories of my original teacher, Professor Chi, Kwan Wen. He frequently did Wave Hands in Clouds while waiting, instead of just wasting time.


Roberta showing the crossed hand position in “Daughter on the Mountaintop."

Roberta: My favorite movements are always changing, based on changes in my practice, aha moments, and my mood and body sensations on a particular day. One I always love to do is Daughter on the Mountaintop. This is part of a forward and back movement sequence where hands and arms start low and then move to the top of the mountain, hands crossed with the left hand nearer the heart. 

10. Is your program suitable for all levels and abilities? 

Kathleen: Indeed! These slow, gentle movements can be done sitting or standing, modified to your range of motions and your choice of duration and number of repetitions. Come join us!

Roberta: Absolutely! Our movement meditation programs are meant to be practiced by people of all ages and abilities. They can be easily modified to fit with your physical comfort level. We devote time for student questions at the end of each session.

Gokhale Moving Meditation classes take place every Monday at 2PM (Pacific Time) with Roberta and every Wednesday at 12PM (Pacific Time) with Kathleen. 

Please share below your questions or comments about Moving Meditation:

Susan’s Success Story

Susan’s Success Story

Susan Taormina
Date


Susan (left) enjoying time with her grandchild and family. 
Susan sent us this photo, commenting, “but check out the C-shaped spine—wow!”

I am a 70-year-old woman. As a young woman I was tall (5’10"), slender, and active as I would ever be raising my six children. 

For the most part, my body and I had a good relationship, but, over time and with the demands of my life, something problematic happened. My body began talking to me: my knee, psoas, sacrum, and lower back hurt, and I also suffered a loss of balance. I mainly saw a chiropractor but also physical therapists, massage therapists, and acupuncturists…the list is long. When you want to function and feel halfway decent, you try everything.

By the time I was 60, I had three fractures in my spine and a diagnosis of osteoporosis. For 10 years I worked hard to control the osteoporosis and did well rebuilding my bones, but even so, I am now 5’6", four inches shorter than I was. Perhaps it is vain to wish every day for the return of my stature, but to stand tall and straight has been a preoccupation. I tried to hide my posture under my clothes, but of course that doesn’t really work! 


Learning to stacksit gave Susan a much-improved position for her piano and organ playing.

In my thirties I started teaching piano and became a church organist. Recently, because of the pandemic, our church music has had to be prerecorded. On Sundays, when the recordings were broadcast, I saw myself seated at the organ and was astonished to see how small and bent over I was. This was not the way I had imagined myself looking. It was horrifying. I knew something had to change.


These people all have open chests and relaxed, posterior shoulders. Young children, our ancestors, 
and diverse populations in nonindustrialized areas of the world today share this healthy posture. 

In spite of the deterioration, I maintained hope of improvement. When I came across Esther Gokhale for the second time in a year, I paid attention. I was inspired by her TEDx talk, interviews, and website. There was wisdom and a depth of insight there that I had not seen before, and a pursuit of positive change that matched my own. There was something compelling in the testimonies of the Gokhale Method alumni, and Esther’s research into ancestral and primal postures. It all rang true and had evidence to back it up. I had to try the Gokhale Method.

For all my efforts and the various things I had tried, nothing up to that point had worked for me. I was afraid that Esther’s approach was not going to work either. I told myself I would give it a year. I started working with Esther and gave her my trust and commitment. I learned my new body awareness methodically through the 18 concise lessons of the Elements online program. At times I worried I would be disappointed again, but Esther’s expectation of a good outcome—combined with her integrity and tenacity—kept me moving forward. 


Susan used to tuck her pelvis and collapse her spine (left). Having learned to antevert her pelvis and 
use her inner corset (right), she now stands tall, regaining length in her torso.

An important step for me was understanding the difference between a tucked pelvis and an anteverted pelvis, and that I could make it happen in my own body. Doing the “inner corset” also made visible changes. I wasn’t bent over from fatigue by the end of the day. I was so grateful. I could be upright again, and I felt back to being myself. Previous to the Elements course, my body had become something to fear; it has now become something I take pleasure in.

So many things have gotten better. I had a tight psoas for decades, which caused pain in my groin. I don’t feel that anymore. Before if I fell asleep on my back, I would wake myself up snoring or run out of breath. That has gone. It had also been difficult to breath when walking; now all of my breathing is much better. Over the winter I have been enjoying barefoot walks along the beach, applying what I have learned about my feet. This attention is paying off and my feet are changing. A small bunion is reducing and the big toe is coming home (Esther said it probably would) while the other toes are relaxing straighter.


Cultivating kidney bean-shaped feet with strong arches helps take pressure off the delicate structures of the forefoot. Susan notices her bunion is reducing and her toes are starting to straighten.

The daily class on the 1-2-3 Move program is very important for me to maintain ongoing improvements—and it keeps me motivated. The online community helps me celebrate and practice what I have gained. I’m inspired by Esther’s beautiful visuals of healthy body alignment and architecture. 


Occasional anatomy snippets woven into the 1-2-3 Move classes 
help participants to understand their own body architecture.

Additionally, the Q&A session following each 13-minute class makes it easy to ask questions. Just last week someone asked a question about the role of rectus abdominis (the six-pack ab muscles) and a huge light shone for me; I realized how these muscles can tuck the pelvis and/or round me forward. Now I let that sort of tension go—and I can stand straighter! I’ve learned how to use my “inner corset” muscles, drawing my deeper abs in and upward like I’m going into ice-cold water. I regularly go quarry swimming, so I know exactly what that feels like!

This entire journey of finding out how my body works has been transformative for me. Best of all, the Gokhale Method has shown me how I can once again live my life upright and pain free. What a gift! 


Which Shape is Your Spine?

Which Shape is Your Spine?

Esther Gokhale
Date

SCIJ isn’t a very memorable acronym, but the shapes of the letters do accurately represent the four most common spinal shapes. In this blog post you will discover which SCIJ category you belong in, what changes you might want to make, and the first baby steps to improve your spinal shape.


The letter “S” is widely used to describe the conventional paradigm for an ideal shape of the spine. The Gokhale Method perspective is that we need a paradigm shift.


Loren had developed a pronounced S-shaped spine before she took the Gokhale Elements online course. Tightened lower back muscles formed a pronounced lumbar curve, and her upper back had to round over to return her to upright. 

S. This is the spinal shape considered to be normal (as well as ideal) in today’s conventional wisdom. You will find the S template for spinal shape in lay circles, alternative health circles, as well as medical circles. Massage therapists, yoga teachers, physical therapists, and medics, are all taught the S-shape paradigm, which may include arguments about the strength of arches and “opposing curves'' and their ability to absorb vertical load like a spring.

The S-spine consists of a significant concave curve in the lower back meeting a significant convex curve in the upper back. From the Gokhale Method perspective, both curves are exaggerated and can lead to pain and dysfunction. This posture loads the spinal joints and takes a lot of muscular tension to maintain. It is the reason, we posit, that maintaining “good posture” has a reputation for being hard work. If this shape fits your spinal contour, it is unlikely to have been called out by either conventional or alternative practitioners. After all, it is the described ideal. If you have faced the frustration of having your back “go out” soon after an intervention, or your symptoms return again and again, a possible reason is that your S-shaped spine has never been recognized as the root of your problem, let alone be treated. 


This medical illustration (1990) displays the excessive curvature that can result in pinched nerves and compressed intervertebral discs. 

As both the vertebrae and the intervertebral discs have virtually parallel upper and lower surfaces, like a cylinder, the exaggerated curves of the S-spine create pinch points that can impinge on nerves, and cause wear and tear on the discs and degenerative change in the bones. Any of the tissues of the back, shoulder area, and neck might well “complain” about being obliged to maintain these contours.

An ideal first step to improving the shape of your S-spine would be stretchsitting. You can begin to learn stretchsitting here.


The letter “C” describes the most common modern posture of all—slumped.


The C-shaped spine will curve more at the top if we hunch more…


or curve more at the bottom if we tuck more…


either way, a C-shaped spine is bad news for our discs.

The C-spine is the product of slumped posture, with the tail tucked between the legs, shoulders rounded, and head forward. This compresses the front of the spinal discs, squeezing the interior contents (the nucleus pulposus) backward. This is the most dangerous direction to load the spinal discs since the nerve roots exit the spine right behind the discs. Slumping with a C-spine also overstretches and weakens the ligaments around the spine, undermining their ability to maintain the integrity of our all-important spinal column. Many people alternate between forcing an S-shape in their spine in the name of “good posture” (wrong!) and collapsing into a C-shape when they are fatigued from their efforts. Both these shapes in fact cause damage—in different ways—and need to be replaced with a J-shape (keep reading!). 

An ideal first step to improving the shape of your C-spine would be learning to use your inner corset, the deep muscles of the abdomen and back which support and protect the spine. This is explained in detail in my book, 8 Steps to a Pain-Free Back.

Free Chapter of 8 Steps to a Pain-Free Back

As a special gift to newsletter subscribers who have confirmed their subscription, we would like to send you the Inner Corset chapter from Esther's book, 8 Steps to a Pain-Free Back.

Please enter your email address in the field below and you will be sent an email with your Inner Corset chapter. You may receive a confirmation email to sign up to the Positive Stance newsletter first.

Free Chapter of 8 Steps to a Pain-Free Back


The I-spine shape results from a “sinking into oneself” without a significant increase in spinal curvature. 
Older people may develop an I-spine as they lose height due to spinal degeneration. Unsplash

The I-spine is common in older folk living in modern industrialized societies. There are no particularly pronounced contours in the spine, but rather a general “melting into itself” with the disappearance of 1 or more inches in height accompanying the aging process. The shrinkage is often the result of degeneration in the discs or mini-fractures in the vertebrae. Some diagnoses that might accompany this spinal shape include osteoporosis and stenosis. The pelvis is tucked, there is no angle between the buttocks and the back, and the buttocks are underdeveloped. Though the I-shape is most common in older people, it can begin at a young age with tucking the pelvis.


This photo of Taylor Swift shows how a tucked pelvis flattens the lumbosacral angle, and disadvantages the gluteal muscles, combining to produce a flat “behind." 

An ideal first step to improving your I-spine would be to learn stretchlying on your back.

The letter J represents the healthiest spinal shape. 


The shape of this Ubong tribesman’s back is best described as a J-spine.

Though rarely preserved in adults in modern industrialized societies, the J-spine is the shape we all enjoyed as toddlers and is still prevalent in many nonindustrialized areas of the world. This “J” is a modern, stylized “J,” reflecting the relatively straight alignment of the vertebral column and the pronounced angle at the lumbosacral junction. There is no exaggerated lumbar sway or thoracic curvature. You can see this shape embodied in the Ubong hunter’s torso. 


This medical illustration from 1911 more closely depicts the J-shape spine rather than the S-shape of modern conventional wisdom. The only pronounced curve is at the L5/S1 junction at the base of the spinal column.


Since taking the Gokhale Elements online course, Loren has made good progress in losing unwanted curvature in her back. Her upper lumbar spine has straightened out considerably. Over time, given her dedication, we expect to see her most pronounced curve move lower as she continues to cultivate her J-spine. 

If you are interested in restoring your J-spine, we recommend taking our Elements course (one-on-one coaching online), or our Foundations Course (one-on-one or small groups in-person) or Pop-up Course (not available during COVID). These courses teach you to systematically lengthen, strengthen, and remodel your spine to a healthier J-shape in a safe and effective way. 

To gradually and safely improve their spinal shape students learn well-honed techniques using their fingertips to monitor their spinal groove, kinesthetic and visual cues, customized exercises, and visualizations. Because it is still challenging to rely heavily on your proprioceptive sense, we have also developed the PostureTracker™, a tool that tells students exactly where they are positioned using Bluetooth sensor technology. PostureTracker tracks the shape of your spine in real time—it gives immediate and intuitive feedback, is easy to use, and reveals information about your spine that a plain mirror cannot show you. Though PostureTracker is not yet available for sale, it is available as a loner (while supplies last) to students who sign up for the online one-on-one Gokhale Elements course.


If you sway in your lumbar area, PostureTracker will show what is going on with your spine.

To get an idea of the current shape of your spine, view yourself side-on. You can use a mirror, but it is best to photograph or video yourself, or use several mirrors, so that you can observe your shape without turning your head. Take a while to study yourself both sitting and standing. Notice that your spine changes if you alternate between swaying and slumping. You may discover that your habitual posture combines elements from two or more of the categories we have described—for example, you may most closely resemble the I-spine, except that your head and neck jut forward.


The curves in our spines precisely reflect our everyday posture habits.

If you would like a trained eye to help you understand your spinal shape and how to improve it we recommend an online Initial Consultation with a Gokhale Method teacher. In-person Initial Consultations may also be available depending on the COVID status of your area.

Prime your Spine with Primal Head-loading

Prime your Spine with Primal Head-loading

Esther Gokhale
Date


Esther teaching with the Gokhale™ Head Cushion

We Gokhale Method teachers love our head cushions! I find there is nothing better than head-loading, even with a light weight, to evoke a taller stance, help straighten out excessive neck curvature, and strengthen the deepest of our neck muscles.


Esther learning to head load from women in Burkina Faso

The realization that head-loading must have been a ubiquitous activity hit home in my research travels to Burkina Faso in the 1990s. I started sharing the benefits of head-loading with my students, and designed the Gokhale™ Head Cushion to make head-loading an accessible and convenient exercise.

Heads up for head-loading
I notice that for the vast majority of students, relatively little coaching evokes a clear vertical response that helps the head to glide back and the neck to lengthen. The response is semi-automatic. Most people find it much easier to find this vertical axis and upward movement of the neck with a weight on their head. And the weight cues not only the musculature of the neck to align its vertebrae well, but also the inner corset muscles, reducing sway and lengthening the lumbar spine.

Why does head-loading recruit the deep stabilizer muscles along the neck and spine so readily? What makes it so easy for our students to tap into this rather complex movement pattern, involving myriad muscles along the spine? I suspect our long anthropological history of headloading, together with the adaptive value of musculature protection against the compressive force of gravity on our spines, may explain our responsiveness to a load on the head.

Part of our primal skill set?
In the ‘90s, I was fortunate enough to take an anthropology course at Stanford University with Professor Emeritus John Rick, a researcher of hunter-gatherer societies.

As part of the course we had an afternoon workshop in stone toolmaking, or “knapping.” This was how our Stone Age ancestors used to make finely crafted arrowheads, and involves striking flints at exactly the right angle. This may sound obscure as far as skills go, but for one million years of our evolutionary history our stone “tool kit” and our Stone Age skill set did not change—an astonishing stretch in our archeological records, especially when you consider the rapidity of technological change for modern humans.


The ability to fashion a good arrowhead may go deeper than a learned skill. Wikimedia Commons

Having taught the course numerous times, Professor Rick noticed that approximately 10% of students possess an uncanny ability to acquire this skill. The technique required is not easy to work out intellectually, nor by a short period of trial and error; it seemed some people just had a knack for it, an intuitive know-how. His best guess was that these particular modern-day humans retained some vestigial DNA code—that this was a skill that had been selected for over millennia and still survives to some extent in today’s population.

My hunch is that head-loading could be similar—that we are genetically encoded to respond well to a weight on the head. In modern times we tend to think of head-loading as a distant practice done by a few women in the villages of Africa or India for fetching water and gathering firewood. 

But actually, until very recently in terms of human history, head-loading was seen in every corner of the globe. Until the early 1900s it was a virtually universal way of carrying things. In the Europe of yesteryear, head-loading was widely used by agricultural workers and market porters. It’s still used in more traditional regions of Europe like Sicily and Portugal. In much of the developing world it remains notably persistent, even in the largest cities.  


Porters at Covent Garden, London, 1880. They wore specially shaped hats to steady their baskets.


This beautiful painting illustrates a gleaner carrying her harvest bundle on her head.
The Gleaner, William Morris Hunt, 1865. Wikimedia Commons

The ultimate functional exercise
I am generally in favor of the functional approaches to exercise which have become popular in recent times. It makes sense to focus on the whole-body movements that we evolved to do and that serve us well in daily life, such as pushing, pulling, and lifting, rather than more contrived regimens and machine-based exercises. 

It’s interesting that while we are perfectly adapted to carry on our heads, and used to do so, it is not included in weight training programs, nor in the functional exercise repertoire. And in spite of how well it serves our inner corset and stabilizing muscles, head-loading is not typically included in core workouts. 

Why did this once universal skill pass under the radar of our homegrown fitness gurus. Two possible reasons come to mind: 

  1. Without nuanced training, head-loading can damage the delicate tissues of the cervical spine.
  2. Head-loading came to be seen as the preserve of lower-status individuals: the poor, the women, and laborers in far-off lands.

It is worth noting that head-loading, combined with glidewalking, stood the test of time precisely because it is such an efficient and sustainable means of getting tasks done. Today, we tend to prefer our exercise to burn the greatest number of calories in as short a time as possible! 

Getting started with head-loading
I hope you are inspired to get started with some gentle head-loading. At home you can easily improvise your load with a beanbag, or a packet of rice or salt from the cupboard. You want a weight of around 21 oz. / 600 grams. Choose a substance that will mold to the shape of your head and that is soft enough not to hurt if it falls on your feet! A plastic package will be less slippy wrapped in a hand towel and less prone to splitting if it falls. The Gokhale Head Cushion is designed to elegantly meet all these criteria.


The Gokhale™ Head Cushion is specifically designed for head-loading practice.

Once equipped and ready to go, here is a video tutorial to support you:

Our Gokhale Method teachers are also available, in person and online, to give you personal coaching in neck and head placement and feedback on your efforts. Please share if and how this primal and functional activity has served you.  

How to Beat Neck and Shoulder Pain While Cycling (Cycling for Everyone, Part 2)

How to Beat Neck and Shoulder Pain While Cycling (Cycling for Everyone, Part 2)

Tiffany Mann
Date

This is Part 2 of a 3-post series on cycling with healthy posture by Gokhale Method teacher and longtime cyclist Tiffany Mann. Read Part 1 here!


Little Tiffany (circa 5 yrs old), a new bike rider, having such fun!

Neck and/or shoulder pain is a common ailment even experienced cyclists regularly encounter. It takes awareness and muscular engagement while cycling to not allow gravity to further pull the head forward and down and round or hunch the shoulders, a posture problem that is already prevalent in our modern culture.


This cyclist in Berlin is on a bike that is too small for him, leading to the pronounced rounding visible in his upper spine. A supportive fit helps prevent rounding. Original image courtesy Raquel García on Unsplash.

While it does take some effort, via muscular engagement and kinesthetic awareness, to maintain a healthy shoulder and head placement while bicycling, the payoff is worth it. You will be able to ride pain-free for longer, and you will also be patterning a healthy upper body position regardless of your activities and movements. You will also strengthen and develop baseline tone in stabilizing muscles, and they will become more accustomed to doing the job of maintaining shoulders back, back of the neck tall and straight, and head lined up over the body, as we teach for all posture stances — sitting, standing, hip-hinging (all of which cycling incorporates!).

Opening the shoulders and chest
Rolling open the shoulders and drawing the scapulae down and back onto your back where they belong allows your chest to stay open. This gives you a better breathing pattern and better circulation to and from your arms, both of which are especially important as you are using your arms to support yourself and guide the bicycle, and using your lungs to provide oxygen to your muscles and cells that are working hard during this exercise.


This cyclist in Lisbon, Portugal rides a well-fitting, front-suspension mountain bike. Her leg is externally rotated, with a slight bend in the knee. She demonstrates a J-spine with her torso and head stacked, and hinges at the hips. Finally, her shoulders are back and her grip on the handlebars is relaxed. Original image courtesy Justine Camacho on Unsplash.

Activating the inner corset as a shock absorber
Using the set of muscles deep in your abdomen and back that we call the “inner corset” helps protect the neck along with the lower back (that other pesky trouble spot for cyclists!). Inner corset engagement gives length to the whole spine, including the cervical discs, and creates more space between the vertebrae. You will better withstand any jarring sensation from uneven road surfaces, potholes, or gravel, with this brace of deep muscles engaged. This brace of muscles includes the longus colli — deep muscles in the neck, which, when engaged, keep the neck tall and straight, and as a bonus, allow your trapezius muscles, those “hunchy” shoulder muscles, to relax.


This cyclist in Manhattan uses his well-fitting bike skillfully. His pelvis is anteverted, his shoulders remain back, and he uses his eyes to lead his gaze, rather than compensating with an arched neck — even with a baseball hat on underneath his helmet. Original image courtesy Javier de la Maza on Unsplash.

Hands, arms, and handlebars
With your inner corset in place and holding your torso steady, your arms can be relaxed when they need to be and not doing more of the work than they need to. Your hands and arms want to be relaxed and not be squeezing or holding on too tightly to the grips and handlebars — that creates unnecessary tension and fatigue.


My family on a banana seat custom tandem: Skip, Willa (4 years old), and Coco (7 years old). Original image courtesy Ken Richardson.

Lengthening the neck and employing the gaze
Craning your neck is another unhealthy posture pattern that can both fatigue the superficial muscles in the neck and damage the delicate cervical discs. Instead of craning your neck to look around you, keep the back of your neck long and tilt the head on its axis, and use your eyes — they can see plenty well and will actually benefit from the exercise of looking out into the horizon and to the periphery. 


This cyclist in Vietnam demonstrates an open chest, relaxed shoulders, and healthy leg rotation while riding. Original image courtesy Minh Pham on Unsplash.

Putting it all together
All of these pieces work together to help keep your ride sustainable and pain-free. Our founder Esther Gokhale, in her two-part series on cycling posture and choosing the right bike seat for good posture, goes into great detail about ways to prevent more types of cycling-related pain through the application of Gokhale Method techniques. As Esther explains, stacksitting and hip-hinging are both crucial for sustainable cycling posture. If you need an introduction to these or other Gokhale Method techniques, keep in mind that you can get familiar with them in Esther’s book, or even work online with several of our teachers, one-on-one! Some teachers are even available for one-on-one teaching in person, where permitted. Don’t hesitate to reach out!

For more information on Tiffany’s teaching in the Boston area, contact her here.

My Favorite Exercises for When You Can't Visit the Gym, Part 1: Chair Pose

My Favorite Exercises for When You Can't Visit the Gym, Part 1: Chair Pose

Esther Gokhale
Date

This is the first post in our series on home exercise during shelter-in. For Part 2 on Toning the Gluteus Medius, click here!


Making the most of shelter-in by practicing chair pose Gokhale-style in my backyard garden.

Whether you are on the road, in a campground, or just stuck at home during quarantine, you can always exercise. In the daily lead-up to our ongoing Posture 1-2-3 Challenge for alumni subscribers, I often turn to dance as a way to process whatever baggage might have set foot in my psyche that particular morning, and also to get the group moving and warmed up for the main program. I’ve been dancing since I was a young child, so I have a very strong bias for dance as a way of exercising, but I also like to change it up with other types of exercise. It turns out that we have a lot of options, even when we can’t access the gym.

First up is Chair Pose, from yoga. Chair Pose (Utkatasana in Sanskrit) is a great example of an at-home, equipment-free exercise which can strengthen a variety of muscles in very little time. You don’t have to spend forever and a day in Chair Pose to reap its benefits. This makes it a perfect fit for our busy lives.


In the image above, Cecily's behind is well behind, and her J-spine visible — both good details from a Gokhale Method perspective. The overlaid graphic conveys her Gokhale SpineTracker™ readings. Note on foot placement: in the Gokhale Method, we teach placing the feet about hip width apart and facing slightly outwards as a way of optimally supporting primal leg architecture.

Chair pose with a Gokhale Method filter:

  1. Prepare your lower body. Start with kidney bean-shaped feet, and do a little squat, to let gravity assist in settling your pelvis between your legs. Then come back up, but not to a parked position (that is, avoid locking your hips forward and knees backward). A parked position allows the muscles to “check out” (that’s why we find ourselves drifting to this position repeatedly!), but is damaging to the joints. Rather than parking in your joints, get your body into a “ready position:” that is, a position with a little spring in it that is easy on the joints and also enables you to move on a dime.
  2. Prepare your upper body. Use the rib anchor technique, with your shoulders rolled and the back of the neck tall. Now we’re ready to begin with Chair Pose.
  3. Bending the knees slowly, go down-down-down, keeping the knees from crossing over the toes. Yes, this detail makes it harder, and you may have to grip on the floor with your feet.  This is good for your feet! The main reason for this is to minimize stress to the knees and maximize challenge to various leg muscles.
  4. Add in the inner corset. If you are able, raise your arms ahead of you or, even better, up above your head. In this case, be super-attentive to ramping up your rib anchor to not allow your back to sway. Now, you just stay there. It’s challenging, and that’s the point. Visit your boundaries, but stay on the healthy side of them.

Let’s review: Chair Pose actively recruits your inner corset. The action of raising the arms above the head can be used to recruit the inner corset especially strongly. If you were to look at your belly (in a mirror) while in Chair Pose, you may come out looking a bit like a greyhound with a slenderized, sleeker abdomen below your full ribcage. To finish, return to a ready position with a little spring in it (again, not parked).


This practitioner demonstrates the “greyhound look” of an activated inner corset. Note on foot placement: In the Gokhale Method, we teach placing the feet about hip width apart and facing slightly outwards as a way of optimally supporting primal leg architecture. Image courtesy Elly Fairytale on Pexels.

I’ll be describing other favorite exercises in future blog posts — in the meantime, try “sitting” it out in Chair Pose during work breaks and as part of your exercise regimen. Consider setting your timer to go off every 20 minutes to remind you to do Chair Pose (or some other future pose) for about a minute. In this way you will make rapid progress in tone, form, and your experience of life! I look forward to teaching you Gokhale Yoga 101 and Strengthening Exercises - The Gokhale Way. Let’s make the most of our ongoing situation!

Teaching My 95-Year-Old Lithuanian Mom the Gokhale Method, Part 2

Teaching My 95-Year-Old Lithuanian Mom the Gokhale Method, Part 2

Aurelia Vaicekauskas
Date

 
Lithuania, 1967. My mom is in the center, with my sister and me on either side of her.

My mom had beautiful posture when she was young, as you can see in the photo above. Here she is, flanked by my sister and me. Note her open chest, lengthened neck, and head pivoting on the axis of the spine. I believe healthy posture has helped her age well. When she recently developed leg pain, she assumed it was part of the aging process and that there was nothing she could do about it. But happily, after working with some Gokhale Method techniques, her pain has subsided.

As a result, she now sleeps better and has more energy. She’s even resumed some light housekeeping. To help protect her back while vacuuming and sweeping the floor, I taught her the inner corset technique.

The inner corset: what is it?
Anytime one lifts, twists, or moves their arms or legs away from the body, there is an opportunity to distort the spine. Distortion puts unhealthy stress on bones, joints, and nerves. The inner corset technique is crucial in protecting one's back while in action. It lengthens and decompresses the spine by activating our deepest abdominal and deepest back muscles (transversus abdominis, obliques and rotatores, and multifidi). This muscular engagement forms a “corset,” which preserves the spine through physical activities. Notice how the discs are protected with extra space in the illustration below.

We all have this muscular engagement pattern available. It is automatically activated with activity that poses an immediate threat to the spine, such as jumping off a high place. However, when the threat is low: picking up a grocery bag or vacuuming, this instinctive bracing is not activated. Most back problems are a result of cumulative misuse of the body. Therefore, learning to use the inner corset in daily activities is the key!

Hands-on help from a Gokhale Method teacher is the best way to find the right muscles. This is true of teaching my mom, as well. While working with her, I was able to help her use her breath to engage her inner corset (see below). Teachers often practice this with students several times to create new muscle memory, and I did the same with my mom. 

 
Helping my mom locate the correct muscles by using her breath also helps her build muscle memory.

Vacuuming with an active inner corset
Alas, with her inner corset in place, my mom is now ready for action. She has always enjoyed housekeeping and continues to vacuum and clean at 95! Now she can keep her back lengthened and maintain her spine’s structural integrity while she does this work. Engaging her inner corset allows her arms to move independently of her torso. It’s a win-win: a workout session for the abdominal and back muscles; meanwhile, the back is protected, and the house is clean! 


My mom shows no sign of slowing down now that she’s learned Gokhale Method techniques.

Summary
I am so grateful my mom gave the Gokhale Method a chance. Not only did it help relieve her nighttime leg pain — as I described in my previous blog post — she now has tools to keep her activities safe! To her huge credit, it took an open mind, a bit of courage, and effort to try something new. I am so proud of her. I believe one is never too old to learn a few Gokhale Method tricks. And we never know what changes are possible until we try!

Posture in Old Lithuania

Posture in Old Lithuania

Aurelia Vaicekauskas
Date


Harvesting rye with scythes in early twentieth-century Lithuania. Original photograph Balys Buročas, 1923.

The Gokhale Method has improved my understanding of how posture correlates to our health and physicality. The method is based on healthy body architecture and has been informed by movement patterns from populations without back pain, those shared by our ancestors worldwide. This inspired me to take a look at my own forefathers in Lithuania, especially their posture while laboring in the fields. 

Memories of my youth
I was born and raised in urban Soviet Lithuania. Yet, we had a little plot of land outside the city in “kolektyviniai sodai” (collective gardens) and most of our weekends and summers were spent there. It was heaven to play in the fields, but there was always plenty of work.

My sister and I were often assigned weeding, watering, or harvesting to complete. It was definitely good exercise and a learning experience. I remember how proud I was when, one summer, my dad deemed me grown-up enough to show me how to cut grass with a scythe. It took a lot of coordination and control to swing the blade just so, to catch the grass low enough and to not drive the blade into the ground.


Harvesting rye with scythes in Juodėnai village, Lithuania. Original photograph Povilas Butkus, 1938.

In the summertime, we frequently visited with our relatives in the country. The grownups helped with harvesting and us kids followed them around and entertained ourselves with lighter tasks. My parents, aunts, and uncles all grew up on farms and were used to this type of work. I remember them teasing each other and laughing in the fields. Yet, it was hard work and they were all exhausted by the end of the day.

My own ancestors in Old Lithuania, like ancestral peoples everywhere, must have carried much body wisdom. Working the land shaped their bodies and their posture. Theirs wasn’t just a weekend task: it was a day-by-day, year-after-year way of life.

Photo treasures
Much more recently, I found a treasure trove of photos on E-paveldas. I immediately recognized the pristine body architecture and beautiful movements of the Lithuanian farmers. Here were women and men working with a clear J-shaped spine — which is found in highly functioning and musculoskeletally sound populations and is a cornerstone of the Gokhale Method. I was not surprised to see the J-spine show up in historical photos from Lithuania. How else could one exert oneself on a daily basis and remain productive and intact?

Before machinery, harvesting was a communal affair. Men did most of the chopping, plowing, and scything. Women raked and gathered, but also did heavier work when needed. Hay and grain harvesting was done with scythes. When harvesting grain, as in both photographs above, the cuttings were gathered and bundled into neat bunches and stacked in big piles in the fields. If harvesting hay, the cuttings were first spread out to dry and once dry, the hay was gathered and transported to the barns (below).


Young women from Didsodė village harvesting hay. Original photographer unknown, ca. 1940.

In the picture below, we see women hefting piles of dry hay to load up a horse cart.


Women loading harvested and dried hay onto a horse cart. Original photographer unknown, 1935.

Postural highlights
These old photographs give us a good view of people’s silhouettes. In contrast to modern-day postural tendencies in industrialized societies, there is no tucking of the pelvis. Behinds are very much behind. Shoulders are back and necks are lengthened. That’s J-spine, the same spinal shape we all had when we were little! 

This body architecture sets a foundation for inner corset engagement. Here, the obliques, transverse abdominis, rotatores, and multifidi muscles are all engaged. 

The inner corset muscles stabilize and decompress the spine so there is no wear and tear on spinal structures during exertion. This is how repetitively thrusting with pitchforks, lifting weights over the head, forcefully swinging scythes across the body, or reaching and pulling with rakes can be performed without hurting one’s back. Of course, the inner corset muscles get a huge workout! Meanwhile, they become stronger and in turn better support the spine.

Additionally, heavy arm and shoulder actions require correct shoulder placement. Notice that the farmers’ chests are open and wide, and shoulders are set further back. This shoulder location allows for better arm circulation, opens the chest cavity for better breathing, and prevents the upper spine from slumping. This position is key for efficient movement and protection from injury.

Bending well is essential to avoid back pain. You can see all the women hinging beautifully from their hips and keeping their backs flat while harvesting potatoes, doing laundry, and cooking. In spite of long hours bending, they did not hunch their shoulders, round their backs, or distort their spines.


Potato harvest in the Džiuginėnai fields. Original photograph Juzefas Perkovskis, 1940.

This healthy way of bending does no damage to the bones, discs or ligaments. Instead, it strengthens the muscles in the back (erectors and rhomboids) and provides the best stretch for the leg and hip muscles (external hip rotators and hamstrings).


Women hip-hinging while doing laundry. Original photograph Balys Buračas, 1923.


Hip-hinging while cooking in an open-air summer kitchen. Original photograph Stasys Vaitkus, 1937.

Another beautiful image (below) depicts three shepherd boys with their instruments. Notice that their lengthened leg and hip muscles in turn allow the spine to stack without slumping even when squatting on the ground. Their legs remain externally rotated, and their foot arches intact.


Village shepherds. Note the deep, healthy squat at left. Original photograph Stasys Vaitkus, 1938. 

In the last image (below), an older couple carries a yoke (naščiai) and baskets. What a clever way to carry a load! The yoke is placed close to the spine — the best place to bear weight, just like in weight lifting, while arms and hands are spared.


Marija and Augustas Šarkai on their way to harvest potatoes. Group Photograph/Bernardas Aleknavičius, 1971.

This couple encapsulates what we find across all ancestral populations:

  1. Their feet are turned out and bean-shaped.

  2. Their behinds are behind them.

  3. Their ribcages are flush with the contours of the torsos, which means their lower backs are lengthened.

  4. Their shoulders are set way back and their arms are externally rotated.

  5. Their necks are long; their chins angle down.

Furthermore, this couple is not young anymore. I am sure they worked throughout their lives, yet they retain beautiful, erect posture.

Reflection
This was a brief glimpse of village life in Lithuania in the early twentieth century. The photographs of my ancestors laboring in the fields are brimming with body wisdom. This wisdom is a part of a common worldwide heritage that has been displaced by modern culture. Yet, it is still available to us through photographs, stories from elders, and posture work.

I felt inspired by the wisdom and proud of my Lithuanian heritage when looking at these pictures. I encourage you to do the same! Look through your own family photos, if you have them, or historical photography books. Let these images inspire you and reaffirm how well our bodies are designed, and how sturdy and strong they are when used well.

What is the Best Ab Exercise?

What is the Best Ab Exercise?

Esther Gokhale
Date


The abdominal crunch, though ubiquitous, is actually quite detrimental to the spinal discs and nerves. Better to find an abdominal exercise which respects and protects the spine! Image courtesy Jonathan Borba on Unsplash.

Happy Holidays! The dawning of a new year is a time when many people make efforts to establish new habits, many of them body-related. With the desire to improve ourselves often comes a (sometimes unhealthy) heightened awareness of how our bodies and their shapes appear to others. This is particularly true of abdominal muscles. Photoshopped, unrealistic images of sculpted torsos plaster newsstand covers every January. Crunches are the most commonly recommended exercise for increasing ab strength, often with six-packs as the goal. But do six-packs actually indicate broad-spectrum ab strength? What is actually the best ab exercise —  something protective of our backs rather than detrimental to our spinal health? How can we balance form with function?

The Gokhale Method describes two important sets of abdominal muscles that keep us healthy: the “rib anchor” and the “inner corset.” The rib anchor helps prevent the lower back from arching. The inner corset protects the back from a variety of compressive threats — weight-bearing, impact, and vibration, as well as any distortion in shape like arching, rounding, or twisting. The inner corset includes the rib anchor plus a more extensive set of deep abdominal and back muscles.  

Well-designed ab exercises would:

  • tone the deeper layers of the abdominal wall that constitute the rib anchor and inner corset muscles, while de-emphasizing the shallower rectus abdominis (six-pack) muscle 

  • put no unhealthy stress on your neck, spinal discs, or spinal nerves

  • take as little time out of your day as possible


Here, my daughter Monisha, a high-level athlete, demonstrates how rib anchor and inner corset activation can make all the difference in pull-up form.

Now for some specific measures to strengthen the rib anchor and inner corset muscles. Based on how much time they take out of your day, we will divide them into 3 tiers: 

Tier 1: Everyday activities
These strengthening measures are fully integrated into your everyday activities. They don’t take any time at all out of your day. Your daily activities need to be vigorous enough that they would ordinarily stress your spine. However, by activating the rib anchor and/or the inner corset every time your spine would get stressed, you not only prevent damage — you get your ab exercise as well. Think about this approach like “on-the-job training.” The advantages are numerous:

  • You strengthen the various components of your “brace” or “inner corset” in exactly the proportion they need to be strong. No overdevelopment of the six-pack (this is common and tucks the pelvis); no neglecting the deeper abdominal and back muscles (this is also common and leaves the area weak and unprotected).

  • There’s no threat or damage to your spinal discs, nerves, or neck in this approach. Compare this with the threat and damage caused by crunches, which unfortunately remain the most popular ab workout in gym routines. 

  • It takes no time! It takes no longer to lift well (with the inner corset engaged) than it takes to lift poorly. It takes no longer to twist well (with the inner corset engaged) than it takes to twist poorly. And it takes no longer to run well (with the inner corset engaged) than it takes to bounce around willy nilly and destroy your discs and nerves.


Proper abdominal engagement is crucial for safe running technique — and it doesn’t necessarily look like a six-pack. Image courtesy nappy on Pexels.

Tier 2: Modified activities
These ab strengthening measures are slightly contrived (but not awkward) ways of modifying everyday postures and ways of moving to get our ab exercise needs taken care of. This is the next best choice if your everyday activities don’t quite cover your exercise needs.  As many of us sit behind computers for larger and larger fractions of the day, I’ve begun recommending engaging the inner corset 10% whenever a student can remember to do so. This is the extent to which these muscles would have been recruited in sitting were they primed by carrying weights as much as our hunter-gatherer ancestors clearly did.


Laptops and other computers are wonderful tools, but they also encourage us to be passive and increasingly sink into ourselves over the course of a work day. Inner corset and rib anchor activation, even 10%, can help us learn to “wake up” our deeper abdominal muscles. Image courtesy Brooke Cagle on Unsplash.

Tier 3: Supplemental exercises
Doing supplemental exercises and therapies to strengthen the abs. These take time. To be efficient, I recommend whole-body exercises, yoga poses, or dance sequences that enable you to do several exercises in parallel. Some of my faves are chair pose, samba, and TRX planks.


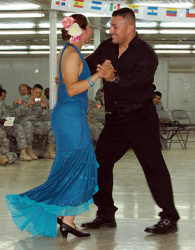
Samba is a fun, social, sensual way to actively engage and strengthen the inner corset. It’s never too soon to start getting ready for Carnaval! Original image courtesy PlidaoUrbenia on Wikimedia Commons under CC BY-SA 2.5.

Helping it stick
Do you find it difficult to fit posture work into your daily schedule, or struggle to form new habits? (This is part of being human!) I’m excited to announce our new Gokhale Exercise Challenge, a live-streamed, daily 15-minute exercise session I’ll be leading personally at 7:00am Pacific / 10:00am Eastern every morning from January 1, 2020 through January 21, 2020. This enrichment of our Online University content is free for all Online University members.

If you are an alum of our Foundations Course or Pop-up Course and haven’t yet enrolled in our Online University, join today by calling 1-888-557-6788 to receive a special discount on your annual membership between now and January 8, 2020.

Q. What if I miss a session or live in a completely different time zone — can I still participate?
A. Yes! If this time slot doesn’t suit you, you can watch each session at your convenience for up to 24 hours after the live session.

Q. I’m not in great shape. Is this accessible to me?
A. Absolutely! All Gokhale Method alumni at any level of fitness will benefit from these exercises.

I look forward to starting the New Year with you!

Subscribe to inner corset