glutes

Wake Up Your Glutes, They Snooze, You Lose

Wake Up Your Glutes, They Snooze, You Lose

Esther Gokhale
Date

In surveys of what people find physically attractive in a partner, a shapely butt is often highly rated. Perhaps it’s no surprise, but if you want, there are even apps to help! So, are good-looking glutes all about sex appeal and filling out our clothing in a flattering fashion? While these concerns may be valid, it is also true that well-toned glutes have many other, profound, but less widely recognized attributes. 

This blog post takes a look at the bigger picture of glute function. You may be surprised to find out just how much your glutes can contribute to healthy posture and a pain-free body.  

Glorious glutes—not just a “nice to have”

Your glutes potentially form the largest muscle group and have the largest impact. Most of us realize at some point in our lives, perhaps due to overdone squats or steep hill climbing, that the glutes are major players in sports and exercise. But if we don’t need them for competitive sports or challenging hiking, is it still worth investing in them for better returns? Let’s take a look at the dividends.

Reduce stress on your lower back

Glutes have a crucial role in offloading stress from the lower back and sacroiliac joints. When the glutes are weak, the lower back muscles work harder to try and stabilize the pelvis and trunk, leading to overuse and pain. When the glutes are strong, along with the inner corset, they steady the pelvis and lower back. This reduces the risk of wear and tear to discs and bones, nerve pain, and muscle spasm in the area.

Time lapse photos by Eadweard Muybridge (in book) of man speed walking, naked.
Vigorous and/or repetitive movement, without the gluteal strength and pelvic stability shown here, leaves the back and spine more vulnerable to damage. (Photographs by Eadweard Muybridge, 1872​​1885)

Avoid sciatica and piriformis syndrome 

True sciatica occurs when there is pressure on the sciatic nerve, usually from a herniated disc or degenerative changes in the spinal joints. The symptoms may be numbness, tingling, burning and/or electrical shock-like pain. It usually extends from the buttock down the leg, and sometimes the foot, on one side. The Gokhale Method helps by restoring the anteverted position of the pelvis, and decompressing the lumbar spine where the sciatic nerve roots exit. We call the resulting natural alignment a J-spine.

Piriformis Syndrome is a condition characterized by pain, tingling, or numbness in the buttocks and often down the leg. It occurs when the piriformis muscle compresses or irritates the sciatic nerve. The sciatic nerve passes under (or, in some individuals, through) the piriformis muscle, and is particularly prone to overwork and disturb the sciatic nerve if its neighbor, gluteus medius, is not doing its duty. The Gokhale Method encourages healthy pelvic positioning and gluteal function to allow the sciatic nerve free passage through the area. 

Front and side-view diagrams of sciatic nerves in skeleton/body.
The profile view (right) shows swayed, leaning back posture, which causes problematic tightening in the posterior chain muscles and compresses the lower spine, including its discs and nerves. 

Make your movement strong, flexible, and stable

Your glutes are the powerhouse muscles that propel you in climbing, squatting, running, jumping, and more. They also work to control those movements, and are key to maintaining your balance. But glutes are not just for vigorous exercise…

In walking, it is your glutes that enable you to correctly achieve forward motion, rather than relying overly on your psoas and quads, shuffling, or falling forward. Glute activation brings a natural smoothness and grace to walking that we call glidewalking. Glidewalking allows your front foot to meet the ground deliberately but lightly, which is gentle on your joints; it also stretches your psoas with every step. 


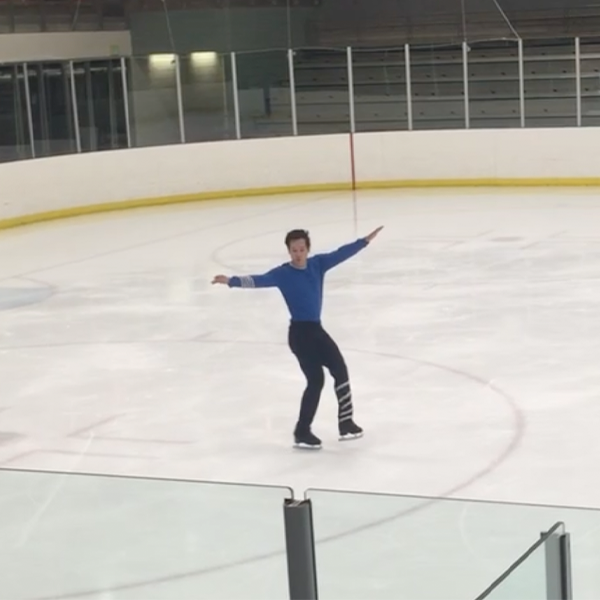
Long jumper Khaddi Sagnia of Sweden uses her glutes to power the run up and propel her amazing jumping…and also to glidewalk away.

Muscles support a healthy metabolism 

The muscular system plays an integral role in our body’s metabolism. Well-used muscles will be larger, helping to burn calories rather than store them. This can help to keep insulin levels low in the blood and can contribute to a healthy metabolism and weight range. 

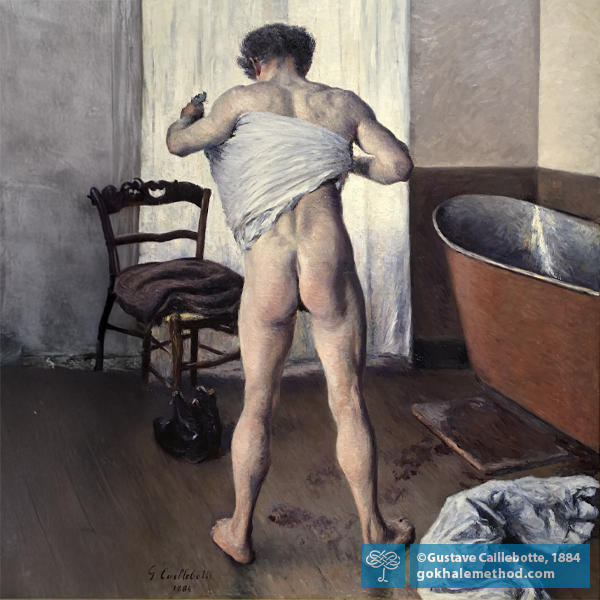
Man at His Bath, toweling dry, back view, oil painting by Gustave Caillebotte, 1884.
Well-toned glutes contribute to a healthy muscular and metabolic system. Man at His Bath by Gustave Caillebotte, 1884.

The foremost antiaging strategy—beautiful buttocks!

Never mind face yoga, cosmetic lifts, or surgical implants. Rather than costly interventions that do nothing to stop you losing your balance, strength, and mobility, embrace the art and science of how to rejuvenate your body by learning to move as you are meant to. Healthy posture can greatly improve your body’s architecture, self-confidence, health span—and your appearance as a bonus!

 Infant standing aligned on bike pedal, back view; contrast with elderly person teetering with cane.
As infants (left) we instinctively align ourselves well, making good use of our muscles. In our society, adopting poor postural habits as we go through life results in lack of healthy muscle tone, like “glute amnesia”—flat, wasted muscles that have forgotten how to work (right).

Best next action steps

We invite you to join us for a themed Free Online Workshop: Wake Up Your Glutes, They Snooze, You Lose, on Friday, September 6 at 12:30 pm PST, in which you will learn how to make every step a rep! A replay will be available over the weekend if you cannot join live. So sign up, and you will also receive a special offer.

This workshop launches our 21-day Strong Glutes, Strong Body Gokhale Fitness challenge, which will run from Sept 9–29, to help you continue to build strength and improve your posture.

Clare’s Gokhale Method® Success Story

Clare’s Gokhale Method® Success Story

Excerpts from an interview with Clare Rosenfield
Date

In January and February this year I took the Gokhale Method Elements course, which consists of 18 brief (13 minute) but potent lessons. I would like to share my experience of the Gokhale Method with you in this blog post.

My goals were to find out how to sit, stand, and walk well, so that I don’t overstress the scoliotic parts of my back. I was also in search of more comfortable and beneficial sleeping positions. I felt I needed guidance to help me develop a better sense of my body posture and alignment. To be able to do a one-on-one course online made this possible for me. 

It was only when I saw the difference between my “Before” and “After” pictures that I realized just how much change it was possible to make to my posture in such a relatively short period. 

Clare Rosenfield standing side on for Before and After photos.
Learning to stand well has been transformational for me. You can see that I used to park my hips forward and sway back, pressuring on my lower spine and sending my neck forward—little wonder I was in so much pain. Though still a work in progress, I know how to align my weight better throughout my whole body.

I have always enjoyed exercise, movement, and body work, including hiking, Qigong, and yoga. I now have a healthy standing point from which to do all these activities.

When walking, for the first few steps I might omit to squeeze my glutes and check through the other things I know to do…but it is becoming more habitual so my muscle memory soon kicks in. Or I recall my favorite prompt of Esther’s, “if your glutes snooze, you lose.” 

The J-spine concept was entirely new to me. I had tucked my pelvis under (as you saw in the above “Before” photo) all my life as far as I can recall. Consequently, I believe, the place that hurts for me is around L5-S1 at the very bottom of my spine, so I have to be accurate to squeeze my glutes from a relaxed pelvic position and not to sway and compress my lower back trying to make it happen with the wrong muscles. A single follow-up lesson on this was really useful to help me relax my pelvis back even more.

Diagrams showing the lower lumbar vertebrae and sacrum, (a.) anteverted at L5-S1, (b.) retroverted (tucked) at L5-S1.
A healthy L5-S1 angle (J-spine) permits the wedge-space disc there the space that it needs (a.). Learning the Gokhale Method finally enabled me to stop tucking my pelvis and sacrum, and damaging my L5-S1 disc (b.).

Due to my scoliosis I have to be extra careful about how I do things, and with poor bending form, I would always ache—or have a more acute disaster. Now I understand why. I use the hip-hinging technique as I’ve been taught (plus putting my hands on my hips) and I can bend comfortably—it amazes me! I don’t straighten my legs like some of the pictures we see, as I don’t have the hamstring length, but I can follow the principles involved. 

Clare Rosenfield standing side on and hip-hinging for Before and After photos.
Since learning to hip-hinge I can bend without distorting my back and without pain. There are many principles to learn that contribute to healthy bending, which comes later in the course, but it has been well worth it.

Since 2005 I have been playing the harp, for which being in the right position is important. I pull the harp towards me more now, and when I bend, I bend at the hips, not rounding my back. When sitting with a backrest I have found using the Stretchsit® Cushion makes a good deal of difference to my comfort—I have one in the car, and in fact I’m sitting with one in this interview right now to reduce the pressure on my lower back.

The Gokhale Method Stretchsit® Cushion

The gentle traction you can get in your lumbar area by using a Stretchsit® Cushion reduces compression and asymmetry in your spine.  

Since a hysterectomy in 1995, I have lost bone density and three inches in height. I am working nightly with stretchlying to lengthen my spine and reduce my scoliosis. I am confident that stretchlying at night and using my inner corset to support my spine during the day will prevent any further height loss and increase in my scoliosis, as I have already seen such improvement in my posture. These two measures may well enable me to regain some of the height in my spine that I have lost.

In October I had an eye surgery, a partial cornea transplant, and to make sure that it stayed in place, for three days following the operation I had to keep my head still and remain on my back. I practiced stretchlying carefully leading up to the operation and found I could lie there all night comfortably; stretchlying is the best!

Come morning I have the option of switching to stretchlying on my side, which I also learned in the course. Again, I found a follow-up lesson on stretchlying on the side helpful as it involves a little more technical precision, especially with anteverting the pelvis, to work its magic.

For me the biggest help for my upper body was learning the shoulder roll…and I feel like my neck automatically gets into the right place after I’ve positioned my shoulders well. It also positions me better in sitting and standing, and helps me do more of the things I care deeply about.

One of those things is artwork, and I am now much more aware of my body while I’m doing it. For example, I’m standing straighter, and if I start to slouch—oops—I can feel it. 

Colorful drawing with words by Clare Rosenfield
I love the poetry of combining imagery and words in my artwork.

I’m also at the computer writing books, including a biography, children’s books, and poetry. As I spend a good deal of time sitting, it’s important to do it well. 

Books variously written, illustrated, and recorded by Clare Rosenfield Books variously written, illustrated, and recorded by Clare Rosenfield
These are four of the numerous books I've published. I have illustrated the three books shown along the top here. Seven Meditations for Children I have recorded as an audiobook—see how the child is sitting with a nice straight back!

My husband had an eminent career in public health which took us all over the world. Rather than take a lucrative post as an Obstetrics and Gynecology trained MD, he chose instead to work for the poor and underserved of the world, becoming Founder-Director of the Center for Population and Family Health, 1975–86. He was then Dean of the Mailman School of Public Health at Columbia University, 1986–2008, and honored while alive with the naming of the Allan Rosenfield Building and after his passing by the Tribute Wall I fundraised for. The first year of our marriage was spent in Nigeria, and we were in Thailand for six years. I must have seen a lot of examples of elegant posture in the rural areas of those countries, but back then I didn’t recognize how important it was.

Photo of the Tribute Wall to Clare Rosenfield’s husband, Allan Rosenfield MD
Here is a photo of the Tribute Wall to my husband—there we are together, bottom left. My husband served in Korea as an Air Force doctor. You can see people headloading in Nigeria (left hand panel, photo top right).

I have six grandchildren, three boys and three girls, aged 12–23. When I’m with them I try to help them with their posture—they spend so much time hunched over. I guess it’s hard for children to envisage they are statistically likely to have back pain down the line, but at least I can sow the seeds for them to think about posture, and set as healthy an example as I can. I’m so glad that the Gokhale Method is there to help all generations—and especially the young—to rediscover their healthy posture heritage.

I’m known to my grandchildren as “the Nana who raps instead of naps!” Here is a rap I would like to share with you:

IT'S TIME WE VOW TO SPEAK RIGHT NOW
 

It's time we vow to speak right now

our vow to share a peace we dare

to live and keep and not let sleep

In mere intentions while old conventions

Toot horns of war. No more, no more,

We shout out loud, no more to shroud

Our depths of heart. It's time to start,

Yes, twenty-four seven, on Earth bring Heaven,

So one, two, three, it's you and me

To take a dive in what's alive,

Our YES to fate before too late

To emanate our LOVE not wait,

to one and all, the world enthrall

So they will see that all we be

One family! Yes all we be

One FAMILY!

Best next action steps for newcomers

If you would like insight on your posture, consider scheduling an Initial Consultation, online, or in person.

You can sign up below to join one of our upcoming FREE Online Workshops. . .

Posture Workouts in a Swimming Pool

Posture Workouts in a Swimming Pool

Esther Gokhale
Date

August is peak holiday time across the northern hemisphere, and many of us who live here will find ourselves poolside, or even better, in it!

Being in water has the natural advantage of lifting weight off the joints while providing gentle resistance training. Aching backs or knees can find relief from compression in the natural buoyancy that water provides. This has made pool exercises a popular prescription with physical therapists over many years, especially for post-operative or post-injury rehabilitation. 

On land, to relieve pain and compression, people usually use elaborate measures like inversion tables, traction units, or going to outer space! In the Gokhale Method we provide decompression for the lower back relatively simply with the Stretchsit® Cushion or the nubs on our Gokhale™Pain-Free Chair. But stepping into water is the simplest of all, giving you freedom of movement and the ability to strengthen yourself simultaneously.

Women in a swimming pool exercising with dumbbells.
Pool exercise also provides a fun and refreshing environment for exercise in summer heat waves! Wikimedia

This blog post gives you three ways to harness the unique benefits of being in water to practice and develop healthier posture. These exercises are challenging enough to do as a stand-alone workout or as a way to prime your swim session.

Healthy posture habits honed in water will benefit your daily life on land, as well as giving you greater stability and power for your swimming or other sports. 

For safety and best results, I recommend that you progress the session in the order given here, starting with Exercise 1 and, once you are familiar with it, move on to Exercise 2 and finally add Exercise 3. 

1. Stabilize your spine by using your inner corset

You will use a natural brace of muscles as you walk across the pool. It will give you the stability you need to cut through the resistance of the water without wobbling and threatening the alignment of your spine. 

Imagine you are getting into ice cold water. Feel how all the muscles around your middle can contract and make you more slender. You want to work hard enough to feel this from deep in the pelvis all the way up to your rib cage. You want to feel the muscular engagement all the way around your mid torso, like a tightly laced corset. 

Drawing of the muscles of the inner corset on a standing female figure. 
The muscles of the inner corset include the deep intrinsic back muscles, the abdominis transversus, and the obliques. 

Gokhale Method teacher Eric Fernandez shows how engaging the inner corset draws the abdomen in and makes the torso slender.

This is one way of recruiting your “inner corset," which will help stabilize your spine as you walk and is key to swimming with a more streamlined, efficient stroke. We teach this technique and others in more detail in our in-person Foundations course, one-day Pop-up course, our online Elements course, plus our Gokhale Exercise program. You can read more about your inner corset here.

2. Headload to lengthen your neck and to find deep spinal support

In industrialized cultures we have an epidemic of forward head carriage, putting enormous strain on the neck and structures throughout the back. Finding healthy alignment through your neck, combined with the inner corset, helps your whole spine to support itself well. Resting even a modest additional weight on the head can help us to find our vertical axis and stand tall. This is the reason I developed the Gokhale™ Head Cushion

Drawing of the muscles of the inner corset on a standing female figure ; woman in Burkina Faso with a tall, straight neck and functional head posture.
Headloading encourages recruitment of the deepest muscles of the inner corset and the neck, especially the longus colli at the front of the spine. 

In the pool I suggest you use what you have at hand—your hands! Rest them on your head and push up against them with your head. Keep your nose and chin angled downward. Proceed very gently if you have neck issues. You can gradually build up the intensity over a number of sessions. 

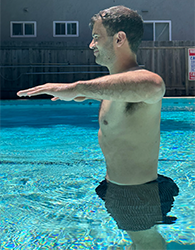
Gokhale Method teacher Clare Chapman headloading her hands walking in a pool. 
Gokhale Method teacher Clare Chapman headloading in the pool using the weight of hands and arms. Create space between your shoulders and your ears—keep your shoulders down as your neck grows tall. 

Establishing healthy length in your neck will help you to retain a straighter, more spacious alignment while swimming, especially in breaststroke where people tend to crane their necks to hold their heads above water. Consider training to swim with your head in the water, if you do not do this already, which will enable a much healthier alignment of your torso, neck, and head.

Gokhale Method teacher Eric Fernandez engaging the muscles of the inner corset in the pool, hands on head.
Especially when you raise your arms, you may need to use your rib anchor muscles to prevent your back from swaying.

3. Power up your walking using your feet and glutes

Many of us compromise our walking by overusing our quads and hip flexors (psoas muscle) and underusing our glutes. We predominantly reach our front leg forward in our strides, instead of generating propulsion from the rear leg with our glutes and foot muscles. 

Woman walking in market, Odisha, India.
Our ancestors and many people living in more traditional or nonindustrialized societies—where joint and back pain are rare—walk using their glute and foot muscles more than we typically do.

As you walk in the pool, make each step a rep. Each step wants to progress through a pose that includes a straight back leg and a bent front knee. As each leg goes back behind you in turn, squeeze your buttock muscles on that side. Engage the upper outer quadrant of your glute pack. This is not the kind of glute squeeze that clenches your lower butt cheeks together and tucks your pelvis. 

Gokhale Method Alumna Christine Andrew in a glidewalking pose in the pool (underwater shot).
Gokhale Method Alumna Christine Andrew working hard to achieve healthy walking form in the buoyancy and resistance of water.

Grab the floor of the pool with the whole sole of your foot, and then push off from your toes. Focus on maintaining the convex foot shape as you do this. Propel to glide forward, not bounce upward.

Gokhale Method teacher Eric Fernandez grabs with his foot in the pool, aerial view.
Eric actively grabs the floor of the pool with each foot to pull the body forward and then push back.

Putting it all together: Aim to keep healthy form and walk as smoothly as you can through the water. This develops both healthy length and muscle power in the right places.

If you notice your back arches back as you walk, take smaller steps and lean more forward until you master the art of keeping your spine stable with the rib anchor and inner corset techniques. Enjoy!

Best next action steps for newcomers

If you would like to know which posture changes will help you be pain-free and functional, schedule an Initial Consultation, online, or in person.

You can sign up below to join one of our upcoming FREE Online Workshops. . .

Treadmill Training with Healthy Posture

Treadmill Training with Healthy Posture

Esther Gokhale
Date

During the Victorian Era, a British engineer, William Cubitt, invented the treadmill as a means of harnessing hard labor in prisons and penal colonies. It was also used unproductively, purely as a punitive measure. Despite this sordid history, the treadmill has become a highly beneficial and enjoyable device within the context of a contemporary lifestyle.

The sedentary nature of modern life in the industrialized world leaves most of us with less than the ideal amount of physical activity. In 1968 the importance of aerobic exercise was popularized by the book Aerobics by Kenneth H. Cooper. Inspired by this book, the first electric consumer treadmill was developed by another American by the name of William Edward Staub. 

Front cover of book Aerobics by Kenneth H. Cooper
The book Aerobics by Kenneth H. Cooper did more than any other to promote the role of “aerobics” for health, founding a paradigm that continues to this day. Aerobics by Kenneth H. Cooper

Staub’s invention was enthusiastically taken up and the exercise treadmill is now used by some 50 million¹ plus Americans and millions more around the globe. The treadmill has several benefits over running outside:

  • It provides a controlled environment and avoids inclement weather
  • It can be private and safe
  • The track is clear and trip-hazard free
  • Incline or speed can be set as required
  • Progress can be tracked and data stored
  • You can read and work at it

A row of contemporary treadmills with screens, with one female user
Treadmills are now in gyms, homes, hotels, colleges, and research and medical facilities across the world. They encourage cardiac fitness, but not necessarily healthy form. Unsplash

Treadmills can be particularly helpful for some groups of people:

  • Those new to exercise who are still building a baseline of fitness and confidence
  • People rehabilitating from injuries, surgeries, strokes, etc. 
  • Those with a lack of access to good walking and running terrain
  • Athletes, fitness trainees, and research subjects wanting to track progress
  • Those who have little time for exercise

NASA astronaut Mark T. Vande Hei on a treadmill inside the ISS module Tranquility
NASA astronaut Mark T. Vande Hei jogs on a treadmill inside the International Space Station module Tranquility—perhaps the ultimate example of limited space and opportunity for exercise, and for the value of monitoring. Wikimedia

Healthy form—as important in treadmill workouts as any other activity

Because a treadmill track has more give than some terrain it may appear to be a more forgiving surface for our joints. However, we know from research on running shoes that substantial cushioning can actually result in a higher level of injuries²—the cushioning reduces proprioceptive sensitivity and lulls people into a false sense of being protected and actually hitting the ground harder.³

When it comes to using a treadmill, you don’t want to rely on either softer shoes or a softer surface to offset the effects of less than healthy biomechanics—and the biggest obstacle to healthy biomechanics is poor posture. 

Man running with tucked pelvis, internal rotation of feet and legs, rounded torso, and forward head carriage
Jogging or walking with a tucked pelvis, internally rotated feet, legs, and hips, a rounded torso, and forward head carriage stresses both muscles and joints. Switching to using a treadmill won’t fix these problems—but reclaiming healthy posture will. Pexels

Treadmill exercise is repetitive, and what you want is repetitive benefit, not repetitive strain. With some posture know-how, your treadmill training will not only get you aerobically fitter and stronger, but will also retrain your musculoskeletal system to work optimally. That means more gain, less pain, and less time out nursing injuries. Here are our top training tips:

Caution: Using a treadmill can be hazardous. If you’re not accustomed to using one, make sure to get appropriate support to make your introduction safe. Please consult your physician or PT if you have medical challenges. 

Starting your treadmill session

We recommend that you walk before you run! Not only is walking an excellent orientation and warm-up on a treadmill, but you get to practice actions common to both walking and running at a speed that helps you correct, pattern, and refine as you go. We encourage all our students to evoke the benefits and protections that are built into the ways our ancestors have walked for millennia.

Man in India walking carrying pitchers on yoke.
Treadmills are useful for practicing many aspects of healthy walking form, a body-wisdom we can relearn from traditional village societies where it is still prevalent. This man is in India. 

Power yourself with the right muscles

The earliest treadmills were human powered—which meant you had to push the ground away behind you, much as in natural walking form. With a machine powering the track beneath you, it is easy to underdo the muscular self-propulsion that ideally comes from squeezing the glutes of the leg that is going backward, and pushing off with that foot. 

Use your treadmill session to wake up your foot muscles. Imagine the treadmill is broken and you are using your feet to jump start it. In the first half of the stride your foot pulls the ground towards you; in the second half of the stride, it pushes the ground behind you. Be careful to not disproportionately use the muscles under your toes, but rather, include the long plantar muscles under the main arches.

Michelle Ball, Gokhale Method teacher, running on sandy beach, close-up
We can relearn the natural responses of the feet to grab the ground and push it behind us—even while wearing shoes on a treadmill.

We teach these nuanced techniques in logical sequence and detail in our in-person Foundations course, one-day Pop-up course, online Elements course, plus Gokhale Exercise program. 

Using an incline on a treadmill can improve your posture and back pain

Setting an incline of 10°–15° for part of your workout will help you cultivate a slight forward lean. This stance puts your behind behind you and your gluteal muscles in a position of mechanical advantage. It can also take pressure off the upper lumbar area if you have a habit of swaying.

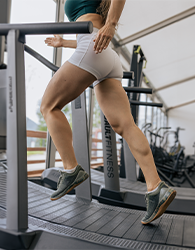
Woman running on curved HIT treadmill, lower body view.
We get greater benefits and reduce potential downsides when we use treadmills with healthy posture. This runner is on a curved track, designed for sprinting and high intensity training (HIT). Pexels

Monitor your posture as well as your performance 

One thing that treadmills cannot track is your posture. Especially as you increase your miles and speed, problematic posture increases the risk of damage throughout your body. We suggest the following ways to monitor your posture:

  • Take a deep-dive into healthy posture by reading 8 Steps to a Pain-Free Back or taking one of our courses
  • Use the mirrors in the gym or an app on your home computer 
  • Videotape yourself and play it back in slo-mo to examine your form
  • If you have a personal trainer, share this article and get them on board with your healthy posture treadmill training
  • Use PostureTracker™, our Gokhale Method wearable, available to course participants and Alumni.

3 views of PostureTracker™app in use.
PostureTracker gives you real time feedback on your form, and tells you the degree to which you are moving away from your healthiest position—whether that’s your spinal shape (a), your head position (b), or your degree of leg extension (c).

For more detail on healthy posture in running check out our blog post series: 

P1: Introduction  P2: Meet Your Feet  P3: How to Choose Running Shoes  P4: Taking Care of Your Knees  P5: Anteverted Pelvis  P6: Upper Body

Best next action steps for newcomers

If you would like insight on your posture, consider scheduling an Initial Consultation, online or in person.

You can sign up below to join one of our upcoming FREE Online Workshops. . .


References:

¹ Statista Research Department. “Users of treadmills in the U.S. from 2006 to 2017,” Dec 8, 2022, https://www.statista.com/statistics/191605/users-of-treadmills-in-the-us-since-2006/.

² S. Robbins and E. Waked. “Hazard of Deceptive Advertising of Athletic Footwear,” British Journal of Sports Medicine 31, no. 4 (December 1997): 299–303, https://doi.org/10.1136/bjsm.31.4.299.

³ Daniel E. Lieberman, “What We Can Learn About Running from Barefoot Running: An Evolutionary Medical Perspective,” Exercise and Sport Sciences Reviews 40, no. 2 (April 2012): 63–72, https://doi.org/10.1097/jes.0b013e31824ab210.


How To Go Down Stairs (Part 2)

How To Go Down Stairs (Part 2)

Esther Gokhale
Date

Are you beginning to wonder if you will need to set up your bed in the living room? Do you think twice about visiting places with stairs? Do you have a friend or older relative facing this kind of challenge? 

Welcome to our second post on navigating steps and stairs. Our first post looked at how to power yourself up stairs—this one talks about how to come down stairs. This kind of “life exercise,” done skillfully, can be transformative and gives many benefits beyond getting you to where you want to go.

Two women descending steps.
Going down stairs is a functional exercise that doesn’t need a gym. Freepik

Walking downstairs gets you fitter than walking upstairs! 

Dr Michael Mosley, a well-known BBC health journalist, has a favorite study that had people walk either up or down the stairs of a 10-story building twice a week, using the elevator in the other direction. Both groups saw improvements in many health outcomes—but those walking down the stairs—perhaps surprisingly—did better. They were fitter, had a lower resting heart rate despite doing less cardiovascular exercise, lower insulin sensitivity, lower blood fat levels, better bone density, superior balance, and twice the improvement in muscle strength. You can read more about the benefits of eccentric rather than concentric muscle action here.

Safety first

Whatever your fitness and mobility level, follow these measures to use steps and stairs safely:

  • Use a handrail if appropriate
  • Watch out for slippery or unsound surfaces and trip hazards 
  • Wear well-fitting, non-slip shoes

Start with your stance

When descending stairs, it’s especially important to maintain a well-balanced stance from start to finish. You want to position your body in a shallow zigzag squat, or “ready position.” We teach this stance in detail in our in-person Foundations and Pop-up courses, and our online Elements course. As the name suggests, this stance makes us available for action and quick reaction.

Martina Navratilova ready for the ball, Prague Open, 2006.
A zigzag stance or “ready position” readies us for dance, sport, or stairs. Martina Navratilova ready for the ball, ECM Prague Open, 2006. Wikimedia

The benefits of a zigzag stance for walking down stairs

Having your behind behind with your torso angled forward from the hip joint while descending stairs has several benefits:

  • It keeps your center of gravity further back so you are less likely to fall. By contrast, if you tuck your pelvis, your center of gravity goes further forward, making it more likely you will slip. This is familiar to anyone who has been on a ski slope.
  • Your head aligns over your feet, allowing you to see where you are placing your feet more clearly. 
  • It makes it easier to antevert your pelvis and direct body weight through your knees in a healthy way. 
  • It is good practice for other activities like bending, sitting, squatting, and more. 

Man walking down steps with a healthy zigzag stance.
Gokhale Method teacher Eric Fernandez descends steps maintaining a zigzag stance.

Your glutes help you keep your balance

In coming down steps and stairs your glutes contribute to the important job of stabilizing your hips, pelvis, and sacroiliac joints. Together with other muscles they play a key role in keeping you balanced over your standing leg as the other one is smoothly lowered to the next step. The importance of our glutes for achieving stability through the hips and pelvis is one of the areas of convergence between conventional advice and the Gokhale Method®. Having your behind behind you in a zigzag stance enables the glutes to work optimally.

Try hovering in your zigzag stance for a while on one leg—you will soon feel your glutes working. Be sure not to tuck your pelvis, as this interferes with the glutes’ stabilizing ability.

Anatomy drawings showing gluteus maximus (left) and, underneath, gluteus medius (right). 
Knowing where your buttock muscles are situated can help you visualize them working: gluteus maximus (left) and, underneath it, gluteus medius (right). 

The quadriceps lower you down—as well as take you up

When descending stairs, the back leg quadriceps work eccentrically to lower you with control as your front foot approaches the step below.

Anatomy drawing showing the quads
The “quads” are four muscles on the front of the thigh that insert at the knee. Wikipedia


Notice the quads of the supporting back leg working to lower the body’s weight.

Externally rotated feet v. internally rotated feet

Another important ingredient in coming down stairs is external rotation of the feet and legs. This is the natural angle for the feet, and encourages optimal alignment of the knees, hips, and pelvis. 

Woman in Odisha, bare feet pointed outward, close-up from behind 
The feet of this woman in Odisha, India, have retained a healthy angle outward.

Externally rotated feet are also preferable to feet straight ahead as this enables more of your standing foot to contact the step securely while you lower your other leg. 

Feet descending steps, externally rotated, front view.
Externally rotated feet encourage healthy alignment of both the foot and leg.

Internally rotating your feet will, over time, collapse your arches, and create bunions and knee problems. You will also be more likely to trip over your toes. If you currently have this habit, adopt a mild turnout of about 5° to give your muscles and joints time to adapt to change. You can read more about foot angle here

Feet descending steps, internally rotated, front view.
Internally rotated feet are problematic for your structure, and your safety.

Best next action steps for newcomers

If you would like insight on your posture, consider scheduling an Initial Consultation, online, or in person.

You can sign up below to join one of our upcoming FREE Online Workshops. . .

Positive Self-Talk for Positive Outcomes

Positive Self-Talk for Positive Outcomes

Esther Gokhale
Date

We’re a month into the New Year—and that has me thinking about what helps us to keep going and succeed with our New Year's resolutions. Including our posture and exercise goals. 

One thing that I have found works well for me, and for my students, is to choose my words carefully. 

Choosing words with care

The words we use can be extremely powerful. They can shift your mindset from negative to positive. We may not even realize that we have disadvantaged ourselves with a mental framework of negative words and phrases until we gain a fresh perspective. These frameworks can go back so many years we have mistaken them for a permanent part of ourselves.

Some of our self-talk goes back to our childhood. Our parents of course do their best for us, but parenting in our culture is often an isolated, poorly supported, and arduous journey. Parents’ anxieties, prejudices, and even best intentions are often embedded in negative language and unwittingly passed on to us. Over the years I have seen how many students have internalized their parents' criticism. I encourage students to let this go. It’s a disservice to yourself. 

Photo of negative words that have been cut away from their prefixes with scissors.
You can cut out the negatives in your vocabulary.

Our peers have also often learned to speak in terms that are unhealthily competitive and even unkind. For example, imitating or commenting on other people’s physicality is an easy way to score a laugh. The intention may be to entertain, but on the receiving end it can be hurtful. 

Change your language to change your mindset

Carol Dweck, a professor of Psychology at Stanford University, wrote her seminal book Mindset about the importance of what we believe to be true, especially about ourselves. A person with a fixed mindset will believe that they have a finite level of endowed talents, intellect, and so on. This is self-limiting, and leads to behaviors which seek to protect this self-image—for example, not trying too hard, or shying away from challenges.

Photo of flying bird silhouetted against the sky, framed with rainbow.
Let’s not limit our potential with negative beliefs and a fixed mindset. Pixabay

This is not to say there’s no individual variation in talent; there clearly is. But aptitude is not a fixed entity. For example, many people feel they cannot dance. Maybe someone told them once that they had “two left feet.” One of our teachers in England, Clare Chapman, told me, “I was a non-dancer for 50 years until I worked with the Gokhale Method. I now enjoy healthier posture, love to dance, and join 1-2-3 Move with my camera on.” Potential can be left unused, or it can be nurtured. What helps is a growth mindset, and a positive vocabulary to express it.


Our daily 1-2-3 Move program includes a joyful Dance Party to start each session.

Here are some examples of fixed mindset language that we have heard over the years as teachers:

  1. I have the family shoulders—people used to call me “coke bottle.”
  2. I hate my flat feet 
  3. I have no butt

Such statements hold you back from believing you can change. If you have previously said negative things about your posture, your body, or appearance, there is still the opportunity to reframe your observations positively. For example. . .

  1. Shoulders come in various shapes and sizes, but how they appear is only partly due to inheritance. Odds are that if you learn how to shoulder roll, you will lose the exaggerated sloping that tends to come with rounded posture. Gently opening and resettling your shoulder joints will guide them “back home” to a more posterior, externally rotated, and natural place. You can learn how to shoulder roll here.
  2. By learning to kidney-bean shape your feet you can realign the bones of your foot arches, and strengthen the muscles which support them. Restoring this natural foot shape is also a great correction and preventative for bunions. You can use any orthotics you may have as a training aid, although many of our students soon find they no longer need them.

Photo of woman’s kidney-bean shaped feet, from Odisha, India.
Note the bean-shaped contours of this woman’s feet. She has well developed inner and transverse arches, giving her feet convexity rather than a collapsed shape. (Odisha, India, 2017) 

  1. Let go of thinking “I have no butt!” What that usually means is that you haven’t yet developed your glutes due to tucked posture, which disadvantages their action. Most people in our culture tuck their pelvis, which results in underusing the glutes. We teach our students how to get their behinds behind them (without tensing their backs), and to use their glutes to power each step. We call this smooth, elegant action glidewalking.

Photo of woman, standing at airport check-in, pelvis tucked and buttocks under-developed.
Buttock muscles that have been underused due to tucking the pelvis retain their potential to be developed in healthy walking and posture.

Changing your posture with love

All these techniques and principles are covered in our in-person Foundations and Pop-up courses, and our online Elements course. Technically effective and efficient as our courses are, our teachings really land best when we bring love into the process. A loving attitude enables new possibilities and holds us safely on course. It is the best way to parent, to teach, and to succeed in changing what we do. It is not by accident that the name of our publishing house for 8 Steps to a Pain-Free Back is Pendo, the Swahili word for love. 

Changing your posture with positivity

The uplifting words, music, and dance of Bing Crosby and the Andrews Sisters summarize it all. . . Enjoy!


The inspiring song Ac-Cent-Tchu-Ate the Positive alongside video footage.

To find out how the Gokhale Method can help you become pain free, schedule an Initial Consultation, online or in person, with a Gokhale Method teacher.

To learn more about the Gokhale Method, sign up for one of our upcoming FREE Online Workshops...

The New Year 3 x 3 Fitness Challenge: Strength without Strain

The New Year 3 x 3 Fitness Challenge: Strength without Strain

Esther Gokhale
Date

We’re here to help with your New Year’s fitness resolution. Join us for a FREE 10-day New Year 3 x 3 Fitness Challenge, which is offered as part of the Gokhale Exercise program. It will be fun, safe, and effective, enabling you to build your strength without strain and injury, because, all the while, you are also training for healthy posture! 

The Gokhale Exercise banner showcasing six different program teachers.

Your 10-day challenge consists of three sets of three (3 x 3) popular exercises. Our approach to these well-known exercises is unlikely to be found in any standard gym or fitness program where, unfortunately, poor postural habits go undetected or are even unknowingly promoted. Here the exercises will be taught with our “Gokhale filter” to respect what is natural and healthy for your body.

The New Year 3 x 3 Challenge Exercises:

Exercise #1: Push-ups

Push-ups are a highly functional exercise that will assist you with many daily tasks and a range of activities—getting up from the floor, yoga, weight training, gardening, pushing heavy doors or strollers, etc.

A lot of people, especially women, have difficulty supporting their weight with their arms; their upper body muscles are much weaker than lower body muscles. That was certainly my story.

To this day I haven’t yet done a full push-up though I am getting tantalizingly close thanks to our Gokhale Fitness and Yoga programs. I can now lower myself to the ground with full control, (an excellent eccentric exercise, which you can read more about here), and can push up from part way up. I am hopeful that the 10-day New Year 3 x 3 Challenge will take me all the way! 

Gokhale Method teacher Eric Fernandez demonstrates a push-up with poor form.
This push-up is done at a bench rather than on the floor to be easier. However, common problematic habits can still creep in, as Gokhale Fitness teacher Eric Fernandez demonstrates.

Gokhale Method teacher Eric Fernandez demonstrates a push-up with healthy form.
This push-up shows healthy form.

Exercise #2: Squats

Growing up in India, I was surrounded by people sitting on the floor and squatting frequently throughout the day. These habits contribute to greater mobility in the formation of the hip joint, and flexibility in the tissues surrounding the hip joint. 

People in our culture rarely have this degree of mobility and flexibility in the hips and ankles, and so squat poorly in a way that does damage—rounding the back and pronating the feet. This is more of a collapse downward than a well-supported, well-aligned squatting movement. 

In the 3 x 3 Fitness Challenge, Eric will show you how to do squats in a safe way, to boost the strength of your knees, quads, glutes, thighs, and whole lower body. Done well, deep squats are not only safe—research shows that they can improve the health of knee menisci and cartilage, ligaments, and bones.

Gokhale Method teacher Eric Fernandez demonstrates a squat with poor form.
This squat demonstrates poor form, such as internal rotation of the legs. 

Gokhale Method teacher Eric Fernandez demonstrates a squat with healthy form.
This squat demonstrates healthy form.

Exercise #3: Deadlifts

Often known as a Romanian deadlift due to its popularity among weightlifters in Eastern Europe, a deadlift strengthens almost everything on the back of your upper and lower body. It is also a good exercise to test and develop hip mobility, and to develop bone density. 

The deadlift utilizes our primal way of bending, which we call hip-hinging. Hip-hinging is instinctively used by our infants, and widely by adults in many parts of the world where traditional patterns of movement have been maintained. Hip-hinging is taught in our Gokhale Method® in-person Foundations and Pop-up courses, and our online Elements course.

Gokhale Method teacher Eric Fernandez demonstrates a deadlift with a kettlebell and poor form.
This deadlift demonstrates common mistakes such as rounding the back.


This deadlift demonstrates healthy form.

Here’s your Challenge:

Day 1: You’ll test how many reps of each exercise you can do in a minute. You’ll take a minute’s rest between each of the three sets, and between each exercise. 

Days 2–4: You will do other exercises that compliment and build up your strength for the 3 x 3 Fitness Challenge.

Day 5: Check-in on your goals.

Days 6–9: Continue with strength training.

Day 10: You’ll go through the challenge again and see in what ways you have improved. Expect an improvement in your strength, in the number of reps you can do, and in your range of motion!

Is this fitness challenge suitable for everyone?

The 3 x 3 Fitness Challenge is designed for practically everyone, with easier options given for those taking steps towards the full exercise, and additional challenges for those who find them relatively easy. 

People are often surprised at how working with healthy posture changes their experience of an exercise—depending on the situation, you may feel stronger and lighter, for example. Or you may discover that you were unknowingly “cheating” and can benefit your body by making different, healthier efforts.

If you have had an injury or surgery recently, or have a particular health issue, we recommend that you seek the advice of your preferred physician or health professional before starting the Challenge. We encourage everybody to work within their capabilities—this is not a no-pain, no-gain program!

I look forward to meeting you as we challenge ourselves to greater fitness, and healthier posture.

If you would like to find out more about how the Gokhale Method can help support you, sign up to join one of our upcoming FREE Online Workshops. . .

How to Climb Stairs Part 1: Onward and Upward

How to Climb Stairs Part 1: Onward and Upward

Esther Gokhale
Date

Few of us, wheelchair users excepted, pass a day without climbing steps or stairs. Students often ask if posture has any bearing on how best to do this—and the answer is yes! Our approach to pain-free, healthy posture works precisely because it helps you with all your daily activities. This blog post is the first of several containing introductory tips for using steps and stairs. We will focus here on how to power yourself upward.

Steps and stairs—the benefits

If you are looking to maintain or improve your cardio fitness and lower body strength, climbing steps and stairs will check that box. For example, this could be opting for the stairs rather than the elevator at work.

A young man and woman ascending stairs side by side.
Choosing to take the stairs over the elevator is an easy way to build movement breaks into your day. Pexels

Or, if you have a suitable baseline fitness, you can also use steps, stairs, or gym machines, to up the challenge in your training sessions.

Gokhale Fitness teacher Eric Fernandez on a step machine.
Gokhale Method teacher Eric Fernandez being put through his paces on a step machine.

If you have mobility issues, perhaps due to joint injury, degeneration, or poor balance, using stairs could be something you need to take, literally, one small step at a time, and possibly with the help of a healthcare professional. However, once steps and stairs are appropriate for you, then, whether you are at the level of post-op rehab, or athletic training, the healthy postural form taught by the Gokhale Method® will make your efforts safer, encourage healing rather than damage, and make each step you take more efficient and powerful.

Safety first

Whatever your fitness and mobility level, first check that you can use steps and stairs safely:

  • Use a handrail if that’s right for you 
  • Ensure good lighting in the area
  • Watch out for wet, slippery, or unsound surfaces such a torn carpet or loose tiles
  • Watch out for untied shoelaces, trailing clothing, and other trip hazards 
  • Wear well-fitting, non-slip shoes

Start with your stance

Angling your body forward slightly will be of immediate advantage. It will put your behind behind you, placing your glutes in a position of mechanical advantage where they can work optimally. The glutes are an important part of the posterior chain, that is, muscles in the back of the body, which need to play a prominent role in powering you forward. 

The body wants to angle forward in line with the back leg when walking up steps. ✅

Most people overly rely on pulling up their body weight with the anterior chain when they climb. This overuses the major hip flexor (psoas), and thigh muscles (quads). It is a pattern that usually arises because the pelvis is tucked, sending the “behind” underneath. With the pelvis tucked, the glutes are unavailable to contribute the forward propulsion that makes climbing easier.

A woman climbing steps with a tucked pelvis.
Climbing steps with a tucked pelvis disadvantage the posterior chain muscles that do this job best.

Squeeze those glutes for both stability and lift

As you stand on one leg and prepare to step up, adopt your forward stance and contract the glutes of that standing leg strongly. Gluteus medius will stabilize your leg and pelvis and help maintain your balance, while gluteus maximus will propel you forward and up to the next step.

Anatomy drawings showing gluteus maximus (left) and, underneath, gluteus medius (right). 
Knowing where your buttock muscles are situated can help you visualize them working: gluteus maximus (left) and, underneath it, gluteus medius (right). 

The gluteus maximus is the largest and most superficial of the buttock muscles, and pulls your leg back. When one leg is fixed on the ground, as during walking or climbing steps, its muscular contraction will propel the body forward. The gluteus medius is closer to the hip joint, higher, and further out to the side, where it helps in maintaining balance as well as adding momentum. 

glutes of the supporting leg actively contracting climbs steps, back view.
Notice the glutes of the supporting leg actively contracting.

In addition to climbing stairs becoming easier, contracting your glutes has the additional advantage of giving you a more athletic appearance by toning and lifting your buttock muscles.

Work those calves and spare your knees

Lower down your posterior chain, your calves and feet are designed to do the job of propelling you upward. When the calf muscles of your standing leg contract, they lift your heel, driving your forefoot against the ground and your body up. Without the calves providing propulsion, too much heavy lifting will be relegated to your quads, which is likely to overload your knee joint. 


Most people are aware of their more visible calf muscle, gastrocnemius (in red); underneath it lies the deeper soleus (in green). They both contract to point the forefoot down, driving the heel and leg upward when the front of the foot is on the ground. Wikimedia

Using your calves will mean that your feet and ankle joints also get healthy work and movement. Often people climb stairs with their ankles fixed, having become accustomed to walking on flat urban surfaces—little wonder this joint becomes stiff, weak, and injury-prone. Climbing stairs with good postural form will lend your ankles much-needed mobility, and bring a welcome boost to the circulation in your lower limbs.  

This slo-mo video shows the calf muscles of the rear leg contracting during the step up.

If you are not sure if you are activating your glutes as well as you might, you can find instructions in my book, 8 Steps to a Pain-Free Back, or sign up for my Free Online Workshop, Wake up Your Glutes: They Snooze, You Lose, on January 12, 1:30 pm PT. 

If you would like more nuanced guidance on how to navigate steps and stairs, or on refining your glute squeeze, consider scheduling an Initial Consultation, online or in person, with a Gokhale Method teacher.

If you would like to find out more about how the Gokhale Method can help support you, sign up to join one of our upcoming FREE Online Workshops. . .

Running: Part 6: Upper Body

Running: Part 6: Upper Body

Michelle Ball, Gokhale Method teacher
Date

Welcome to the sixth blog post in our series on running. My name is Michelle Ball, and I am a Gokhale Method® teacher living in Tasmania. I am also a lifelong runner and am passionate about sharing the benefits of healthy posture with the running community, be that beginners, seasoned runners, or anyone in between. Even if you walk rather than run, the posture principles outlined in this post can still help you to enjoy an active and pain-free body well into old age.

Running with a well-positioned upper body

In this post we will consider the upper body. Runners are inclined to pay far less attention to the upper half of the body than the lower half, as they focus on gait pattern, cadence, footwork, and propulsion. This is hardly surprising, but the lower body, while super-busy, really is just half the story. 

Healthy posture in the upper body brings the following benefits:

  • Protected spinal structures
  • Improved biomechanics
  • Unimpeded flow and momentum
  • Support that makes the body feel lighter
  • Athletic appearance

4 elite female runners in profile showing healthy form.
Healthy posture principles are important for the upper body as well as the lower. Implementing them can both protect your spine, and bring mechanical advantage to your running. Unsplash

I have found the upper body principles that we teach in the Gokhale Method® in-person Foundations and Pop-up courses, and our online Elements course, made a world of difference to my running. Let me share some key points with you. . .

Anchoring your ribs

As explained in my previous post, Running: Part 5: Anteverted Pelvis, a forward leaning position when running helps to avoid compression in the lower back. In our culture it is common that people have tight lower back muscles (erector spinae), and weak opposing muscles of the torso (internal obliques). This creates a sway back, which pulls the torso into a backward leaning position. A deliberate forward lean will help counter this. 

Gokhale Method teacher Michelle Ball running angled forward, side view.
Here you can see me keeping a consistent forward angle throughout my torso, neck, and head.

Most people will benefit from some degree of forward rotation of the thorax to fully correct a sway and bring their torso into a straight and healthy alignment. This adjustment can be made and maintained by engagement of the internal oblique muscles, or rib anchor, as we Gokhale Method teachers call it. The rib anchor can be learned with a simple but precise maneuver which you can learn here

Female runner (upper body) in profile showing swayback and lifted chin.
Overly contracted back and neck muscles can give a misleading feeling and appearance of being upright. In reality, overly muscles are pulling the lumbar and cervical spine into compression, threatening discs and nerves. Pexels

Deeper support and protection for your spine

Running is classed as a “high impact” activity. This is one reason to run with the best posture and technique you can. Even if you are running smoothly with impeccable form, running will generate additional forces that impact the spine on landing. Perhaps that is how “jogging” got its name! 

Using your inner corset while running lends natural protection to the joints, discs, and nerves of the spine in two important ways. Firstly, it creates and maintains length, and secondly, it confers stability, preventing untoward twisting, forward, back, and sideways movement. The trunk and pelvis remain a single unit, with no jiggling from micro-flexing and extension, or bobbing up and down—and the head travels at a continuous level, sparing the neck. In these respects good running form is the same as good walking form. The spine and its tissues are saved from both acute injury and long-term wear and tear. How to find and deploy your inner corset is explained in detail in Esther’s bestselling book, 8 Steps to a Pain-Free Back.

An S-shaped spine medical illustration from 1990, and a J-shape spine from 1911.
These two medical illustrations from 8 Steps to a Pain-Free Back show how, in modern times (e.g., 1990), deeper spinal curves have come to be regarded as normal and desirable. The Gokhale Method advocates a return to a straighter, longer spinal shape (e.g., 1911). 

Avoiding neck pain while running

Deep engagement of the inner corset will preserve length in the lumbar spine, and this supportive structure also encourages length in the cervical spine, or neck. In addition, locally, the longus colli muscle, which attaches to the front and side of the neck and upper thoracic vertebrae, needs to be engaged to draw the neck back into a tall, lengthened position in line with your body. 

 Anatomical drawing of the longus colli muscle.

The longus colli muscle (seen here in red) draws the vertebrae of the neck back into a healthy, tall, and spacious alignment. Wikimedia

Gliding your head up and back, while allowing your chin to rest down, will provide stable and relaxed carriage for your head, and a happier neck. You can learn how to glide your head back here.

Woman running with head and neck back in line with body, side view
Your head and neck want to remain back in line with your body, even as you lean forward. 

Man running with tucked pelvis, internal rotation of feet and legs, rounded torso, and forward head carriage
You don’t want to jut your chin forward and let your head literally run ahead of you. Pexels

Trunk stability

The trunk stability that protects the spine also enables efficiency when running, as energy is not dissipated into incidental movements that detract from forward motion. It enables all propulsion to be well channeled, rather than just pulling the spine around. As running expert Marc Cucazella reminds us, ‌“You‌ ‌can’t‌ ‌fire‌ ‌a‌ ‌cannon‌ ‌from‌ ‌a‌ ‌canoe.”‌ In the upper body this propulsion comes from the arms.

Arm movements in running

Whereas in glidewalking the arms largely rest, in running the arms actively contribute to propulsion and alternate with the leg action. In sprinting the arms are especially important, moving straight forward and back like pistons on either side of the body. The arms‌ ‌are bent at‌ ‌45 degrees ‌or‌ ‌slightly‌ ‌more,‌ with the hands‌ ‌moved ‌in‌ ‌a‌ ‌circular‌, ‌‌rearward‌ ‌pull motion,‌ ‌‌as‌ ‌if‌ ‌you‌ ‌were‌ ‌chopping‌ ‌wood.‌ The arms‌ ‌then‌ ‌recoil‌ ‌forward,‌ ‌very slightly rotating‌ the shoulders‌.‌ What you don’t want is the arms to be crossing the midline of your body and pulling you off balance. Arm action can be much more relaxed at an easy jogging pace or in distance running. 

4 elite female sprinters in profile showing strong arm action.
The vigorous piston action of the arms in sprinting requires a well-configured shoulder joint. Unsplash

Whatever your running speed, it is extremely important that the shoulders be well positioned, so that the joint—where the bone of the upper arm, shoulder blade, and collarbone meet—can connect well, and the soft tissues, nerves, and circulation can function optimally. You want your shoulders to be happily at home in their natural, posterior position. You can learn how to roll your shoulders back here.

Open, posterior shoulders will also help you to access breathing in your upper chest. If you tend to hunch forward, draw your elbows more together behind you to assist the external rotation of your shoulders.

Relaxed and bouncy shoulders

In gentler jogging and long distance running, the shoulder area can be more relaxed. Healthy alignment within the shoulder joint is still important for the hundreds of to-and-fro arm reps, and to cushion the impacts traveling through the joint with every stride. A healthy postural relationship between the upper back, the shoulder girdle, and the neck will help the shoulders to be responsive rather than held tight, and to bounce a little as you run. 

Anatomical drawing of the trapezius muscle.
The trapezius muscle is at the center of healthy upper back, neck, and shoulder posture. It helps the shoulder to lift, lower, and gently bounce through impactful movement. Wikimedia

Stick or twist?

The synchronized alternation of arm and leg movement is vital for momentum and balance during running. This will be integrated by the torso twisting somewhat. There is a counter movement of pelvic rotation backward as the chest moves forward on the opposite side. The key is neither to over stiffen, nor over twist the torso. A stiff body keeps the hips from extending fully, can shorten your stride, and puts more pressure on the knees and leg joints. Over twisting can cause a “sloppy” run and impinge on the spinal joints. This is where staying tall with a strong inner corset is invaluable, as the inner corset allows healthy rotation both through and beyond it.  

In particular, avoid an upper/lower torso separation with twisting happening almost entirely at the T12/L1 junction, where the ribs meet the lumbar area. Twisting here is sometimes misguidedly encouraged to help power the arms, especially in fitness walking classes. However, there is no ball and socket joint at T12/L1 that makes swiveling here a good idea for the spine! 

South African sprinter Wayde van Niekerk running, side view
This runner’s torso shows considerable rotation, but it is distributed along the spine—it does not twist at just one point. South African sprinter Wayde van Niekerk sets a world record at the 2016 Olympics. Alessandro Bianchi / Reuters

Olympic gold medalist Tirunesh Dibaba running, front view
Olympic gold medalist Tirunesh Dibaba also shows even rotation of her torso from hip to opposite shoulder. I’ve also noticed that most East African runners have a significantly higher arm carriage, and are among the best runners in the world. Bretta Riches – Run Forefoot

If you would like guidance on any aspect of your posture and/or running, including your head, neck or shoulder position, consider scheduling an Initial Consultation, online or in person, with a Gokhale Method teacher.

Here are previous running posts you might like:

Running P1: Introduction, Esther Gokhale

Running P2: Meet Your Feet, Michelle Ball 

Running P3: How to choose running shoes, Michelle Ball 

Running P4: Taking care of your knees, Michelle Ball

Running P5: Anteverted Pelvis

If you would like to find out more about how the Gokhale Method can help support you, sign up to join one of our upcoming FREE Online Workshops.

Running: Part 5: Anteverted Pelvis

Running: Part 5: Anteverted Pelvis

Michelle Ball, Gokhale Method teacher
Date

Welcome to the fifth blog post in our series on running. My name is Michelle Ball, and I am a Gokhale Method® teacher living in Tasmania. I am also a lifelong runner and am passionate about sharing the benefits of healthy posture with the running community, be that beginners, seasoned runners, or anyone in between. Even if you don’t run, but do want an active and pain-free body well into old age, this blog post is for you!

What is an anteverted pelvis? 

Pelvis refers to the bony pelvis, and means basin, or bowl, in Latin. Anteverted means tipped, turned, or inclined forward, from the Latin ante to go before or in front, and vertere to turn. So we are referring to a pelvis that tips forward. 


The angled belt line of the Ubong tribesman on the left shows that his pelvis is anteverted—mildly tipped forward. Contrary to popular belief, an anteverted pelvis does not cause excessive lumbar lordosis (sway back) when there is a healthy angle at the L5-S1 junction. His back remains surprisingly straight by conventional standards. 

Three standing figures in profile showing anteverted, “neutral”, and tucked pelvis
(a.) An anteverted pelvis facilitates heath posture. The commonly advocated “neutral pelvis.” (b.) is actually mildly tucked and does not allow the correct lumbo-sacral angle and stacking of the spine. (c.) A markedly tucked (retroverted) pelvis leads to a tense, compressed lumbar area, or to slumping., 

How an anteverted pelvis benefits the spine:

As you see in the image above, an anteverted pelvis (see example (a.)), is the foundation for a healthy, straighter, more vertical spine, which does not sway or round. It provides the correct orientation for the sacrum to support the L5-S1 disc, which is wedge-shaped, and then for the L5 vertebra and those above to stack well. A tucked pelvis, over time, will likely cause the L5-S1 disc to suffer wear and tear, bulging, or worse, and put pressure on the sciatic nerve roots.


(a.) An anteverted pelvis preserves the wedge-shaped L5-S1 disc. (b.) A tucked pelvis cannot accommodate this and the lower discs will suffer undue pressure and bulging toward the nerve roots.


Like the Ubong tribesmen and people throughout the nonindustrialized world, these elite runners show both an anteverted pelvis and an upright torso. Unsplash

Running leaning forward

Some running coaches teach a forward lean of the torso, which I agree reproduces some of the benefits of a healthy L5-S1 angle for runners who are currently stiff at that joint and therefore slightly tucked if they remain upright. Leaning forward helps compensate for any lack of L5-S1 angle, and harnesses power from the energy of impact when the back leg pushes off. 

Leaning forward is strongly advocated in the ChiRunning technique, which was developed by Danny Dreyer. You can watch Esther in conversation with Danny here, where he explains his approach.

Graphic over photo of runner in profile showing benefits of leaning forward 
Danny Dreyer advocates a forward lean when running, with shoulders, hips and ankles aligned. This is a useful technique to help orient the pelvis, especially if the L5-S1 angle does not allow for the torso to be upright. It also provides additional momentum.


World-renowned Kenyan runners often run with a good L5-S1 angle that anteverts the pelvis, combined with only a slight forward lean. Flikr

Powerful glutes 

An anteverted pelvis also confers mechanical advantage to the buttock muscles. With the behind behind, they can contract powerfully to pull the legs back and aid propulsion. Under-developed glutes are a common casualty when the pelvis is tucked. 


You can see here that I am running with my pelvis anteverted, and a slight lean forward, both of which put my glutes behind to help power my stride.

It is important that, in an effort to get your behind behind, the anteverted pelvis is not mimicked by simply sticking your bottom back with tension (sway) in the lower back. The pelvis needs to settle into anteversion naturally, with healthy articulation at the L5-S1 joint, relaxed back muscles and hip joints, and healthy alignment throughout the body. Gokhale Method teachers have the techniques and expertise to help you get there without inadvertently creating more postural problems. 

Young woman running with behind behind but swayed back
This runner has her behind behind her—but, as the creases in her top confirm, she is tensing her back into a sway and lifting her front ribcage to get there. Pexels


This footballer has his behind behind with an anteverted pelvis that articulates at L5-S1. His torso remains largely straight, which enables him to twist with good length in his spine, rather than compounding compressed discs and nerves. Pixabay

I find it interesting that a forward-leaning stance which aligns the torso with the extended back leg and supports pelvic anteversion is also a key ingredient in learning to glidewalk. Glidewalking is taught in detail in our Gokhale Method® in-person Foundations and Pop-up courses, and our online Elements course. Glidewalking produces a natural, smooth and powerful gait, which in particular strengthens the glutes and the feet. Students who have learned glidewalking find their running improved by the Downtime Training™of simply walking—but walking well. 

Good hip health

The anteverted pelvis is part of nature’s blueprint for healthy human posture and sound biomechanics. It is no surprise therefore that it confers many benefits throughout the body. An anteverted pelvis gives the best fit and function for the hip joints, avoiding the misalignments that occur with tucking. Poorly aligned hips can cause bursitis, labral tears, and osteoarthritis within the joints, and soft tissue issues such as muscle strains, tendonitis, and ITB (iliotibial band) problems further down. 


Jogging or walking with a tucked pelvis encourages tight hip joints, internal rotation of the feet, legs, and hips, rounding of the torso, and forward head carriage. Pexels

Pain in the knees, lower legs, and feet 

When runners get pain in their knees, lower legs, or feet, one of the last places they are likely to look for a remedy is their pelvic position. They are far more likely to blame their shoes! While the right shoes are important, (see Running P3: How to choose running shoes), it is often a revelation for runners to realize how the angle of the pelvis affects their gait. 

One serious problem with tucking the pelvis that hits runners particularly hard is excessive heel strike. While this may also occur in walking with a tucked pelvis, running or even slow jogging will mean that an unduly forward thrusting front leg will suffer more impact. This may result in not only wear and tear, but immediate and painful damage, as the femoral head (top of the thigh bone) is jammed back into the hip socket, and the knee joint of a more forward and likely more straightened leg is jarred.  Sticking the heel forward is like ramming the brakes on while still stepping on the gas! The answer to a thudding heel strike is not to buy excessively padded shoes, but to antevert the pelvis.


A tucked pelvis points the thighs forward, resulting in an excessive heel strike and jarring through the front leg knee and hip. sportssurgeryclinic.com


This runner has her behind behind, but the orientation of her pelvis comes from a
swayed lumbar area, not from L5-S1. The front of her rib cage and chin are pulled up.
She is about to heel strike—bad news for her straightened front leg and hip joint.
Unsplash

Doing a much better job, an anteverted pelvis:

  • Puts the muscles and soft tissues, especially the glutes, in a position of mechanical advantage, without threatening the lumbar spine
  • Enables better weight distribution and therefore bone health 
  • Places the thigh in a healthier position to absorb forces in the hip socket 
  • Allows landing with a bent front knee, with better shock absorption 
  • Facilitates a light heel/midfoot landing, avoids excessive heel strike, is more energy-efficient

Female runner in back/profile view showing good form and anteverted pelvis 
This runner has good form. Her behind is behind because of a pronounced angle at L5-S1 (anteverted pelvis). Her back remains largely straight, her shoulders back, her neck tall. She will land without unduly jarring her joints. Unsplash

Support for the pelvic organs 

An important benefit of an anteverted pelvis is that the bones of the pubis are able to play their part in supporting the pelvic organs. Organ prolapse and incontinence can affect everyone, especially as we age, and is also a common problem in our culture for women during or after pregnancy. When the pelvis is tucked the organ support is overly reliant on the soft tissues of the pelvic floor, such as the Kegel muscle.

 Two diagrams in profile showing anteverted and tucked pelvis effect on pelvic organs.
(a.) With an anteverted pelvis, the pubic bone is positioned to support the pelvic organs. (b.) With a tucked pelvis, the Kegel muscle is obliged to assume this role.

There is nothing worse than getting a run in and having to use the bathroom, especially if there is not one available! Heather A. Dunfee is a physical therapist in the Mayo Clinic Healthy Living Program, and a certified Pregnancy and Postpartum Corrective Exercise Specialist. She does not refer specifically to the anteverted pelvis, but she is clear that tucking the pelvis is bad news:

For runners, good alignment can help your core to better absorb impact, preventing leaks. For example, a slight forward lean helps to put your deep core "canister" in the best alignment to do its job. Think about stacking your rib cage over your pelvis, something that comes naturally when running uphill. . . Hills are great because they force the body into a position of rib cage over pelvis and untuck the bum.

If you would like guidance on any aspect of your posture and/or running, including pelvic position, consider scheduling an Initial Consultation, online or in person, with a Gokhale Method teacher.

Here are previous running posts you might like:

Running P1: Introduction, Esther Gokhale

Running P2: Meet Your Feet, Michelle Ball 

Running P3: How to choose running shoes, Michelle Ball 

Running P4: Taking care of your knees, Michelle Ball

If you would like to find out more about how the Gokhale Method can help support you, sign up to join one of our upcoming FREE Online Workshops.

Subscribe to glutes