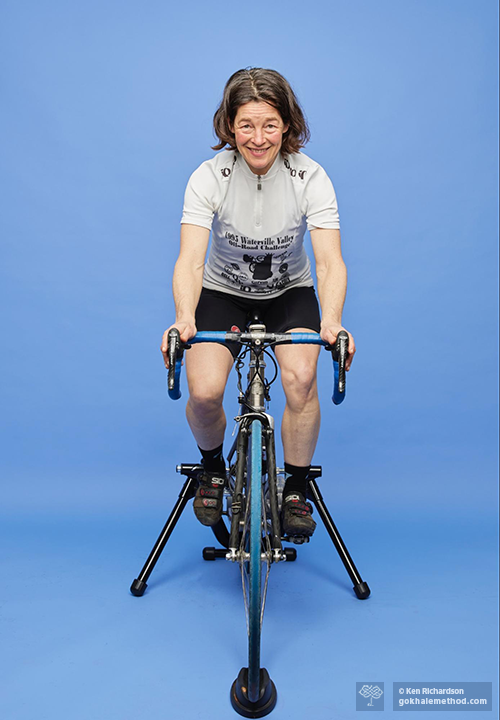
bicycle

Family Cycling: That’s How We Roll

Family Cycling: That’s How We Roll

Tiffany Mann
Date

Cycling has been a passionate sport and hobby of mine for decades. I am no longer a professional bike racer; I am now a mother and Gokhale Method® teacher. As a result, I have become more observant of what can “go wrong,” posturally speaking, when riding a bicycle. And I work to improve my posture as I pedal. For example, it takes vigilance to keep my shoulders back and my head aligned with my torso. I now know how cycling can enhance my form, and vice versa. I also enjoy modeling key posture principles to guide my daughters and partner so that they too can be comfortable and healthy on a bicycle.

Cycling is a part of family life

In this blog post I would like to share with you some of the cycling activities and posture tips that have benefitted us as a family. Prior to parenthood, my partner and I raced and trained together for many years, traveling to quite a few states and even abroad to indulge our passion. When our daughters were born, we decided that, at least in our busy city, Somerville, MA (the most densely populated city on the Eastern Seaboard, USA!), we would get about with them on bicycles instead of driving. 

Gokhale Method teacher Tiffany Mann and family with carrier bikes.
Here I am supporting a customized cruiser with our daughter, Willa, aged two, in a car seat on the back. My partner, Skip, sits on a customized tandem with Coco, aged five. Car seats worked well as carriers and even allowed Willa to nap during our outings. Can you make out the second car seat on the front of my cruiser?   

Of necessity, we hauled our young daughters around on homemade bicycle “carrier-cruisers,” with car seats attached. Both bikes offered comfortable arrangements for young children—and great exercise for us parents! These days, there are so many choices of bicycles made for transporting children, it might feel overwhelming and hard to know where to start. Bike shops are now a terrific resource, happy to offer guidance and expertise, help with fittings and even track down special equipment if needed. With so many options out there, including information on the internet, you won’t have to customize your own bicycle unless you want to. 

Cycling makes a better world for our children

We know it’s better for our environment to cycle than to drive everywhere. Some people choose to live car-free, and that certainly saves money, as well as the planet! We are thankful for the bike lanes that are becoming a more prevalent part of the infrastructure in cities and suburbs alike. As bike lanes make cycling more accessible, you’ll find more people of all ages pedaling instead of driving, which in turn makes it safer for everyone. 

Charity rides or fundraisers are a great way to enjoy family time together while also supporting good causes. These benefit rides are usually closed to traffic, or directed by officials, which makes the ride casual and relaxed. Varied routes are offered, making the event open to a wider range of ability and fitness levels. 

Adults and children cycling a 10k Pan Mass Challenge fundraiser.
Here we are doing a kids Pan-Mass Challenge, raising money for cancer research and treatment. Coco, aged five, is leading the pack on this 10K ride.

Adults and children gather with bikes for a 10k Pan Mass Challenge fundraiser.
Notice the two photographers’ interest in Skip’s bicycle arrangement, with the little bike attached by bungees to the front so that Willa, aged two and a half, could ride a bit of the course too.

The Graves family rest after a 48.6-mile fundraiser cycle ride.
The Graves family has just completed the D2R2 (The Deerfield Dirt Road Randonée) fundraiser ride. They chose the moderate, yet challenging, 48.6-mile route, and will celebrate with a refreshing plunge in the river, and a BBQ for a refuel. Their son is just nine years old—the family that rides together, has fun together! 

Lloyd Graves aged 7, getting ready to bike to school with his dad.
Here is Lloyd Graves aged seven, getting ready to bike to school with his dad. Studies¹ have shown that children who walk or ride their bicycle to school are more engaged and ready to learn than those who have been driven to school. Their circulatory system is boosted, and also their executive functioning is activated and neural pathways have been firing, both being used to make decisions before even entering the classroom. 

Now that my daughters are 15 and 12, they’re ready to explore the world on their own to a degree. By cycling they now have the skills and self-confidence to ferry themselves around our city to meet up with friends or attend their extracurricular activities. 

We all need bikes that fit our bodies! 

You can consider bicycles as an extension of the human body, and both adults and children need bikes that fit them, for efficiency, safety, and enjoyment. Most often an ill-fitting bicycle is too small, which forces hunching and rounding of the shoulders and compression of the whole spine—neither of which are helpful for your posture or body mechanics. As kids grow so quickly it is especially important to watch out for this. With the right size, and sometimes even type of bicycle, it is possible to enjoy all the benefits of cycling from being very young until well into old age. 

Rachel Holt on small tricycle, Dummer, New Hampshire, c. 1927. Jim Griffin, Flickr
Rachel Holt on tricycle, Dummer, New Hampshire, about 1927. This is a charming portrait. From a cycling perspective, Rachel could do with a bigger bike, so that her thighs can drop down and she no longer has to tuck her pelvis and round her back. She will also be able to pedal a lot more efficiently!
Jim Griffin

A bicycle that is too big may have a child too stretched out to reach the handlebars comfortably, and/or bouncing on the saddle in an effort to reach the pedals, which stresses the hips. It can also be a challenge to maneuver, adding unnecessary strain and making it unsafe. 

Young girl on large tricycle, guided by bending over woman, Ken Hyman, Pinterest
This tricycle is still a little too big for its rider to reach the pedals and the ground—though she’ll soon grow into it! kenheyman.com

The benefits of balance bikes

We can begin bike riding at an early age, and even new walkers or soon-to-be walkers, can consider using a “balance bike.” They have some advantages over a tricycle. Balance bikes are built without pedals, so the novice rider can focus on balance and steering. (Pedals can also be taken off some bikes, then put back on when the child is ready.) With balance bikes, all the propulsion is with the feet actively pushing the ground away and behind, so there is a natural tendency for the body to adopt a position of biomechanical advantage by sitting with a tipped forward pelvis. This is an example of posture aiding our movement; when the feet go behind our hips, they can better push the ground away from us. This action comes readily since little children aren't fighting a tight psoas, or struggling with stiff joints. This is an action we would like our feet to do in walking, which is to actively engage with pushing on the ground beneath us. It is amazing how fast tiny children can propel themselves using just their feet to paddle along! 

Willa Brown on Strider® balance bike, aged 11 months.
Our daughter Willa, aged 11 months, scooting along on her Strider® balance bike. Notice how she keeps her shoulders back and leans slightly forward. Balance bikes encourage children to propel themselves with natural foot strength.

Another benefit to learning to ride without pedals is that, by definition, a child can easily reach the ground, so a parent is not pushing or guiding from behind or towing the handlebars in an effort to help the child maintain balance. This often sees the parent adopt a very compromised position, hunching over and distorting the back. Best to help the child learn to ride solo; take them to a grassy area or quiet, dead-end street or parking lot where they can let fly!   

Illustration of woman bending over small child on bike by Esté MacLeod
This beautiful illustration shows the mother maintaining a straight back as she bends forward to guide her child learning to ride. Most parents do not bend so well, causing cumulative damage to their spinal discs. Esté MacLeod

Modeling healthy posture for your children

One of the best ways a parent can encourage their children to maintain healthy posture on a bike is to model it themselves. For example, once you get used to sitting with the behind behind and the pelvis tipped forward rather than tucked under, it is not only comfortable, but, pretty soon, preferred. We teach a similar style of sitting in the Gokhale Method called stacksitting, for when you don’t have a backrest for support. You can learn how to stacksit here

Willa Brown, aged four, riding a bike, sitting upright.
Willa, aged four, sitting forward enough on her “banana” seat to comfortably reach the handlebars and maintain her shoulders back. See how she stacksits beautifully, with her back straight and behind behind.

On a bicycle you may also be sitting leaning forward, which, to do well, requires more inner corset activity and also the ability to hip-hinge, which are both explained in detail in Esther Gokhale’s book, 8 Steps to a Pain-Free Back

Tiffany Mann and husband Skip riding a tandem bike, sitting angled forward.
Here Skip and I are both sitting angled forward. Skip is the leader in navigation, I’m leading in posture! My head, shoulders, and behind are further back, where we would like them to be. We’re enjoying quality time working in tandem! 

Even holding the handlebars in a relaxed way actually begins with relaxed shoulders that stay open and back. Just because you are reaching forward for something, does not mean the shoulders need to round forward. A tip I offer my children is to do a shoulder roll when we come to a stoplight. This allows the shoulders to “reset” if they have come forward a bit, or even a lot! We teach shoulder rolls in the Gokhale Method as a gentle way to open up the chest and allow the shoulders to rest back where they belong. Teaching this early on is good practice for other daily activities; if one can maintain shoulders back in place while using the arms out front on a bicycle, then keeping them back in place in other contexts, like at a computer, will be easier and become habitual. You can learn how to shoulder roll here

Willa Brown, aged 12, standing, hands on hips, ready to cycle.
Willa, aged 12, helmet on and excited for a morning bicycle ride on the Cape Cod Rail Trail. One of the benefits of riding a bicycle at any age is the joyousness that comes from moving your body and exploring the world around you. 

In fact, nearly all the postural principles that we teach in our in-person Foundations course, Pop-up course, or online Elements course, can help your cycling to become more efficient, healthier, and more comfortable. If you would like expert help with your cycling posture, or to find out more about how our courses could help you with any activity, get started with an online or in-person Initial Consultation with any Gokhale Method® teacher. Or sign up for one of our free online workshops below. 

Reference:

¹ “Why Your Kids Should Walk or Bike to School This Year.” Saferoutes Utah. Accessed on July 5, 2022. https://saferoutes.utah.gov/why-your-kids-should-walk-or-bike-to-school-this-year/

Five Posture Tips to Power Your Cycling

Five Posture Tips to Power Your Cycling

Tiffany Mann, Gokhale Method Teacher
Date

This is Part 3 of a three-post series on cycling with healthy posture by Gokhale Method teacher and longtime cyclist Tiffany Mann. Read Part 1 and Part 2 here.


Gokhale Method teacher Tiffany Mann is passionate about 
combining her cycling and posture expertise.

Spring has arrived, and perhaps like many people, you want to spend more time on your bike! Maybe you’re already an avid cyclist looking for some tips to make cycling more comfortable and sustainable for years to come; or you’ve taken a break and are ready to step back on the pedals. Perhaps you just want to get up those hills! 

Even if you are a beginner, it is so satisfying and pleasurable to use your own muscle power to propel yourself on this simple machine; but it is still well worth looking at how to use your energy as economically as possible. Cycling doesn’t have to be superhard work, and you can benefit your posture at the same time.

My last blog post focused on keeping your arms, neck, and shoulders comfortable when cycling. In this post I want to pass on some simple tips on how best to pedal and use your legs efficiently. 

As in any physical activity, good form is essential for the best transfer of effort, minimizing fatigue, and reducing wear and tear on the body by using relevant muscles and sparing others. You can still get an excellent whole-body workout if you want to pedal hard, but your chance of injury will be far lower. 

Tip 1. Get your saddle height right 

Having your saddle either too high or too low can make pedaling miserable. The saddle wants to be at an optimal height for the foot, ankle, and lower leg to power the pedal rotation. Too low a saddle, as is unavoidable on too small a bike, and none of your joints can open up enough to transfer optimal power from the muscles. You want an almost full-length pedal stroke that gives a good transfer of power, starting from the glutes and hips, through the quads and to the feet. 


This saddle is too low for comfort and results in inefficient pedaling. 

Have the saddle too high, and the pelvis rocks up and down as each leg in turn overextends to reach the bottom of the pedal stroke. This is not only inefficient in terms of energy transfer but puts a lot of strain on the lower back and sacroiliac joints. If your hamstrings are a reasonable length, they can accommodate a good saddle height without any ill effect or abuse to the hips and low back. Some serious cyclists raise their saddle after they’ve reached a threshold number of miles or time on their bike, as their hamstrings have adapted and lengthened during the ride.  


We have all pedaled since we were toddlers on tricycles. Now that our coordination is more developed
and our
cycles better engineered, pedaling can become a more refined action!
Unsplash

Tip 2. Improve your pedaling power

In cycling, propulsion is from the glutes, thigh, and calf muscles, pushing down and pulling up on the pedals. Instead of just pushing downward on the pedals in a fixed-ankle, one-side-at-a-time action, you want to think of your pedaling motion as continual, circular and smooth, with the whole ankle involved. This takes strength and flexibility in the calf, which needs to alternately contract strongly and elongate. The Achilles tendon that attaches the calf muscles to the heel also gets a healthy workout as the foot moves through its circular motion. When done with good form, cycling not only strengthens our tissues, but can also lengthen them. Gokhale Method students who have learned to propel themselves in walking will already have a good deal of relevant muscle memory and power in their legs and feet and will likely be pleasantly surprised when returning to cycling.


A good pedaling action bestows both efficiency and healthy exercise
 for the foot, ankle, and lower leg.
Wikimedia

Tip 3. Use your feet

You don’t want to be sending your weight, as well as transferring the force of your pedal stroke, onto just the delicate toe bones. Instead, placing the more robust ball of your foot on the pedal will elicit the most power transfer. 

At the bottom of the pedal stroke (the 6 o’clock position) you want to pull the pedal back with your feet. The “pulling up” phase of the pedaling action is most effective when you are clipped into the pedals with cycling shoes, or toe straps, but you can still imagine you are “grabbing” up with your plantar foot muscles inside a regular shoe. Gokhale Method students will already have learned to use their feet strongly when walking by grabbing and then pushing the ground away and behind them, which translates well into cycling. You can learn this grabbing action from our Gokhale Moment Inchworm video here.

The feet are actively engaged. They grab and help push the pedal down, and at the downward-most position, they
start to pull back and then up.

When you are feeling more confident in your cycling and want the extra power that comes from being “attached” to your bicycle, cycling shoes and clipless pedals are a terrific investment that can really up your game. The more you use your feet and ankles the stronger they will become, serving you better in cycling, walking, running, dancing, and more. . .


Have your knees not too bent but not fully extended either. You want a small bend just like an athletic “ready position.” Slight external rotation of the legs and feet allows the knees to track well.

Tip 4. Keep your knees happy

Cycling should actually be good exercise for the knees as it uses the quadricep muscles on the front of the thigh that help stabilize the knee. However, a common threat to the knees is riding with the seat too low, (see Tip 1), which stresses the knee joint and causes inefficient pedaling form and fatigue. 

Your feet also want to be pointing outward just a little. Not quite as much as in healthy standing, which is 10°–15°, but enough to afford a degree of external rotation for your legs. Your knees will be happy tracking at this angle, the same as your feet. This helps avoid pronation in the feet and ankles, and pressure on the inside of your knees. 


These two look set for fun on their customized bike! The boy on the left sits well, while his friend could do with untucking his pelvis. You want your behind behind you and your back straight.

Tip 5. Antevert your pelvis 

A common threat to happy knees is riding with a tucked pelvis. Tucking the pelvis pushes the thighs into a more forward position than they would be in if the pelvis were anteverted. As a result, the far end of the thigh bones, where they form the upper half of the knee joints, are also more forward. These “overshot” knees then have a poor alignment for distributing downward force through the joint and into the lower legs and feet and are much more likely to suffer painful wear and tear. 

An anteverted pelvis serves both seated and standing pedaling positions well.

Good posture is a bit like a jigsaw puzzle—get a prize piece like the pelvis in the right position and many things fall into place. An anteverted rather than a tucked pelvis is often the missing piece for beneficial cycling posture. Having already set up some external rotation of your thigh bones, you will have created the space needed for your pelvis to tip and settle forward into anteversion. This puts your behind behind you, and from here, whether sitting or standing, your buttocks are in a position of mechanical advantage to drive your ride. Happy pedaling!


Riding with a tucked pelvis disadvantages the glutes and encourages a C-shaped spine.
It is very common in both amateur and professional cyclists. Unsplash


An anteverted pelvis brings your behind out behind you, giving more power to your pedaling, whether you are sitting or standing, and enabling a straight axis for your spine. 

If you are concerned about storing your bike securely with easy access, we recommend this article, which gives helpful advice on finding the best option to store your bike safely in a bike shed or a garden shed. Click here. 

If back pain or other musculoskeletal problems have been holding you back from cycling, or you would like to improve your fitness and posture when cycling, consider joining our Gokhale Exercise program. It will inspire and teach you how to apply Gokhale Method principles while on your bike, and in everything you do. Sign up for your 7-day free trial here.

If you are interested in learning the Gokhale Method principles referred to in this blog, in depth and customized to your needs, we recommend our Elements course (one-on-one coaching online), our Foundations Course (one-on-one or small groups in-person), or Pop-up Course (not available during COVID). 

Getting on a bike is a fabulous way to bring healthy activity, energy, and better posture into your life. We hope you feel inspired and empowered to do just that!

Please share your posture and cycling experiences here:

How to Choose a Bike Seat for Good Posture (Part 2)

How to Choose a Bike Seat for Good Posture (Part 2)

Esther Gokhale
Date

In our part 1 blog post on the topic of bikes, we went over how to find the right frame for you. The next important step is to find the right seat for your body and your bike, since without a decent seat you may be uncomfortable, or may find it challenging to have healthy posture. Your seat should distribute your weight across regions comfortably; it should have padding, but not so much that it lacks support and stability; it should be set at an angle that allows your pelvis to antevert (that is, tip forward relative to the angle of your spine.) A good seat is crucial whether you prefer to be upright and stacksit, or if you prefer a racing style with a hiphinge. Here’s what you need to know about bike seats to find the right one for you:


Seat shape and angle: On most bike seats, it’s possible to change not just the height, but the horizontal position and the tilt of the seat. Make these adjustments carefully on any bike you plan to ride regularly. A small difference in the seat position can have a big difference on your posture as well as your comfort.

The angle of your bike seat—because it makes anteversion uncomfortable or because it tilts you too far forward or backward—may be causing you to tilt your pelvis in a direction that doesn’t allow for good back positioning. Many people prefer bike seats that carry most of their weight on their sitz bones (further back) rather than on the tissues under the pubic bone (further forward), because there are fewer sensitive nerves endings around your sitz bones. So if the front of your seat is tilted too far up (as in the image above left), this can encourage you to tuck your pelvis in an effort to relieve pressure on the pubic bone. And if the seat is really tilted too far up, it forces you into a tuck because of the backward slope of the seat—picture this as the opposite of the wedge you would use to facilitate stacksitting. If you try to sit on your bike with an anteverted pelvis (more angled than the angle of the hiphinge you need to reach your handlebars), and your seat causes you discomfort, you may need to angle the front of the seat downward.

Too much downward tilt is also problematic. If your seat makes you feel as though you are slipping forward off it when you antevert your pelvis, you will need to tip it back more so that you stay comfortably in place without having to brace all your weight against your handlebars. If your seat is tilted forward so that it doesn’t sufficiently ‘cradle’ your pelvis at the right angle, you may also be tucking in an effort to get your bottom further back on the seat.

It is possible that after playing with your seat to find a comfortable middle-ground, you will discover you need a new seat altogether. You should look for one that accommodates the shape and size of your sitz bones and carries your weight in the least-sensitive areas when you are properly hiphinging on your bike. Some seats are wider and may cause chafing against your thigh; you may need a cutout in your seat to relieve pressure under your public bone. To find a seat that matches your body, you may need to do a lot of testing!

Note that many newer “comfort” seats have a huge amount of padding and can amount to sitting on a small mound, rather than distributing your weight and ‘cradling’ your bottom. This extreme amount of padding can actually make it harder to comfortably antevert your pelvis:


Because these seats fall away from a padded peak, your weight is not well distributed; to find a comfortable spot for the pressure to land, you may end up tucking your pelvis so your sitz bones take all the force.

Older “saddle” style bike seats may appear too firm, but they can cradle your pelvis, distribute your weight comfortably, and promote stacking.


The slightly bowl-shaped curve of these seats provides lift in the back like a wedge, but catches your from sliding forward with the projection in the front.

Firmness and fabric covering on the seat will also make a difference in your riding experience. A slippery fabric may cause you to always be sliding around; a squishy seat may feel most comfortable at first, but end up chafing or lacking support. Finding the ideal seat is best accomplished through a lot of testing and laps around the block, so we recommend you find a very patient bike shop attendant to help you with this selection. You may need to purchase several seats so you can test them out on longer rides over several days before returning the rejects.

In addition to the more standard styles found in most bike shops, there are also many kinds of specialty seats available online which may work best for your needs and preferences:


Both of these seats provide a nice bowl shape that can support anteversion and comfortably distribute weight. Personal preference will dictate whether these fit your body, and enable a proper range of movement and a stable seat while on your bicycle.

Getting moving: When it’s time to actually get on your bike, how should you do it? The most gentle way to mount your bike will be to start by straddling the frame in front of the seat. Try doing this next to a railing or wall where you can brace yourself for balance, and move slowly while engaging your inner corset.


This young girl shows the ideal way to start your ride—straddle the frame and tallstand to align your pelvis and spine.

If you are not adept at swinging one leg through the air, or your balance isn’t what it used to be, a bike frame that dips very low in front (like comfort bikes) may be necessary to make getting on and off your bicycle easy. Make sure you can easily step over your frame without hurting your back or losing balance.


This comfort cruiser is ideal for maintaining a relaxed upright posture, and has a low bar in the front that makes getting on and off the bike a breeze!

Before you get up your seat, perform a shoulder roll and slowly reach your arms to your handlebars, to make sure you maintain good shoulder positioning with your elbows close to your sides, and no slump in the upper back. Keeping your shoulders in position may deepen the amount of bend you need to sit with, which will dictate how anteverted your pelvis should be.

When you get up onto your seat, you will have to perform an advanced hiphinge/stacksit, one that is done by bringing your hips back and up, rather than your torso down (while moving and balancing!). As you stand up on your pedals, make sure you start with a straight back, engage your rib anchor, and then slowly deepen your hiphinge as you move your hips back and up onto the seat, keeping your sitz bones out behind you.


Start hiphinging as you stand up on your pedals, before moving your bottom onto your seat.

The motion is similar to hiphinging before lowering down onto a chair for stacksitting:


As your lift yourself into your bike seat, you will need to hiphinge to some degree, more or less depending on the style of your bike and how upright it allows you to be.

If you need to adjust while you are on the move, you can make sure you are properly anteverted by lifting your bottom up a little and repositioning your sitz bones even farther behind you.

As you ride, you can lessen the work of your back, shoulder, forearm, and wrist muscles by keeping as much weight in your seat as possible, rather than supporting yourself on your handlebars. If you have experienced wrist or arm pain, you should consider a frame and seat that allows you to stacksit, since being fully upright will save your wrists from unnecessary stress.

Engaging your inner corset as you ride will also protect you from bumps and jostling. Because you will be in motion, manually checking your position or looking in a mirror is likely impossible, so you will have to rely on your proprioception and your body’s comfort levels to judge how well you are maintaining your posture. But like with everything else, practice makes perfect; with some repetition and regular breaks, you can soon master the Gokhale Method on two wheels!

Do you have any experiences to share about bike seats?


How to Ride a Bike with Good Posture (Part 1)

How to Ride a Bike with Good Posture (Part 1)

Esther Gokhale
Date

Most people, when they ride a bike, tuck their pelvis so the rear portion of their sitz bones rests on the seat. Then they lean over to reach the handlebars causing a lot of spine curvature. With the additional tension created from pushing the pedals and holding the handlebars, and the bouncing and jostling from the road, riding a bike this way can be a painful and harmful activity.


Many modern bike riders look like Mr. Bean when they ride a bike, sitting with an unnaturally curved spine.


Each of these modern-day bikers has a rounded spine and craned neck. Image courtesy John Matrix at bikelist.org.

With a few adjustments, riding a bike can be a harmonious and healthful activity. By using hiphinging and stacksitting, and by making sure you have the right bike and the right settings, you can enjoy this way of exercising and getting around. Here are the key things to look for in a bike frame:

Bike style: In some areas, road bikes and touring bikes—styles that require a deep bend to reach the handlebars—are very common. In other places, cruisers, hybrids, and flat-foot ‘comfort bikes’ are the norm. Pick a style that works best for you, but if you experience back pain, an upright model will likely more comfortable and conducive to good posture.

An additional advantage of an upright bike is that you won’t need much hamstring flexibility and back strength to maintain a J-spine. An upright bike allows you to stacksit on your seat with an easily maintained healthy neck position.


This comfort cruiser is ideal for maintaining a relaxed upright posture. It also has a low bar in the front that makes getting on and off the bike easy.


Shailene Woodley rides a bike with close-swooping handle bars, which make it easy to ride upright with the shoulders back.


This woman from yesteryear demonstrates an excellent J-spine on a ‘comfort’ frame that allows her to stacksit and easily keep her shoulders back. 


Here Kim Kardashian rides an upright with cruiser handlebars. With a slight hiphinge, she is able to maintain healthy spine and neck alignment. This position doesn’t require great hamstring flexibility; it does requires slightly more work than stacksitting.

For those who prefer a more aerodynamic racing style, you will need to do a deep hiphinge. It can be challenging to find a seat that allows for appropriate and comfortable pelvic anteversion. I will write more about bike seats in an upcoming sequel post.


To get closer to a racing position with your torso more horizontal, you will need a pronounced hiphinge to maintain a straight spine. This woman hiphinges quite a bit, but stops short of ideal and therefore has a slightly rounded lumbar spine. Ideally, you pivot your head upwards on the neck rather than crane the neck to look ahead (more on this in a future post). 

Frame size: For good bicycling posture, you will need an appropriately sized bike frame that allows you to maintain a relaxed shoulder and neck position, and allows you to touch your feet to the ground from your seat. The handlebars need to be within reach without your shoulders pulling forward. 


With a little effort, you can find just the right size and style frame to keep you straight and pain-free!

With With good posture and a good bike fit, biking is a pleasure to observe and experience.

The more upright you can be on your bike, the less work you will have to do to maintain your J-spine.

Children often maintain a J-spine on bikes without too much trouble. Children’s bikes are rarely designed for aerodynamic racing, but rather for ease of learning on.

A frame that is too small can cause you to scrunch up, tuck your pelvis, and round your spine. A frame that is too large can pull your shoulders too far forward to reach the handlebars. When your handlebars are in the wrong place and you rest a lot of weight on them, you may create shoulder and neck tension from bracing yourself continuously.


This rider’s bike is too small for him, resulting in a tucked pelvis and rounded spine.

If you are exceptionally tall, you may find it difficult to find a frame that is tall enough to fit you. If you need to lift your seat to its max to create enough legroom for yourself, consider also lifting your handlebars. There are extensions that can be attached to the stem of the handlebars, to bring them closer or farther away, as well as to add height. Your frame needs to be long enough to comfortably reach between seat and handlebars without hitting your knees or scrunching your torso.


This tall rider is having trouble fitting onto a too-small frame—the distance between the handlebars and seat is too short for his torso to fit without buckling at the spine.

For smaller-than-average adults, it is sometimes difficult to find a petite frame that allows you to lower the seat enough to reach the ground, without this causing the handlebars to be uncomfortably out of reach. Again, there are adjustable stems available for handlebars that are shorter than average, or can tilt the handlebars closer to you. With many bike seats, you can also adjust the seat position horizontally, and it may be easier to slide the seat closer to the handlebars than to bring the handlebars closer to the seat. Just make sure that your seat isn’t so far forward that pedaling becomes awkward or uncomfortable.

How well does your bike fit you? What has your experience been riding different kinds of bicycles? How good is your posture when you ride? Please do share!


Join us in an upcoming Free Workshop (online or in person).  

Find a Foundations Course in your area to get the full training on the Gokhale Method!  

We also offer in person or online Initial Consultations with any of our qualified Gokhale Method teachers.

Subscribe to bicycle