Five Posture Tips to Power Your Cycling
This is Part 3 of a three-post series on cycling with healthy posture by Gokhale Method teacher and longtime cyclist Tiffany Mann. Read Part 1 and Part 2 here.
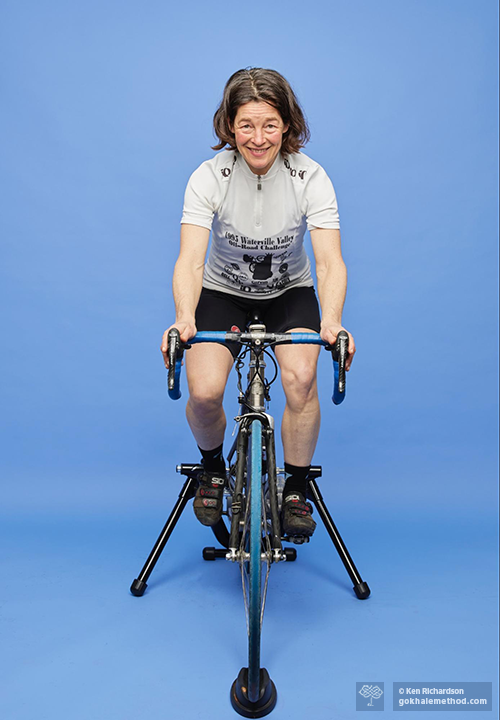
Gokhale Method teacher Tiffany Mann is passionate about
combining her cycling and posture expertise.
Spring has arrived, and perhaps like many people, you want to spend more time on your bike! Maybe you’re already an avid cyclist looking for some tips to make cycling more comfortable and sustainable for years to come; or you’ve taken a break and are ready to step back on the pedals. Perhaps you just want to get up those hills!
Even if you are a beginner, it is so satisfying and pleasurable to use your own muscle power to propel yourself on this simple machine; but it is still well worth looking at how to use your energy as economically as possible. Cycling doesn’t have to be superhard work, and you can benefit your posture at the same time.
My last blog post focused on keeping your arms, neck, and shoulders comfortable when cycling. In this post I want to pass on some simple tips on how best to pedal and use your legs efficiently.
As in any physical activity, good form is essential for the best transfer of effort, minimizing fatigue, and reducing wear and tear on the body by using relevant muscles and sparing others. You can still get an excellent whole-body workout if you want to pedal hard, but your chance of injury will be far lower.
Tip 1. Get your saddle height right
Having your saddle either too high or too low can make pedaling miserable. The saddle wants to be at an optimal height for the foot, ankle, and lower leg to power the pedal rotation. Too low a saddle, as is unavoidable on too small a bike, and none of your joints can open up enough to transfer optimal power from the muscles. You want an almost full-length pedal stroke that gives a good transfer of power, starting from the glutes and hips, through the quads and to the feet.
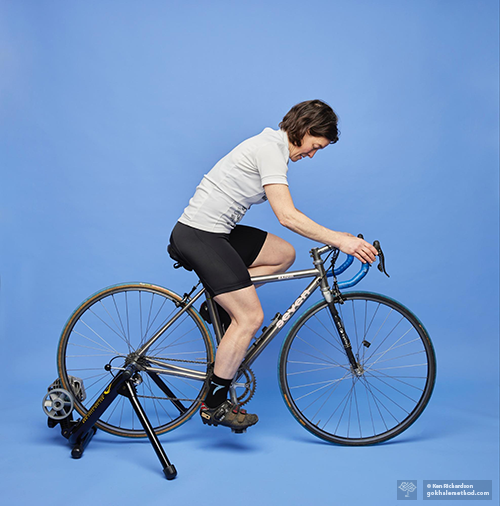
This saddle is too low for comfort and results in inefficient pedaling.
Have the saddle too high, and the pelvis rocks up and down as each leg in turn overextends to reach the bottom of the pedal stroke. This is not only inefficient in terms of energy transfer but puts a lot of strain on the lower back and sacroiliac joints. If your hamstrings are a reasonable length, they can accommodate a good saddle height without any ill effect or abuse to the hips and low back. Some serious cyclists raise their saddle after they’ve reached a threshold number of miles or time on their bike, as their hamstrings have adapted and lengthened during the ride.

We have all pedaled since we were toddlers on tricycles. Now that our coordination is more developed
and our cycles better engineered, pedaling can become a more refined action! Unsplash
Tip 2. Improve your pedaling power
In cycling, propulsion is from the glutes, thigh, and calf muscles, pushing down and pulling up on the pedals. Instead of just pushing downward on the pedals in a fixed-ankle, one-side-at-a-time action, you want to think of your pedaling motion as continual, circular and smooth, with the whole ankle involved. This takes strength and flexibility in the calf, which needs to alternately contract strongly and elongate. The Achilles tendon that attaches the calf muscles to the heel also gets a healthy workout as the foot moves through its circular motion. When done with good form, cycling not only strengthens our tissues, but can also lengthen them. Gokhale Method students who have learned to propel themselves in walking will already have a good deal of relevant muscle memory and power in their legs and feet and will likely be pleasantly surprised when returning to cycling.
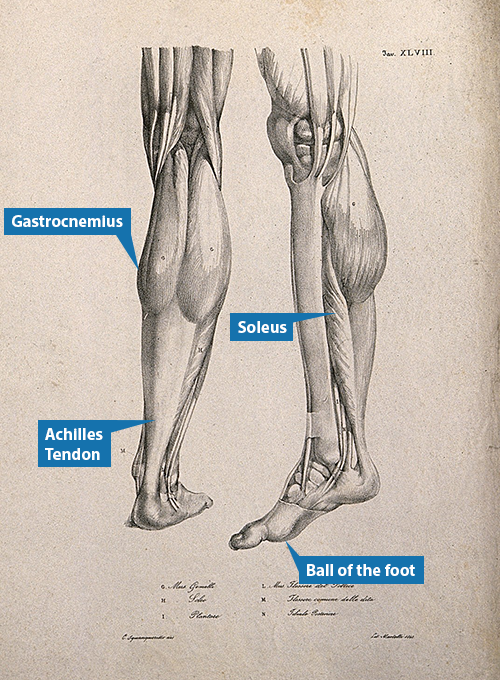
A good pedaling action bestows both efficiency and healthy exercise
for the foot, ankle, and lower leg. Wikimedia
Tip 3. Use your feet
You don’t want to be sending your weight, as well as transferring the force of your pedal stroke, onto just the delicate toe bones. Instead, placing the more robust ball of your foot on the pedal will elicit the most power transfer.
At the bottom of the pedal stroke (the 6 o’clock position) you want to pull the pedal back with your feet. The “pulling up” phase of the pedaling action is most effective when you are clipped into the pedals with cycling shoes, or toe straps, but you can still imagine you are “grabbing” up with your plantar foot muscles inside a regular shoe. Gokhale Method students will already have learned to use their feet strongly when walking by grabbing and then pushing the ground away and behind them, which translates well into cycling. You can learn this grabbing action from our Gokhale Moment Inchworm video here.
The feet are actively engaged. They grab and help push the pedal down, and at the downward-most position, they
start to pull back and then up.
When you are feeling more confident in your cycling and want the extra power that comes from being “attached” to your bicycle, cycling shoes and clipless pedals are a terrific investment that can really up your game. The more you use your feet and ankles the stronger they will become, serving you better in cycling, walking, running, dancing, and more. . .
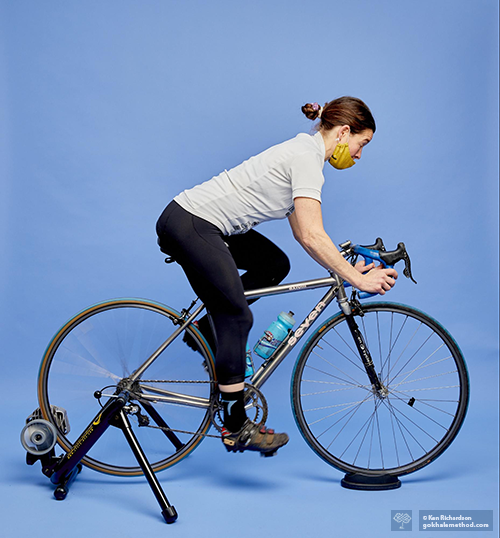
Have your knees not too bent but not fully extended either. You want a small bend just like an athletic “ready position.” Slight external rotation of the legs and feet allows the knees to track well.
Tip 4. Keep your knees happy
Cycling should actually be good exercise for the knees as it uses the quadricep muscles on the front of the thigh that help stabilize the knee. However, a common threat to the knees is riding with the seat too low, (see Tip 1), which stresses the knee joint and causes inefficient pedaling form and fatigue.
Your feet also want to be pointing outward just a little. Not quite as much as in healthy standing, which is 10°–15°, but enough to afford a degree of external rotation for your legs. Your knees will be happy tracking at this angle, the same as your feet. This helps avoid pronation in the feet and ankles, and pressure on the inside of your knees.
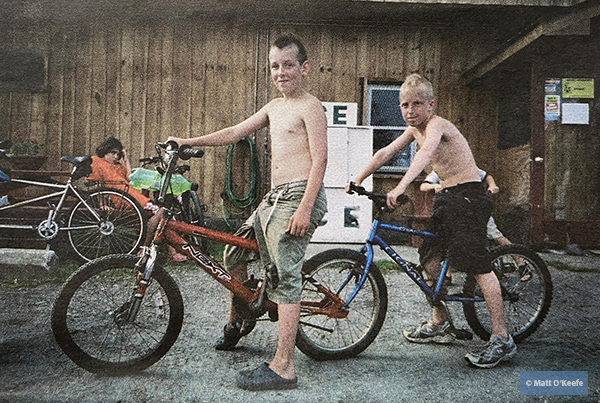
These two look set for fun on their customized bike! The boy on the left sits well, while his friend could do with untucking his pelvis. You want your behind behind you and your back straight.
Tip 5. Antevert your pelvis
A common threat to happy knees is riding with a tucked pelvis. Tucking the pelvis pushes the thighs into a more forward position than they would be in if the pelvis were anteverted. As a result, the far end of the thigh bones, where they form the upper half of the knee joints, are also more forward. These “overshot” knees then have a poor alignment for distributing downward force through the joint and into the lower legs and feet and are much more likely to suffer painful wear and tear.
An anteverted pelvis serves both seated and standing pedaling positions well.
Good posture is a bit like a jigsaw puzzle—get a prize piece like the pelvis in the right position and many things fall into place. An anteverted rather than a tucked pelvis is often the missing piece for beneficial cycling posture. Having already set up some external rotation of your thigh bones, you will have created the space needed for your pelvis to tip and settle forward into anteversion. This puts your behind behind you, and from here, whether sitting or standing, your buttocks are in a position of mechanical advantage to drive your ride. Happy pedaling!
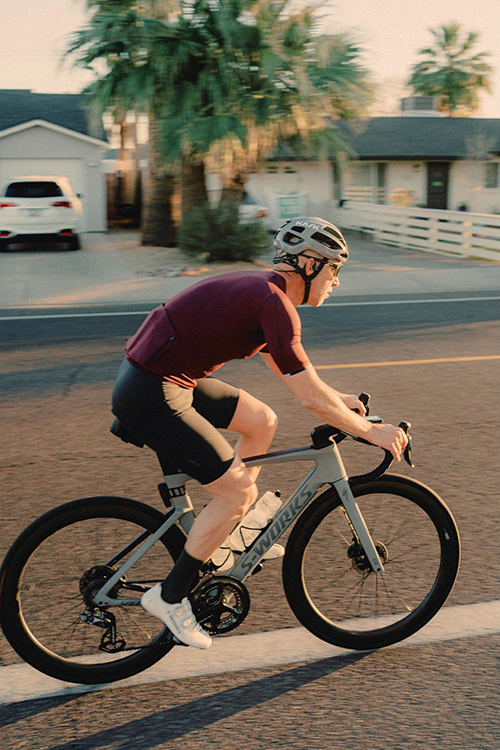
Riding with a tucked pelvis disadvantages the glutes and encourages a C-shaped spine.
It is very common in both amateur and professional cyclists. Unsplash
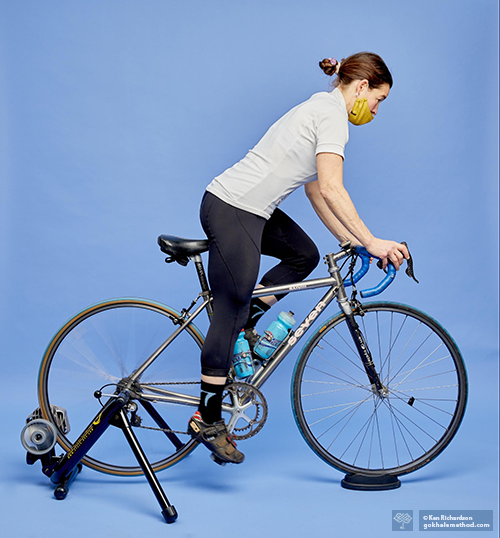
An anteverted pelvis brings your behind out behind you, giving more power to your pedaling, whether you are sitting or standing, and enabling a straight axis for your spine.
If you are concerned about storing your bike securely with easy access, we recommend this article, which gives helpful advice on finding the best option to store your bike safely in a bike shed or a garden shed. Click here.
If back pain or other musculoskeletal problems have been holding you back from cycling, or you would like to improve your fitness and posture when cycling, consider joining our Gokhale Exercise program. It will inspire and teach you how to apply Gokhale Method principles while on your bike, and in everything you do. Sign up for your 7-day free trial here.
If you are interested in learning the Gokhale Method principles referred to in this blog, in depth and customized to your needs, we recommend our Elements course (one-on-one coaching online), our Foundations Course (one-on-one or small groups in-person), or Pop-up Course (not available during COVID).
Getting on a bike is a fabulous way to bring healthy activity, energy, and better posture into your life. We hope you feel inspired and empowered to do just that!
Please share your posture and cycling experiences here:

Comments
Hi, love the cycling blogs,
Hi, love the cycling blogs, thank you. I am a keen 'occasional' cyclist. After my last big cycle trial trip (and undoubtedly a combination of things) I have had IT band pain for several months, pain definitely reducing but doesn't seem to be a quick fix. Any tips about keeping a healthy IT band, especially in relation to cycling. Thanks Wendy Holland
Hi Wendy,A great question!
Hi Wendy,
A great question! IT Band pain can occur for a variety of reasons. Let's explore some of this. Firstly, your body mechanics: is your leg tracking well; does your knee point outward just a bit..as well as, and in alignment with your feet? Are you using your feet well enough? And when you stop or coast, do not make the common mistake of letting your leg turn in. While it may feel like a restful position for the hard-working leg, it is not healhty in the long run, as it puts strain on the knee and hip joint (the two places where the IT Band connects) and reinforces poor body mechanics. In fact, I like to stand over my bike when I've come to a complete stop; disperse my weight equally and take the opportunity for a "reset"--roll the shoulders back, draw back and lengthen the neck, and externally rotate the legs, so that your pelvis can antevert. Again, also taking a moment to reinforce proper body mechanics, and undoing some of that internal rotation and compression that happens while pedalling. I am guessing too, that your glutes might need some strengthening. There are specific exercises for strengthening the glutes--bridges, squats, clamshells, but one of the best exercises is plain old walking! When you walk well, you are using your glutes with every step (as well as stretching out the psoas, which tends to be tight in a lot of people); it is well worth exploring this. And for even more high-quality guided instruction, which focuses on proper form, attending the fitness program will offer even greater reward and benefits 7-day free trial here. Lastly, do make sure your bike is fitting you well. Sometimes the adjustments you need to make are nuanced and you might need a professional bike fit--any bike shop should be able to help you with this!
I hope this helps!
Tiffany
Tiffany, thanks for the great
Tiffany, thanks for the great article. I agree the anteverted pelvis is best. However, on a road bike (and even as shown in your picture) its difficult to antevert the pelvis unless you are off the seat. Almost everyone I see on a road bike is like the guy with the flexed C shape spine as in your picture. So any suggestions on antevreting the pelvis when riding on the seat? Its almost like the handlebars have to be rotated more than 90 degrees backward to avoid having to flex the spine so far forward.
HI David!A great question!
HI David!
A great question! And you're right, anteverting is key. Tipping your pelvis forward is the healthiest position for your pelvis, and therefore the rest of you, during all activities--walking, standing, sitting, even lying down! And cycling is quite dynamic; you are sitting & hip-hinging, standing & hip-hinging, moving back and forth from sitting to standing, and meanwhile you're powering a bicycle with your lower limbs!
So, yes, anteverting the pelvis can be challenging while pedalling and seated on the saddle, especially a racing-style bike (like the one I am riding with a trainer). It's not a matter of rotating the handlebars to bring them closer to you--that compromises your fit on the bike. Nor is the solution angling the seat down, as this tends to send too much weight onto the hands.
The solution is practice. The more your pelvis learns to antevert in other daily activities, the easier it will be to sit on a bicycle and pedal with an anteverted pelvis. Some tips are to "settle" your pelvis when you first get on. Can you feel that your pelvis is tipped forward, that your bum is behind you, not tucked under you? Try to maintain this placement. Anticipate that as the ride continues/gets harder, your position may have shifted--again, it's OK to move around and try to reset your pelvis. Getting up out of the saddle is a great opportunity to reset; shift your weight, use different muscles, and then keep that bum behind you when you sit back down.
The curved/racing-style handlebars are great for offering different resting points for your hands. Even in the "drops" you can hip-hinge with an anteverted pelvis--it's a muscle thing, and everyone can learn to do it. Now, your spine wont necessarily be as J-shaped in this extreme layout, but your pelvis can still be tilted forward.
I hope this helps!
Tiffany
Brilliant advice and comment
Brilliant advice and comment thank you so much Tiffany. I will be doing the Foundation Course with Rachel in June in Wellington, NZ, am so excited for this opportunity. I have wanted to do this for years but up until recently was not available in NZ. I have Esthers book 8 Steps to a Pain free Back but certainly have not mastered glide walking and I love to walk so like you say hopefully with correct walking my glutes overall posture etc will greatly improve. Have a daily fitness programme but will definitely look at the 7 day free trial.
Thanks again, really appreciate the time you have taken, has definitely helped, Wendy
Add New Comment
Login to add commment
Login