J-Spine

The Gokhale Method is Nonnegotiable

The Gokhale Method is Nonnegotiable

Loren Edelson
Date

At the beginning of the pandemic, my tween daughter was the dancer in my house. When her in-person hip-hop class was canceled, she quickly turned online for inspiration, showering me with her 30-second Tik Toks.

I was amused, but resolute that dancing online was not for me. I had my own exercise regime, at the heart of which were a series of Pilates-based exercises that I had incorporated in the hopes of healing a nagging injury. 

But now, 16 months into the pandemic, I’m dancing online too, maybe even more than my 12-year-old. This is thanks to Esther Gokhale and her unbelievably fabulous community who, like me, wanted to find a safe, therapeutic, and fun way of exercising after injuring our backs.

I first heard Esther years ago on a podcast and subsequently checked her book 8 Steps to a Pain-Free Back out of the library. I remember being especially interested in the pictures of women holding their babies so comfortably; I had recently given birth, and I tried my best to imitate the women pictured. 


Me with Baby Yael in 2013. I now see I had a very pronounced S-shape curve. 

From reviewing pictures of myself during that time, I see now that I did a poor imitation, but at the time I didn’t have any pain, so I returned the book to the library. 

However, last November while experiencing non-stop back pain, I purchased the book, which led me to Esther’s website and one-on-one coaching. Six weeks later, after completing the Elements course, this is what I wrote to friends and family in my 2021 New Year’s letter:

I’ve been relearning how to walk, stand, and sleep over the past six weeks. This is what one does when she becomes so desperate for relief from unrelenting sciatica, the kind that starts in the buttock and runs down to the calf. It all began with a yoga injury in May 2019, but the pain became unbearable after our move (hello, stress and grief, and, yes, more disc degeneration.)

An MRI from December 2020 had pinpointed “severe facet arthritis bilaterally” at L4-5, and mild to moderate facet damage elsewhere. I had tried everything from PT to Pilates, from massage to medical marijuana, but what seems to have made the biggest difference is the Gokhale Method, which attempts to reteach the body how to do the work of everyday life without further degrading our discs.

I was skeptical about how much I could actually learn online from a Gokhale coach, given that postural work benefits from hands-on adjustments and corrections. But with COVID-19 raging, this is not the time for in-person classes. Happily for me, my coach was terrific, and after completing the 18 introductory classes, I’m feeling so much better. It’s definitely not a magic bullet, but it’s the best thing I’ve tried so far, and I want to believe that if I keep it up, I’ll eventually be pain free. Here’s hoping I can report that next year.

Seven months later, I am thrilled to say that I am indeed pain-free and living a full life that enables me to care for my family, return to writing, and relaunch my health coaching practice that I had put on hold due to the pandemic and pain.

My recovery has been so complete that in May I undertook training to become a certified canoe instructor and am now teaching at the American Canoe Association’s Camp Sebago in New York. 


Now free from back pain and sciatica I am once again able to canoe.

Even though I feel great, I know that wellness takes regular work, and I’m grateful for the ongoing Gokhale Exercise program. Gokhale Fitness teacher Eric Fernandez has gotten me to enjoy strength training; teachers Kathleen O’Donohue and Roberta Cooks are responsible for me incorporating Moving Meditation into my morning routine, while Esther’s daily 1-2-3 Move program has rekindled my love of dance and taught me steps from traditions that include bharata natyam, samba, capoeira, 50s rock, and reggae. Joan Baez’s music is a fave—she is a student of Esther’s and will often be dancing on the screen with the rest of us. 


Head-loading is a fun way to practice many important posture principles, shown here on the 1-2-3 Move program. 

Esther will also occasionally focus on yoga asanas and offer modifications that have enabled me to safely return to a yoga practice. If you see me balancing boxes (or my canoe) on my head, it’s thanks to all the practice I’ve now had with the Gokhale™ Head Cushion, gently “head-loading” my way to a taller, healthier neck. Thanks to the Gokhale Pain-Free™ Chair and Gokhale Stretchsit® Cushion, I’m also able to sit well at my desk and to drive long distances without pain, something that was impossible seven months ago.

1-2-3 Move often features artefacts such as Greek statues, Indian deities, or photographs of people from different cultures going about their work. Esther points out that examples of healthy posture by Americans are more readily found some generations back, in works such as those by Grant Wood or Winslow Homer.  


A Basket of Clams, 1873, Winslow Homer

My favorite class was the one devoted to the Hindu deity Ganesh, who takes the form of an elephant with a pot belly. While dancing to the “Ballad of Ganesha” by Lil Darkie, we took a cue from Ganesh, who holds himself beautifully, despite his roly-poly largesse. Esther talked about how strong abs are something that everyone, no matter what size, can cultivate. If Ganesh can carry himself well, the rest of us can do so as well. She made a similar point using images of Japanese sumo wrestlers. I deeply appreciate that Esther, raised in India by her Dutch mother and Indian father, takes a global perspective on healing. 


Dancing Ganesh, India, 900–1000 AD, sandstone - Fitchburg Art Museum

As a Functional Nutrition and Lifestyle Practitioner, I’ve come to view the Gokhale Method as nonnegotiable, or what Andrea Nakayama, CEO of the Functional Nutrition Alliance, calls “Tier 1”—the basics that must be in place before supplementation (Tier 2) or any kind of medical intervention (Tier 3). 

Tier 1 includes community support, something that is available in any Gokhale Method group class. These social and emotional components of healing, and the importance of surrounding yourself with healthy posture cues from people, artwork, and music, are frequently discussed during the Q&A on the 1-2-3 Move program. 


In this 1-2-3 Move video, Esther shows how traditional artefacts such as shadow puppets from Java, Indonesia, inspire us to free our arms and open the chest.

The Gokhale Method is not against appropriate medication or procedures. Back in February when I was still having some pain upon waking every morning, I asked Esther what she thought of “injections” as a way to mitigate this. To my surprise she said that she sometimes suggests that her students consider this “Tier 3” approach, but only after they have tried “Tier 1” first. Medical interventions such as injections and painkillers can create a window of pain-relief that enables students to learn to improve their posture and address the root cause of their problem. 

I had already had an injection into my SI joint the previous September, which didn’t give me any relief. So I booked a one-on-one appointment with Esther, who pinpointed an excessive curve in my lumbar area. The transformation I brought about in my spine led to me being used as an example of progress in a blog post about spine shape. 


My “before” (above) and “after” (below) Elements photos show a considerable change from an S-spine towards a J-spine. You can read more about spine shape here.

With ongoing attention to creating more of a J-spine and less of an S-spine I no longer have pain. Perhaps even more importantly, I have greater trust that my body, with the right support, can heal.

Loren Edelson is a Functional Nutrition and Lifestyle Practitioner who writes Given the Givens, a bimonthly newsletter on reaching our full potential, even after receiving a life-changing diagnosis. To subscribe, visit https://loren6c2.substack.com/welcome

Which Shape is Your Spine?

Which Shape is Your Spine?

Esther Gokhale
Date

SCIJ isn’t a very memorable acronym, but the shapes of the letters do accurately represent the four most common spinal shapes. In this blog post you will discover which SCIJ category you belong in, what changes you might want to make, and the first baby steps to improve your spinal shape.


The letter “S” is widely used to describe the conventional paradigm for an ideal shape of the spine. The Gokhale Method perspective is that we need a paradigm shift.


Loren had developed a pronounced S-shaped spine before she took the Gokhale Elements online course. Tightened lower back muscles formed a pronounced lumbar curve, and her upper back had to round over to return her to upright. 

S. This is the spinal shape considered to be normal (as well as ideal) in today’s conventional wisdom. You will find the S template for spinal shape in lay circles, alternative health circles, as well as medical circles. Massage therapists, yoga teachers, physical therapists, and medics, are all taught the S-shape paradigm, which may include arguments about the strength of arches and “opposing curves'' and their ability to absorb vertical load like a spring.

The S-spine consists of a significant concave curve in the lower back meeting a significant convex curve in the upper back. From the Gokhale Method perspective, both curves are exaggerated and can lead to pain and dysfunction. This posture loads the spinal joints and takes a lot of muscular tension to maintain. It is the reason, we posit, that maintaining “good posture” has a reputation for being hard work. If this shape fits your spinal contour, it is unlikely to have been called out by either conventional or alternative practitioners. After all, it is the described ideal. If you have faced the frustration of having your back “go out” soon after an intervention, or your symptoms return again and again, a possible reason is that your S-shaped spine has never been recognized as the root of your problem, let alone be treated. 


This medical illustration (1990) displays the excessive curvature that can result in pinched nerves and compressed intervertebral discs. 

As both the vertebrae and the intervertebral discs have virtually parallel upper and lower surfaces, like a cylinder, the exaggerated curves of the S-spine create pinch points that can impinge on nerves, and cause wear and tear on the discs and degenerative change in the bones. Any of the tissues of the back, shoulder area, and neck might well “complain” about being obliged to maintain these contours.

An ideal first step to improving the shape of your S-spine would be stretchsitting. You can begin to learn stretchsitting here.


The letter “C” describes the most common modern posture of all—slumped.


The C-shaped spine will curve more at the top if we hunch more…


or curve more at the bottom if we tuck more…


either way, a C-shaped spine is bad news for our discs.

The C-spine is the product of slumped posture, with the tail tucked between the legs, shoulders rounded, and head forward. This compresses the front of the spinal discs, squeezing the interior contents (the nucleus pulposus) backward. This is the most dangerous direction to load the spinal discs since the nerve roots exit the spine right behind the discs. Slumping with a C-spine also overstretches and weakens the ligaments around the spine, undermining their ability to maintain the integrity of our all-important spinal column. Many people alternate between forcing an S-shape in their spine in the name of “good posture” (wrong!) and collapsing into a C-shape when they are fatigued from their efforts. Both these shapes in fact cause damage—in different ways—and need to be replaced with a J-shape (keep reading!). 

An ideal first step to improving the shape of your C-spine would be learning to use your inner corset, the deep muscles of the abdomen and back which support and protect the spine. This is explained in detail in my book, 8 Steps to a Pain-Free Back.

Free Chapter of 8 Steps to a Pain-Free Back

As a special gift to newsletter subscribers who have confirmed their subscription, we would like to send you the Inner Corset chapter from Esther's book, 8 Steps to a Pain-Free Back.

Please enter your email address in the field below and you will be sent an email with your Inner Corset chapter. You may receive a confirmation email to sign up to the Positive Stance newsletter first.

Free Chapter of 8 Steps to a Pain-Free Back


The I-spine shape results from a “sinking into oneself” without a significant increase in spinal curvature. 
Older people may develop an I-spine as they lose height due to spinal degeneration. Unsplash

The I-spine is common in older folk living in modern industrialized societies. There are no particularly pronounced contours in the spine, but rather a general “melting into itself” with the disappearance of 1 or more inches in height accompanying the aging process. The shrinkage is often the result of degeneration in the discs or mini-fractures in the vertebrae. Some diagnoses that might accompany this spinal shape include osteoporosis and stenosis. The pelvis is tucked, there is no angle between the buttocks and the back, and the buttocks are underdeveloped. Though the I-shape is most common in older people, it can begin at a young age with tucking the pelvis.


This photo of Taylor Swift shows how a tucked pelvis flattens the lumbosacral angle, and disadvantages the gluteal muscles, combining to produce a flat “behind." 

An ideal first step to improving your I-spine would be to learn stretchlying on your back.

The letter J represents the healthiest spinal shape. 


The shape of this Ubong tribesman’s back is best described as a J-spine.

Though rarely preserved in adults in modern industrialized societies, the J-spine is the shape we all enjoyed as toddlers and is still prevalent in many nonindustrialized areas of the world. This “J” is a modern, stylized “J,” reflecting the relatively straight alignment of the vertebral column and the pronounced angle at the lumbosacral junction. There is no exaggerated lumbar sway or thoracic curvature. You can see this shape embodied in the Ubong hunter’s torso. 


This medical illustration from 1911 more closely depicts the J-shape spine rather than the S-shape of modern conventional wisdom. The only pronounced curve is at the L5/S1 junction at the base of the spinal column.


Since taking the Gokhale Elements online course, Loren has made good progress in losing unwanted curvature in her back. Her upper lumbar spine has straightened out considerably. Over time, given her dedication, we expect to see her most pronounced curve move lower as she continues to cultivate her J-spine. 

If you are interested in restoring your J-spine, we recommend taking our Elements course (one-on-one coaching online), or our Foundations Course (one-on-one or small groups in-person) or Pop-up Course (not available during COVID). These courses teach you to systematically lengthen, strengthen, and remodel your spine to a healthier J-shape in a safe and effective way. 

To gradually and safely improve their spinal shape students learn well-honed techniques using their fingertips to monitor their spinal groove, kinesthetic and visual cues, customized exercises, and visualizations. Because it is still challenging to rely heavily on your proprioceptive sense, we have also developed the PostureTracker™, a tool that tells students exactly where they are positioned using Bluetooth sensor technology. PostureTracker tracks the shape of your spine in real time—it gives immediate and intuitive feedback, is easy to use, and reveals information about your spine that a plain mirror cannot show you. Though PostureTracker is not yet available for sale, it is available as a loner (while supplies last) to students who sign up for the online one-on-one Gokhale Elements course.


If you sway in your lumbar area, PostureTracker will show what is going on with your spine.

To get an idea of the current shape of your spine, view yourself side-on. You can use a mirror, but it is best to photograph or video yourself, or use several mirrors, so that you can observe your shape without turning your head. Take a while to study yourself both sitting and standing. Notice that your spine changes if you alternate between swaying and slumping. You may discover that your habitual posture combines elements from two or more of the categories we have described—for example, you may most closely resemble the I-spine, except that your head and neck jut forward.


The curves in our spines precisely reflect our everyday posture habits.

If you would like a trained eye to help you understand your spinal shape and how to improve it we recommend an online Initial Consultation with a Gokhale Method teacher. In-person Initial Consultations may also be available depending on the COVID status of your area.

Cultivating a J-Spine with Chair Pose (Utkatasana)

Cultivating a J-Spine with Chair Pose (Utkatasana)

Cecily Frederick
Date

As a student and teacher of yoga and practitioner of the Gokhale Method, I choose yoga poses that make good use of my time. “Chair pose” is well worth the time investment. In fact, it has become one of my favorite strength-building postures. It is useful for cultivating a J-shaped spine. It helps increase gluteal tone. It helps to pattern healthy hip movement. It is strengthening for the legs and spinal stabilizers. And, last but not least, it allows a yoga practitioner to smoothly transition between a standing forward fold and mountain pose — without compression of the intervertebral discs.


Cecily Frederick in chair pose with J-spine visible, overlaid with SpineTracker™ snapshot.

   
Detail of Cecily Frederick’s spinal shape in chair pose, overlaid with SpineTracker snapshot.


SpineTracker snapshot of Cecily Frederick’s spinal shape in chair pose.

Chair pose is also Esther Gokhale's favorite way to cultivate strength in all the muscles needed to tallstand well. She recommends it to students who tend to park in their joints (locking the knees and groin, flattening the feet, arching the back and introducing extra curves throughout the spine). After practicing chair pose, the small amount of muscular effort it takes to stand well becomes easy to access.

To practice chair pose, stand with your feet about hip-width apart and kidney bean shape your feet. Reach your arms forward and up as you simultaneously bend your knees, hips and ankles as if you were sitting down and back into a chair. Hold for a few seconds and then press down through your feet (and especially through your heels) to come back to standing while lowering your arms.  

A couple of practice sequences you could consider: 

  • Transition from tallstanding (“mountain pose” or Tadasana) to chair pose and back to tallstanding 4-6 times.

  • Transition from tallstanding to chair pose to an upward forward fold (Urdhva Uttanasana) to chair pose (Utkatasana) to tallstanding 4-6 times.


Cecily Frederick in upward forward fold (Urdhva Uttanasana or hip-hinge).

Five refinement tips

1. Strengthen your butt / spare your knees
To help develop gluteal strength and avoid knee strain, don’t let your knees come forward over your toes as your knees bend. Think about pulling your butt back behind you. Consider using a stool that you position in front of your shins while standing, and don’t let yourself push it forward as you move into chair pose.


Cecily Frederick using a stool to cue chair pose, with help from a friend.

2. Save your discs
To help avoid swaying the back and compressing upper lumbar discs, don’t reach your arms up vertically. Instead let them reach forward. 

3. Settle your pelvis
To help the pelvis to settle well, you might not want the feet and knees too close together. Experiment with different widths between your feet. Remember what you learned in the Foundations Course or Pop-up Course about hip-hinging.

4. Less is more
Don’t force yourself into a deep knee, hip, or ankle bend. Allow your chair pose to begin where it begins. Less is often more in a yoga practice. 

5. Break it down
If you have an injured shoulder you can lower your arms, bring them to your hips or press the palms together in prayer position in front of the sternum.

My Gokhale Method Experience

My Gokhale Method Experience

Aurelia Vaicekauskas, Gokhale Method Teacher
Date

I have been practicing massage therapy and bodywork for over 19 years. I believe in the value of massage and love my work. But over the years I noticed many clients kept returning with the same, or related complaints/injuries, over and over again. And this happened even though they diligently performed PT exercises, stretched, practiced yoga etc. I felt there was something missing, something that could help clients retain the benefits of therapeutic work and maintain their good health. For me that answer came when I learned about the Gokhale Method®, a postural re-education method created by Esther Gokhale, author of the bestseller 8 Steps to a Pain Free Back.

My introduction to the Gokhale Method came through my massage client Susan, a former competitive figure skater and modern dancer who had experience with several forms of bodywork. When she excitedly told me about a wonderful article she had just read in the New York Times about the Gokhale Method, I listened. The whole concept of posture re-education as a means to become free of pain made sense, but with so many different approaches and techniques already out there, I just filed it away to look into later. My “later” came much sooner than I expected. In a few weeks Susan came back for her regular massage and shared with me that she was taking the Gokhale Method Foundations course and how helpful it was.  What I noticed right away in our session were the changes in Susan’s body. The most pronounced improvement was in her lower back. Her spine and pelvis were much more balanced and open, and her hamstrings were no longer tight and congested. I literally felt like I was working on a different person. And what was even more impressive, these improvements persisted over the weeks. That was enough to motivate me to sign up for the course to learn more.

My original intention was to simply experience the work to see if this was something I could recommend to my clients. I didn’t anticipate how deeply the work would affect me. First, what I learned in the course turned my “body worker’s world” upside down. It completely changed my understanding of healthy posture.  Instead of the popular S-spine, considered normal in our society, Esther teaches something very different. She teaches a shape and body architecture shared by our ancestors, some isolated populations today, and young children the world over. She calls this shape a J-spine. And populations with this type of spinal architecture do not experience as much back pain as modern populations do. The lesson is that if individuals get their body parts lined up correctly, they become resistant to injuries and general wear and tear. The Gokhale Method techniques are simple and performed with everyday activities such as standing, bending, sitting, lying down, and walking. The beauty of the method is that once you learn how to apply the knowledge, every task can become therapeutic, whether sitting in a chair, or cleaning house, or standing in a check out line.


Anatomy textbooks from 1911 (right) showed healthier spine shapes than more recent textbooks (left).


Another unexpected benefit of taking the course was the improvement of my overall health. I noticed that my tension headaches decreased considerably. All of a sudden, I found myself with extra time on my hands since I didn’t need to lie down to nurse headaches. I had more energy. Also, my functionally shorter leg evened out and I no longer needed to trim and hem my “long” pant leg.

Before I was introduced to the Gokhale Method, the concept of good posture was confusing. To sit and stand up straight with shoulders pulled back was tiring and very uncomfortable. Popular guidelines on how to attend to the lumbar and cervical curves, and how to walk did not help me. The Gokhale Method clarified posture for me. I learned that good posture is mainly relaxed, very comfortable, and available to everyone. Now if I feel a headache coming on, it’s a cue to check my head and neck position, and to lengthen the back of my neck.  If my pant leg starts to drag on the floor, I am reminded to work my glutes more in glidewalking…


Healthy posture (right), learned through the Gokhale Method, results in a presence that is more upright, more confident, and more open.


So yes, healthy posture is an ongoing project for me, but having the right tools has made it very empowering and rewarding. Practicing my posture helps me center myself — I feel grounded and find I move more gently and mindfully throughout the day.

Water Workout

Water Workout

Esther Gokhale
Date

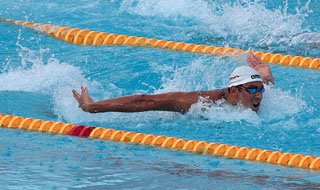
One of the many benefits of having excellent posture is the ability to enjoy an active lifestyle without injury. Conversely, an active lifestyle can help cultivate good posture. While you are still honing your posture, water is a perfect medium to train in since your buoyancy will reduce impact on your joints. In this forgiving medium, you can safely increase your muscle strength, stamina and flexibility while exploring the nuances of natural posture. You can reset movement patterns and connect the dots that make up the Gokhale Method while enjoying the soothing effect of the water on your body and mind.


The butterfly stroke provides an intense workout for the
"rib anchor" muscles.

No matter which stroke you choose, you will have occasion to summon up and strengthen your deep abdominal muscles. These muscles are especially important for the health and safety of your spine.

Breaststroke / Butterfly for Rib Anchor

The internal obliques keep the front of the ribcage flush with the contour of your torso. This “rib anchor” is our best defense against swaying the back. The breaststroke (and butterfly, if you are able) are perfect opportunities to strengthen your rib anchor. In these strokes, there is a strong tendency to arch or sway your back every time you come up for air. Next time you attempt the breaststroke or butterfly, try to come up with your entire upper body, just enough to breathe, without a sway. Your lumbosacral juncture will gain flexibility and your internal obliques will get a challenging workout.


The internal and external oblique abdominal muscles
get a substantial workout in backstroke.

Crawl and Backstroke for Obliques

Asymmetric motions are a great way to strengthen both the internal and external oblique abdominal muscles. When you twist or rotate your body to the right, the external oblique muscles on your left side work together with the internal oblique muscle on your left. The left external oblique muscle rotates your left side forward as the right internal oblique rotates your right side back. Conversely, when you twist to the left, the right external obliques and left internal obliques are engaged.


One way to engage the inner
corset muscles is reach
upwards vigorously as in this
victory gesture.

The arm and leg motions involved in both the crawl and backstroke have a tendency to twist or otherwise distort the torso. If you engage the external and internal obliques appropriately during each stroke, you will tone your obliques as they work to dampen this twisting effect. The result is that the entire body twists rather than just a piece of it.

Adding the Inner Corset

Even if you are conscientiously using your obliques for all three of these strokes, vigorous swimming will include some distortion. To really protect your spine, use your Inner Corset to keep your elongated J-Spine intact. This will have a dual action, protecting the spinal element during your workout, as well as strengthening your deeper back and ab muscles.


Walking in water is a gentle way to
augment your glidewalking technique.

Glidewalking in Water

Even if you don’t swim, water is a soothing and therapeutic medium for practicing Gokhale Method techniques. Glidewalking in water is easy on your joints and provides extra resistance for building strong gluteal muscles and lengthening and strengthening the muscles in your legs. Begin with tallstanding:

1. Kidney bean shape your feet; 
2. Put your weight on your heels; 
3. Antevert your pelvis and engage your rib anchor; 
4. Keep the back of your neck long and your chin down. As you begin to move, imagine yourself walking regally with a basket on your head, or using your legs as poles to punt a boat along a canal.

Enjoy the healing weight of the water. It slows you down, giving you time to become aware of nuances in your gait.

Join us in an upcoming Free Workshop (online or in person).  

Find a Foundations Course in your area to get the full training on the Gokhale Method!  

We also offer in person or online Initial Consultations with any of our qualified Gokhale Method teachers.


Subscribe to J-Spine