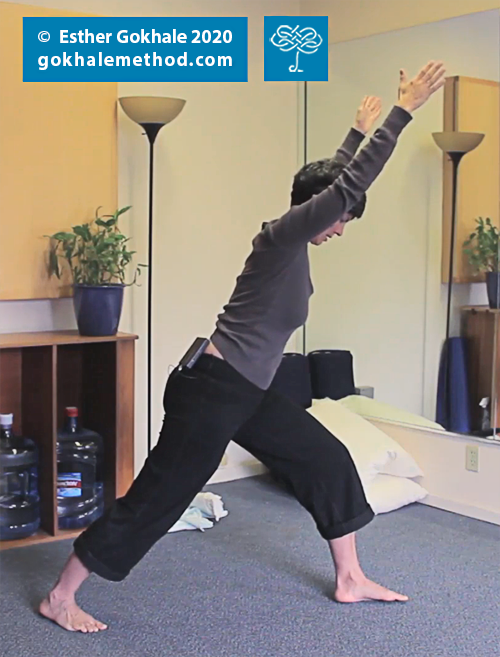
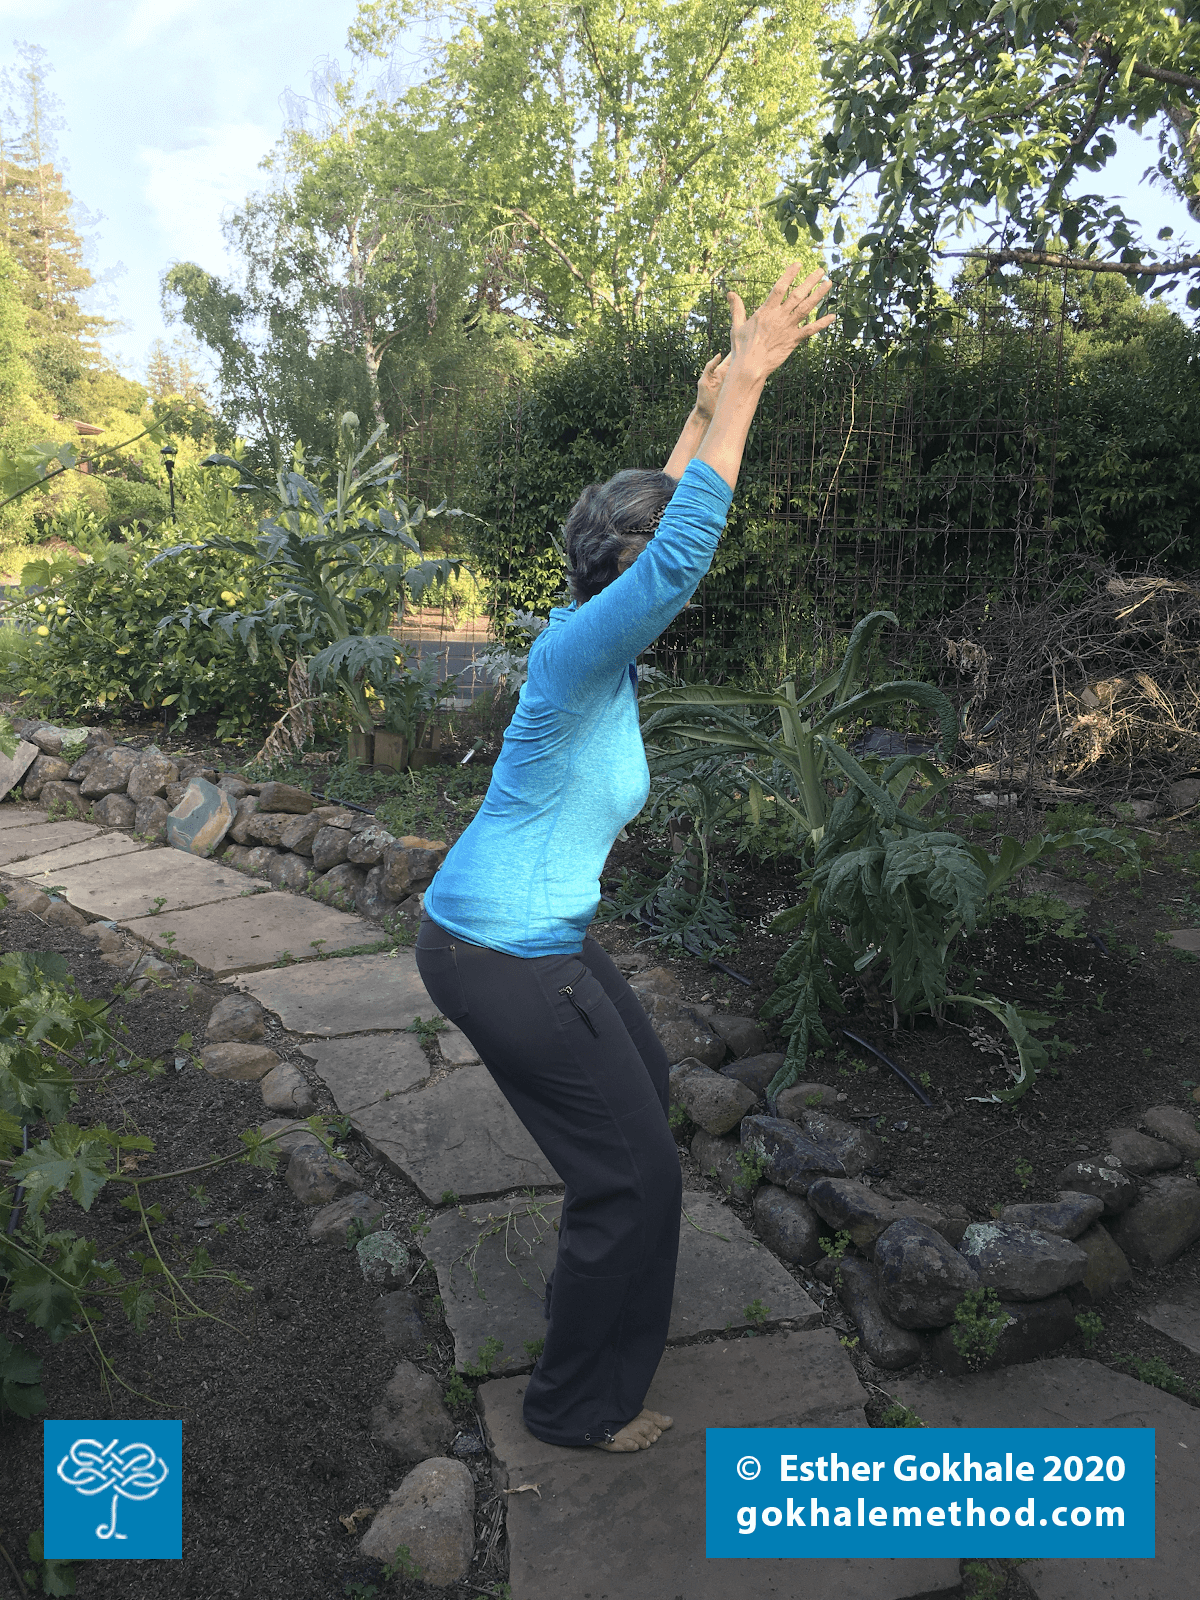
yoga

My Gratitude to My Teachers

My Gratitude to My Teachers

Esther Gokhale
Date

This Thanksgiving I would like to honor two people who profoundly influenced the development of the Gokhale Method®.

Photo of a kerosine lamp glowing against a darkened sky.
Thanksgiving is a time to acknowledge those who lit your way. Image: Unsplash

Noëlle Perez-Christiaens (1925–2019) was my most important influence on this path, and my gateway to inputs from the eminent yoga teacher B.K.S. Iyengar (1918–2014), the French anatomist André Dalmas (1910–1999), and their numerous discoveries. Noëlle was a beautician by background, who developed an avid interest in yoga. This passion took her to India and B.K.S. Iyengar, where she had the good fortune to be one of Iyengar’s early students at a time when he had as few as four pupils gathered together in his living room for lessons. Later, Noëlle also had access to Iyengar’s medical yoga clinic. 

Photo of Noëlle Perez studying with Iyengar in his home.
Noëlle studying with Iyengar in his home.

Noëlle was a witness to Iyengar’s process and absorbed numerous lessons from him that got passed down to her students. Many of these have found their way into the Gokhale Method:

   1. Copying the body mechanics of functional people 

With great insight, Iyengar told his students to “Walk behind the women in the Indian marketplace, and when your shadow looks like theirs you will have learned something.” The idea of mimicking the movement patterns of people in nonindustrial cultures fueled many of Noëlle’s discoveries and was a key part of my training. This kind of anthropological-visual mimicry makes its way into just about every class, article, and offering of the Gokhale Method. Based on our scientific understanding of the human visual cortex being very large and developed (this is reflected in the folk wisdom of “a picture is worth a 1,000 words”), our offerings rarely miss an opportunity to use photographs, video clips, or artwork to amplify the movement principles being taught. 

Photo of a woman walking in a marketplace, casting a shadow. Odisha, India.
A young woman walks through a marketplace, casting her distinctive shadow. Odisha, India.

2. Using props and innovating 

    Iyengar was the first yogi I know of to improvise using simple household props to better aid his students to achieve the shapes and poses he taught. He did this reluctantly because Indian culture values following tradition far more than improvisation (this has changed in recent years). But when his foreign students could not do what he wanted them to do, no matter how much he cajoled, exhorted, and ridiculed them (it’s a well-known joke that BKS stands for “bite, kick, shout”), he resorted to using blocks, ropes, towels, chairs, and whatnot to help the right things happen. In the West, we would regard his inventiveness as part of his genius, but he did these things almost apologetically. 

    Iyengar Yoga teacher Eyal Shifroni using props in Vasisthasana, side plank pose.
    Iyengar Yoga can use extensive props, as in this version of Vasisthasana, or side plank pose. (Senior Iyengar Yogi, Eyal Shifroni). Image: Wikimedia

    Noëlle was similarly inventive and improvisational. I remember being very impressed when, during a private session in Portugal where I was her translator, she gathered up some fallen blossoms and clumped them together to form makeshift metatarsal arch supports. Using props and tools to help students learn better/quicker/deeper plays a big role in the Gokhale Method. Thanks to modern tech, our learning aids include wearables ( SpineTracker™ and PostureTracker™), but we have also developed simpler props like rollers, cushions, wedges, and chairs.

    The Gokhale Method Head Cushion helps a student to find vertical alignment.
    Gokhale Method teacher Clare Chapman helps a student to find healthy vertical alignment with a tall neck by using the Gokhale® Head Cushion

    3. The need for traction in the spine 

    Iyengar’s studio ended up having ropes and swings all over the place. My father, who suffered from sciatic pain, and who was introduced to Iyengar’s studio by my mother, was invariably sent to hang upside down from one of the yoga swings at the start of his lessons. Iyengar also used edges, surfaces, ropes, or plain old hands and feet to get students’ spines to relinquish some of their unhealthy compression. Noëlle’s genius was to incorporate these techniques into everyday life activities, for example, sleeping. 

    In the Gokhale Method, almost every student’s journey begins with traction. The two low-hanging juicy fruit techniques of stretchsitting and stretchlying are perfect starting points on any student’s journey. To facilitate stretchsitting, I invented the Stretchsit® Cushion and the Gokhale® Pain-Free Chair. Stretchlying doesn’t require props other than household pillows. By beginning with these two techniques, students often get relief from compression-related pain as early as Day 1, are better prepared to learn other techniques, and avoid flare-ups along the way. 

    A student preparing to sit with the Gokhale Stretchsit Cushion.
    Gokhale Method teacher Sabina Blumauer guides a student preparing to stretchsit against a backrest with a Stretchsit® Cushion.

    Though Iyengar and Noëlle were both opposed to systematizing and formalizing any of their teachings, I have discovered that for beginner students with back pain, it’s critical to precede any reshaping of the spine with gentle, sustained traction; otherwise one risks herniating a disc, pinching a spinal nerve, or triggering back spasms. 

    4. Modern Westerners need support to sit

    An Indian in a traditional household eats all their meals sitting cross-legged unaided on the floor. It works if you grew up with it. It doesn’t work for people who grew up sitting at dining tables and using raised toilets. I’ve discussed the anatomic and developmental reasons for this elsewhere but Iyengar approached the problem empirically. When he saw his Western students struggling to sit upright, he came up with blocks on the floor and blanket-wedges on chairs. These simple solutions worked. 

    Geeta Iyengar sitting on a wedge of folded blankets.
    Geeta Iyengar, Iyengar’s eldest daughter, sitting on an improvised wedge of folded blankets. Image: thepracticeroom.in

    I tried to come up with a more elegant and universal solution for years. It was, ironically, easier to build a wedge into the chair I designed than to come up with a free-standing wedge. The chair was designed a decade ago; the wedge only came into being this year. 

    Female student sitting on a dining chair with the Gokhale Wedge
    The Gokhale® Wedge offers a portable and elegant way to enable relaxed, upright sitting.

    5. Using the breath to lengthen the torso

    Pranayama is a branch of yoga that teaches numerous breathing techniques to address a variety of physical and mental states. Iyengar considered it an advanced practice and beginners were not introduced to pranayama techniques until they were well-advanced in their hatha yoga (asana/yoga pose) practice.

    Video of Geeta Iyengar teaching pranayama
    Pranayama, as taught by Iyengar, and here by his eldest daughter, Geeta, is a complex and deep practice. Dr Geeta Iyengar - How to Sit in Pranayama


    Noelle brought the key technique of using the breath to lengthen the back into the basics of her Aplomb® teachings, using it both as a way of relaxing muscles and testing alignment. I have found this technique invaluable in myself and for teaching. 

    When the pelvis has healthy anteversion, the spine can stack well and be upright without tension. The relaxation of the erector spinae muscles allows the spine to lengthen with each breath. This breathing motion is highly therapeutic, improving circulation, mobility, and healing throughout the torso. 

    Many of our teachers have backgrounds in yoga and other traditions that include instruction in breathing. Our teacher community is in active discussion about how to bring additional insights about breathing into our offerings, using our signature filters of simplicity, science, history, and anthropology.

    6. Never give up on a student 

    Iyengar was dogged in helping students make changes. He and Noëlle were extremely skilled in making seemingly magical things happen for pupils. They both used a carrot and stick approach; I prefer only carrots, but carry a similar, deep-seated conviction that a whole lot is possible with the right approach, techniques, language, and inspiration.

    I'm immensely grateful for the teachings of Noëlle Perez and B.K.S. Iyengar at the beginning of my journey—they helped me leave my crippling back pain behind, and they inspired and shaped the Gokhale Method. There’s still a long journey ahead towards wider accessibility, more evidence-based research, and mainstream acceptance, but thanks to the head start provided by Noëlle’s and Iyengar’s contributions, I believe we are within reach of a solution for a problem that plagues far too many of us in the modern world. 

    Best next action steps for newcomers

    If you would like to know which posture changes will help you be pain-free and functional, schedule an Initial Consultation, online, or in person.

    You can sign up below to join one of our upcoming FREE Online Workshops. . .

    What Makes the Gokhale® Exercise Program Special

    What Makes the Gokhale® Exercise Program Special

    Clare Chapman
    Date

    Taking the daily classes has helped me perfect the practice and really get the nuances. I am now able to accomplish the rib anchor, which I was struggling with. Also, the daily motivation that I get from checking in and feeling the energy from the group—it has just been an amazing opportunity.
    Elizabeth Kubicki, Gokhale alumna

    Gokhale Method® teacher and editorial writer Clare Chapman explores the When and Why of Gokhale® Exercise with its creator, Esther Gokhale.

    Clare: Can you tell us how the Gokhale Exercise program got started?

    Esther: For a long time now, our teachers and I have been surprised at how much our alumni—graduates of our courses—can forget. This despite their being delighted by the courses and their results. Of course, it shouldn’t be surprising at all, given that humans have forgetting curves as surely as they have learning curves, and that our beginner courses cover a lot of material in a short time frame. 

    Forgetting Curve graph with kind permission from www.organisingstudents.com.au.
    The forgetting curve was developed by German psychologist Hermann Ebbinghaus and depicts the way learned information falls away over time. Research confirms that, on average, students forget 70 percent of what is taught within 24 hours of a training experience. 90 percent is forgotten within a week. Image: www.organisingstudents.com.au

    On January 1, 2020, I decided to try a new format—an online 21-day challenge. Each broadcast was short, reminding alumni of one basic principle of the Gokhale Method that would be familiar, if semi-forgotten. I chose it to be an exercise program to additionally fill the well-understood need for more movement in daily life.

    Esther answers a question from Gokhale alumna Elizabeth Kubicki about the posture principle of straightening the back leg in speed walking.

    Clare: And before long COVID hit, correct?

    Esther: Yes, along with shelter-in-place orders. It became clear people would be stuck in their homes without their usual access to sports and exercise facilities, or their usual interventions for their aches and pains. We had a tested offering whose value had suddenly increased dramatically—it felt important to continue the program, and also to open it up to a wider audience. It gathered a large number of daily participants and evolved to include a great variety of music and dance, art, anatomical education, community and mutual support. Many participants told us that this is what kept their bodies and spirits afloat through the dark period of the pandemic.

    Clare: How did Gokhale Exercise evolve its current format?

    Esther: Gokhale Exercise started with 1-2-3 Move, which uses dance as the vehicle for posture education and entertainment. It continues to this day without having missed a beat! The 13-minute class is our main program, focusing on 1 posture principle, 2 dance moves, and 3 images. It is preceded by a joyous, free-form, 15-minute Dance Party.

    Dance is a human universal, and besides providing a fun way to revisit posture principles, it improves cognition, staves off dementia and depression, brightens spirits and community feeling, and more. Traditional dance is especially true to our ethos of taking lessons from other cultures. Various members of our teacher team contribute: Sabina has deep knowledge of blues and swing styles, Eric loves Latin, and Lang is expert in Capoeira and Brazilian dance moves. My passion is Indian, Brazilian, and Congolese dance​​. . .

    Gokhale Exercise has now blossomed into multiple offerings, adding Gokhale Fitness, Moving Meditation, Fitness for Cyclists, and Yoga, with an increasing number of teachers offering their expertise throughout the day. 

    Photo compilation of 8 Gokhale Exercise teachers.
    Gokhale Exercise teachers enjoy sharing their movement expertise with a “Gokhale filter.” 
    Top left to bottom right: Roberta, Julie, Esther, Kathleen, Eric, Sabina, Tiffany, and Lang.

    Clare: Can you say more about how these different forms of exercise encourage healthy posture?

    Esther: Every 1-2-3 Move class uses traditional rather than modern dance moves. This comes with a level of reassurance about their suitability for the human body; we know these moves have been vetted by entire populations who didn’t have modern pain. 

    Gokhale® Yoga, Moving Meditation and Gokhale® Fitness also explore posture principles that are not emphasized or respected in the average class: anchored ribs, recruiting the inner corset, kidney-bean shaped feet, etc. Respecting the body’s natural blueprint enables us to increase fitness, strength, and flexibility without risking injury. 

    Across all the classes we follow a Posture Principle of the day—for example, Healthy Rotation of the Torso—so whichever class(es) students participate in, they get the range of healthy posture reminders they need at regular intervals. 

    Gokhale Exercise email image of Cornell baseball player.
    Each Gokhale Exercise email comes with a daily Posture Principle image to remind and inspire. This vintage baseball illustration shows healthy rotation of the torso while keeping good form throughout the body.

    Clare: Who attends the Gokhale Exercise program?

    Esther: Classes span a variety of pace and challenge, so for example, our Gokhale Moving Meditation classes are gentle enough for even the most physically challenged members of the community, while Gokhale Fitness pushes almost everybody’s boundaries (while giving easier modifications of the exercises offered). 

    Clare: Is the Gokhale Exercise program suitable for beginners?

    Esther: The ideal starting point for beginners is to take one of our comprehensive courses (the in-person Foundations course, or one-day Pop-up course, or our online Elements course). This is especially true for those suffering pain or dysfunction. In these courses, students can learn with optimal sequencing and detail, and get the one-on-one attention they need. For students who would like a free introduction to the Gokhale Method we recommend signing up for an in-person or online free workshop. For comprehensive personal advice, consider taking an in-person or online Initial Consultation to determine which course is best for you. 

    Many people start with the Gokhale Exercise program because it has a free trial week and costs very little thereafter—we are glad to be able to provide this service for people who cannot afford our courses or who are curious to see what our offerings are like. Having the program open to the public also means that alumni can invite their friends and family members along to try it without any obligations.

    If you have never taken a Gokhale Method course 7-day Free Trial  

    If you have taken a Foundations, Pop-Up or Elements course Free Month Online University

    If you have never taken a Gokhale Method course 7-day Free Trial  

    Clare: What is next for the Gokhale Exercise Program?

    Esther: We want all our students to have a minimum of one month’s live support, available every day, as they approach the end of their courses. So we are delighted to announce that all our valued alumni—from the in-person Foundations, Pop-up, or online Elements courses—will be gifted a free month’s membership of our Online University, which includes the Gokhale Exercise program!

    If you have taken a Foundations, Pop-Up or Elements course Free Month Online University

    Online University member Claire Phillips explains how membership has inspired her progress.

    In addition to Gokhale Exercise, our Online University additionally offers two 45-minute Live Chats every month with me, Esther Gokhale. Topics include flexibility, the human spine, posture and emotional health, to squat or not to squat, and more. There is also unlimited access to our On-Demand Video Library of over 60 topics including advanced posture techniques and practical applications like gardening, cooking, etc.

    Clare: Thanks Esther, Gokhale Exercise is an inspiring and continuing journey!

    FREE 10-Day Back to Basics Challenge

    Alumni often tell us they get a lot of benefit from reviewing the basics—so we are also offering an exciting Back to Basics Challenge, designed for alumni, but also open to beginners, as part of our 1-2-3 Move program and starting September 26 for 10 days.

    Here is the Challenge:

    Each class will review a different Posture Principle, with exercises for practice and challenge. We have prepared a downloadable booklet for participants to print and journal their postural changes and progress. 

    How to take part:

    Online University and Gokhale Exercise members automatically qualify for this challenge—their daily emails will tell them about it. 

    People who have not yet taken a Gokhale Method course and who are therefore not alumni are also welcome to join, and listen in to the Q&A sessions by signing up to our Gokhale Exercise program with a monthly subscription—with our free trial you can test it without any obligations.

    For newcomers 7-day Free Trial

    For alumni (you have taken a Foundations, Pop-Up or Elements course): Free Month Online University

    For newcomers 7-day Free Trial

    For alumni (you have taken a Foundations, Pop-Up or Elements course): Free Month Online University

    We look forward to seeing both new and familiar faces! 

    Gokhale Method alumnus Ben Bernstein PhD appreciates daily reminders of what to work on.

    Posture Tips for Meditators

    Posture Tips for Meditators

    Esther Gokhale
    Date

    It has been over 60 years since Eastern schools of meditation became widely known in the U.S. and Europe, and meditation became widely practiced, with over 14% of Americans having meditated at least once. If we include those practicing mindfulness techniques, using meditation apps, and attending yoga classes with a meditation component, this figure goes far higher.

    The effects of sitting in meditation

    The potential benefits of meditation are well known, and include a calmer, clearer mind, lower levels of stress, better sleep, improved relationships with others, and better mental health. 

    From a posture perspective, whether you sit in meditation regularly or are just getting started, you want the experience to be as healthy for your body as it is for your mind. 

    Tradition and seated meditation

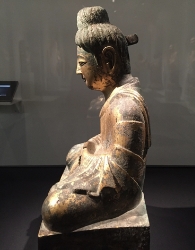
    North Indian Buddha figure with healthy form, 7th–8th century C.E..
    This North Indian Buddha figure shows healthy form. He has a well-stacked spine, open shoulders, and an elongated neck. (Post Gupta period, 7th8th century C.E..)

    Westerners often try to be “authentic” in their meditation by sitting cross-legged on the floor, as is portrayed in most traditions. This is particularly difficult for people who have not grown up regularly sitting this way. It may be that practitioners manage to cross their legs, but then their pelvis is not able to tip forward. Their hip joints will not have developed in childhood and ossified in their teens for unaided cross-legged sitting to be a truly comfortable and biomechanically available option. 

    Common problems in upright seated meditation

    With the pelvis tucked, meditators have two options, both of them unhealthy:

    1. Sitting on their tail bones in a relaxed but slumped position, which will put their spines into a C-shape that overstretches the ligaments of the SI joints and spine, and compresses the spinal discs and nerves. Such collapsed posture restricts the lungs, stomach, and other organs. It also deconditions the deep inner corset muscles that are there to regulate spinal alignment “in the background” during healthy sitting. 
    2. Sitting tucked but holding themselves upright by tensing the back muscles. Many meditators and yoga practitioners are so familiar with this effortful solution to being upright that they don’t realize that they are doing it, or recognize it as poor posture. 

    It takes freedom in the hip socket to allow the pelvis a good range of motion, rotating forward (anteverting) around the head of the femurs—then the spine can articulate at L5-S1 to stack upright and the back muscles can relax. You can read more about healthy pelvic anteversion here

    Man and woman on beach meditating. Crossed legged and slumped.
    The man’s notably tucked pelvis is sending his spine into a C-shape. Their upper backs are rounded, compressing the base of the neck and lifting the chin to face forward. Pexels

    Man on mountain top meditating. Crossed legged and arched.
    This man is holding himself up with tension in his back muscles. He can learn to antevert his pelvis to find its natural L5-S1 angle, allowing his back to be upright and relaxed. To get there we recommend a suitable wedge along with some posture know-how. Pexels

    Woman on beach near sea, meditating. Crossed legged and arched.
    This woman is getting some anteverting benefit from the slope of the beach, but is used to swaying her lumbar area rather than having a healthy angle lower down at L5-S1. Unsplash

    Chinese Buddha figure with slumped posture, 338 C.E..
    This Chinese Buddha figure shows surprisingly slumped posture. Note the forward head, absence of a stacked spine, and tucked pelvis. With a tucked pelvis slumping is the only relaxed option for sitting.

    The hunched figure above is the oldest Chinese Buddha figure that has survived into modern times. The inscription on its base dates it to 338 C.E., 500 years after Buddhism came to China from India. Why does the hunched posture of the Chinese figure compare so poorly with the Indian figure (top)? It is reasonable to suppose that while crossed legged sitting was the norm in India, a warm country where much of the population sits on the floor to gather, eat, socialize, and more, in China, with its generally cooler climate, sitting crossed legged was consciously adopted for meditation but was not a widely used sitting position.   

    Esther Gokhale stacksitting on a Gokhale Pain-Free Chair.
    Here I am stacksitting on the Gokhale™ Pain-Free Chair—my pelvis is anteverted so my spine stacks upright and relaxed, with a healthy angle at L5-S1. This way of sitting enables you to sit in meditation comfortably for prolonged periods if required, and to breathe well. Like all students on the path of postural improvement, I am a work in progress. . .

    Appropriate furniture, props, and seating solutions

    Most Zen and yoga centers in the West have become more enlightened about the difficulty many people have in sitting on the floor, providing chairs, meditation stools, and cushions for meditators’ comfort. Some more recently established schools, such as Transcendental Meditation, have always encouraged practitioners to use chairs and sofas rather than wrangle with the difficulties of sitting on the floor and working through the resultant aches and pains. 

    That said, seeking comfort and back support from soft and poorly contoured modern furniture can also promote slumping, or lead to problematic remedies such as using lumbar cushions which sway the back. You can read more on finding a healthy back rest here, as well as about gentle traction from our Stretchsit® Cushion.

    Traditional and potentially effective solutions to help meditators sit without a backrest include the Japanese Zafu cushion, a high, round cushion that can help the thighs and pelvis to angle down, and a low wooden meditation stool used in a kneeling position. The Gokhale™ Wedge is a modern solution to support stacksitting. In all cases, it is important that the practitioner knows how to anchor their rib cage to resist any tendency to sway, and how to find articulation at the lower L5-S1 junction. 

    Four props for healthy sitting: Zafu cushion, Gokhale™ Wedge, meditation stool, Stretchsit® Cushion
    Four props for healthy sitting (top left to bottom right): a Japanese Zafu cushion, the Gokhale™ Wedge, a kneeling meditation stool, and the Gokhale Stretchsit® Cushion

    Healthy sitting makes for healthy breathing

    Given that controlled or mindful breathing is part of many meditation practices, it’s surprising how little attention is given to the link between breathing well and sitting well.

    Some meditation traditions have mimicked teachers and icons with slumped posture, and teach that the associated abdominal breathing is part and parcel of spiritual practice. This type of breathing, however, results in a soft, expanded belly with low muscle tone, an underdeveloped chest, and inadequate use of the diaphragm and lungs.

    Equally problematic is tensing the back to remain upright, which tightens the erector spinae muscles and restricts the diaphragm and ribs at the back. It takes stacksitting with a J-spine to let the breath work its magic—bringing a natural massage to your spine, better circulation, and length, strength, and flexibility to the musculoskeletal parts of the torso.

    Chop wood, carry water, preserve your posture

    There is a traditional Zen Buddhist koan (puzzle/story): 

    The novice says to the master, "What does one do before enlightenment?"

    "Chop wood. Carry water," replies the master.

    The novice asks, "What, then, does one do after enlightenment?"

    "Chop wood. Carry water."

    Women in Burkina Faso carrying large loads on their heads.
    Chopping wood and carrying is part of everyday life for millions of people in traditional communities—and it is done with healthy posture.

    Of course there are various interpretations of this koan, including that the most pedestrian of activities are also the most sacred. From a posture teacher perspective, the koan reminds us that in the pursuit of spiritual (or mental) development, we should continue to engage with the physical foundations of life. Not only are the body, mind and spirit intertwined, but a healthy body can also help support our other endeavors.

    Breaking free from old habits

    Meditators often come to work with us because they are frustrated by their pain and struggle to be comfortable. In our experience, though meditators are extensively trained in matters of the mind, the training of the body lags behind. Our teachers have expertise in identifying and solving systemic postural errors in meditation and other activities, and are ready to support you on your meditation and life journey.  

    Best next action steps for newcomers

    If you would like insight on your posture, consider scheduling an Initial Consultation, online, or in person.

    You can sign up below to join one of our upcoming FREE Online Workshops.

    The New Year 3 x 3 Fitness Challenge: Strength without Strain

    The New Year 3 x 3 Fitness Challenge: Strength without Strain

    Esther Gokhale
    Date

    We’re here to help with your New Year’s fitness resolution. Join us for a FREE 10-day New Year 3 x 3 Fitness Challenge, which is offered as part of the Gokhale Exercise program. It will be fun, safe, and effective, enabling you to build your strength without strain and injury, because, all the while, you are also training for healthy posture! 

    The Gokhale Exercise banner showcasing six different program teachers.

    Your 10-day challenge consists of three sets of three (3 x 3) popular exercises. Our approach to these well-known exercises is unlikely to be found in any standard gym or fitness program where, unfortunately, poor postural habits go undetected or are even unknowingly promoted. Here the exercises will be taught with our “Gokhale filter” to respect what is natural and healthy for your body.

    The New Year 3 x 3 Challenge Exercises:

    Exercise #1: Push-ups

    Push-ups are a highly functional exercise that will assist you with many daily tasks and a range of activities—getting up from the floor, yoga, weight training, gardening, pushing heavy doors or strollers, etc.

    A lot of people, especially women, have difficulty supporting their weight with their arms; their upper body muscles are much weaker than lower body muscles. That was certainly my story.

    To this day I haven’t yet done a full push-up though I am getting tantalizingly close thanks to our Gokhale Fitness and Yoga programs. I can now lower myself to the ground with full control, (an excellent eccentric exercise, which you can read more about here), and can push up from part way up. I am hopeful that the 10-day New Year 3 x 3 Challenge will take me all the way! 

    Gokhale Method teacher Eric Fernandez demonstrates a push-up with poor form.
    This push-up is done at a bench rather than on the floor to be easier. However, common problematic habits can still creep in, as Gokhale Fitness teacher Eric Fernandez demonstrates.

    Gokhale Method teacher Eric Fernandez demonstrates a push-up with healthy form.
    This push-up shows healthy form.

    Exercise #2: Squats

    Growing up in India, I was surrounded by people sitting on the floor and squatting frequently throughout the day. These habits contribute to greater mobility in the formation of the hip joint, and flexibility in the tissues surrounding the hip joint. 

    People in our culture rarely have this degree of mobility and flexibility in the hips and ankles, and so squat poorly in a way that does damage—rounding the back and pronating the feet. This is more of a collapse downward than a well-supported, well-aligned squatting movement. 

    In the 3 x 3 Fitness Challenge, Eric will show you how to do squats in a safe way, to boost the strength of your knees, quads, glutes, thighs, and whole lower body. Done well, deep squats are not only safe—research shows that they can improve the health of knee menisci and cartilage, ligaments, and bones.

    Gokhale Method teacher Eric Fernandez demonstrates a squat with poor form.
    This squat demonstrates poor form, such as internal rotation of the legs. 

    Gokhale Method teacher Eric Fernandez demonstrates a squat with healthy form.
    This squat demonstrates healthy form.

    Exercise #3: Deadlifts

    Often known as a Romanian deadlift due to its popularity among weightlifters in Eastern Europe, a deadlift strengthens almost everything on the back of your upper and lower body. It is also a good exercise to test and develop hip mobility, and to develop bone density. 

    The deadlift utilizes our primal way of bending, which we call hip-hinging. Hip-hinging is instinctively used by our infants, and widely by adults in many parts of the world where traditional patterns of movement have been maintained. Hip-hinging is taught in our Gokhale Method® in-person Foundations and Pop-up courses, and our online Elements course.

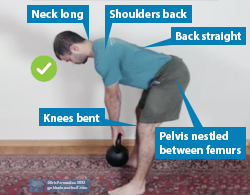
    Gokhale Method teacher Eric Fernandez demonstrates a deadlift with a kettlebell and poor form.
    This deadlift demonstrates common mistakes such as rounding the back.


    This deadlift demonstrates healthy form.

    Here’s your Challenge:

    Day 1: You’ll test how many reps of each exercise you can do in a minute. You’ll take a minute’s rest between each of the three sets, and between each exercise. 

    Days 2–4: You will do other exercises that compliment and build up your strength for the 3 x 3 Fitness Challenge.

    Day 5: Check-in on your goals.

    Days 6–9: Continue with strength training.

    Day 10: You’ll go through the challenge again and see in what ways you have improved. Expect an improvement in your strength, in the number of reps you can do, and in your range of motion!

    Is this fitness challenge suitable for everyone?

    The 3 x 3 Fitness Challenge is designed for practically everyone, with easier options given for those taking steps towards the full exercise, and additional challenges for those who find them relatively easy. 

    People are often surprised at how working with healthy posture changes their experience of an exercise—depending on the situation, you may feel stronger and lighter, for example. Or you may discover that you were unknowingly “cheating” and can benefit your body by making different, healthier efforts.

    If you have had an injury or surgery recently, or have a particular health issue, we recommend that you seek the advice of your preferred physician or health professional before starting the Challenge. We encourage everybody to work within their capabilities—this is not a no-pain, no-gain program!

    I look forward to meeting you as we challenge ourselves to greater fitness, and healthier posture.

    If you would like to find out more about how the Gokhale Method can help support you, sign up to join one of our upcoming FREE Online Workshops. . .

    How Not To Do Yoga

    How Not To Do Yoga

    Esther Gokhale
    Date

    This blog post explains how some common yoga injuries occur and how applying the principles of healthy posture to yoga postures replaces this scenario with movements that are good for your body.

    Yoga postures and back pain

    Growing up in Mumbai, India, my Dutch mother was a student of BKS Iyengar and the Satyananda yogis, and keen for me also to learn yoga asanas, or postures. I practiced, and, being reasonably athletic as a child and already trained in Indian classical dance (Bharata Natyam), did not find it particularly difficult to choreograph the back bends, forward bends, and twists that were asked of me. I became a yoga model, demonstrating postures alongside visiting swamis’ presentations to induce the audience to sign up for upcoming yoga courses.

    Esther Gokhale with yoga student in shoulder stand.
    This photograph shows me teaching yoga as best as I knew how in 1979, standing with a sway in my back (and putting excess flexion into my student's neck).

    Aged 15, I came to the United States as an exchange student and proceeded to go to college here. It was while doing a yoga pose in college that I first experienced a significant back episode with severe spasms. A few years later I injured my back while windsurfing; this time it took five days of bed rest to recover. I did weight training to strengthen my back, and returned to normal activity. 

    When nine months pregnant with my first child, my back problem resurfaced with an onset of sciatica. After my baby’s birth, it grew worse, leading to surgery for a large disc herniation at L5-S1 a year later. Within another year the pain had returned. I declined a second surgery, and instead deepened my quest to understand the causes of back pain and how best to resolve it. 

    Esther Gokhale’s MRI 1987 showing herniation L5-S1.
    An MRI scan done in 1987 revealed the cause of my sciatica and severe back pain—a large herniation at L5-S1.

    Yoga postures require healthy posture

    I learned from my life experience, as well as that of key teachers such as Noelle Perez, that in the industrialized world we do not use our bodies well. As our posture has deteriorated, traditional ways of performing everyday tasks in sitting, standing, and bending positions have become distorted. These damaging postural patterns are now deeply embedded in our culture and have even been unwittingly carried through into therapeutic activities such as yoga. 

    How is it that yoga asanas, developed to bring strength, flexibility, and relaxation to the body, are now causing frequent injury? This question has been the subject of much media coverage in recent decades, including the provocative New York Times article in 2012, How Yoga Can Wreck Your Body¹. From a Gokhale Method® perspective, the primary problem is that poor posture in the population at large, including yoga students, combined with misguided conventional wisdom shared by yoga teachers about what constitutes good posture, has created a perfect storm. 

    I came to realize that much of the flexibility I had as a young yoga model came from the wrong places—it was achieved at the expense of my lumbar discs and nerves as I compressed them to sway back, round forward, and twist. Let’s take a look at how yogis are likely to be causing themselves injuries and how using the Gokhale Method to apply the principles of healthy posture will avoid them:

    Back bends

    A large group of yoga postures are backbends. Bending backwards is something that is generally done extremely poorly in our culture, with most of the bend occuring around waist level. This puts a great deal of pressure on discs, nerves, and soft tissue in an area of the lumbar spine already compressed by tight erector spinae (long back muscles). This shortened baseline length is due to poor posture and furniture, part of our culture’s paradigm shift away from a healthy spine shape. You can read more about spine shape in my blog post What Shape is Your Spine? 

    Yoga model in Warrior pose, side view, extreme bend back.
    Many versions of Warrior pose, or Virabhadrasana in Sanskrit, are taught with a significant bend in the upper lumbar spine or thoraco-lumbar junction. This is especially a problem when one or both arms are lifted, encouraging the ribs to pop up. Pixabay

    Yoga model in Warrior pose, side view, mild sway.
    Even mild sways perpetuate tight muscles in the lumbar area and correspond with a lack of healthy articulation at L5-S1, the lumbosacral junction. Pexels

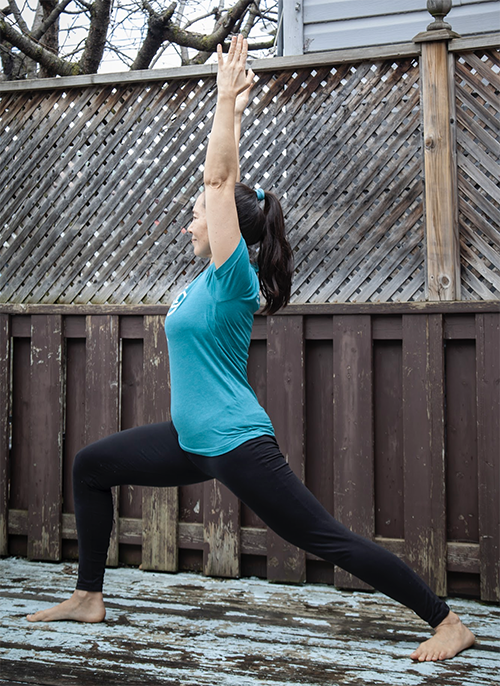
    Gokhale Method teacher Lang Lui in Warrior pose, arms raised, side view.
    Gokhale Method teacher Lang Liu shows how anchoring your rib cage prevents swaying and encourages healthy articulation at L5-S1. You can read more about our approach to this pose in my blog post Why Keep the Body forward in Warrior I 

    Forward bends

    Many yoga postures contain some form of forward bend. This can be standing, sitting, symmetrical or asymmetrical, with the legs together or wide apart. Regardless of these permutations, from a Gokhale Method perspective, the key point is to make bending healthy and avoid the damage that comes with rounding the back, distending the spinal ligaments, and pinching the front of the discs.

    Yoga model in standing forward bend, side view, straight legs, rounded back.
    Standing forward bends (Uttanasana) are often taught with legs straight. This leaves most students in our culture, who have tight hamstrings, straining towards the ground with their shoulders pulled forward. It also rounds the back, distending the spinal ligaments and pinching the front of the discs. Hanging off the lower back is also aggravating for the sacro-iliac joints and soft tissue in the area.
    Pexels

    Yoga model in standing forward bend, side view, knees bent, hands on floor, rounded back.
    Bending the knees softens tight hamstrings allowing a lower bend to the floor—but this student is still rounding her torso to reach over her pelvis and legs to reach the floor. Pexels

    Yoga model in standing forward bend, side view, touching blocks, rounded back.
    This man is using blocks to reach the floor. He is still rounding his back, and severely compressing his neck to try and look ahead. Pexels

    Mother and daughter in standing forward bend, side view, straight legs, rounded back.
    Unfortunately this well-meaning mother is teaching her daughter poor bending form. This is especially regrettable as young children naturally tend to bend healthily by hip-hinging. Pexels

    Yoga model in seated forward bend, side view, rounded back, compressed neck.
    In seated forward bends yoga students often hunch forward. This compounds any rounding already established in the upper back, and forward rounding of the shoulders. Her head also strains forward, chin up, compressing the back of the neck. Pexels

    Gokhale Method teacher Cecily Frederick in standing forward bend, side view. 
    Gokhale Method teacher Cecily Frederick hip-hinges in a standing forward bend. Her pelvis rotates forward around the femoral heads (tops of the thigh bones that form part of the hip joints). Her spine remains long, rather than rounding. 

    Twists

    In twisting postures (Parivrtti), it is especially important that your movement is not concentrated at a particular level of the spine, but is well distributed. Levering into a twist by pushing or pulling with the arms or legs can cause a twist to concentrate at any vulnerable point. Typically people will twist most in the mid-spine at T12-L1. Here the more axially mobile thoracic spine meets the lumbar area, where the orientation of the facet joints limit rotation. This is likely to result in disc bulging or even herniation at this junction, pinching of the nerves, and undue stress on the bony spine.

    Yoga model in crossed leg twist, front view, twist at waist.
    This woman is twisting mostly at the waist. Pexels

    Yoga model in seated twist, side view, levered twist, tucked pelvis.
    This seated twist shows tucking of the pelvis. There is considerable rotation at the base of the shoulder blades as the yogini levers with her arms against a fixed pelvis and legs. Wikimedia

    Yoga model in lying twist, back view, bent legs, tucked pelvis.
    A lying twist with one knee reaching the floor and the opposite shoulder remaining there is an extreme rotation for most people. It will often compromise healthy posture. In this case the woman is using her forearm and tucking her pelvis slightly to get her knees down. It is better to prioritize  healthy movement over achieving the “correct” shape. Pexels

    Gokhale Method teacher Clare Chapman in lying twist, head on.
    Gokhale Method teacher Clare Chapman in a lying twist. Allowing the pelvis to rest back and the thighs to separate avoids tucking and encourages more rotation in the hips. 

    We recommend that you initiate twists using the muscles of the torso’s inner corset, especially the obliques. The inner corset is explained in detail in Lesson 5 of my book 8 Steps to a Pain-Free Back. Using these muscles means that the lumbar spine is protected while the muscles originating in the thoracic area and connecting to the pelvis power the rotation. Engaging the inner corset also lengthens the spine avoiding the common pitfall of imposing rotation on top of flexion (rounding) or extension (swaying) or any other kind of compression. 

    Twists should mainly occur and be appropriately distributed in the joints best designed for them—the ankles (standing twists), hips, the thoracic spine, and the neck. Small amounts of rotation can contribute from elsewhere, but pushing beyond natural limits anywhere by applying force is a recipe for injury and pain.

    Before executing yoga bends or twists, we recommend that you first learn the basics of the Gokhale Method® in our in-person Foundations Course, Pop-Up courses, or online Elements. These courses teach you how to bend back without swaying, and how to bend forward in a way that profoundly benefits rather than damages your body. The Gokhale Method Online University has many offerings for Alumni which explore additional movements such as shearing and twisting in ways that are healthy.

    If you are a yoga practitioner who suffers from recurrent bouts of back pain or strain, have stopped practicing due to injury, or have been put off even trying yoga, then a solution is at hand! 

    It has long been my ambition to offer yoga classes with healthy posture. I am delighted that one of our most experienced and accomplished teachers, Lang Liu, will offer regular Tuesday and Thursday Gokhale Yoga classes, ​​7:00 am (Pacific Time), starting April 21, as part of our Alumni Gokhale Exercise program. 

    We look forward to seeing you there.

    Gokhale Method teacher Lang Lui in Namaste.
    Gokhale Method teacher Lang Liu looks forward to seeing you in the Gokhale Yoga class.

    References:

    ¹ William Broad, “How Yoga Can Wreck Your Body”, New York Times Magazine, Jan. 5, 2012,
    https://www.nytimes.com/2012/01/08/magazine/how-yoga-can-wreck-your-body.html 

    If you would like to find out more about how the Gokhale Method can help support you, sign up to join one of our upcoming FREE Online Workshops…

    Fixing my Posture Fixed my Pain

    Fixing my Posture Fixed my Pain

    Kapil
    Date

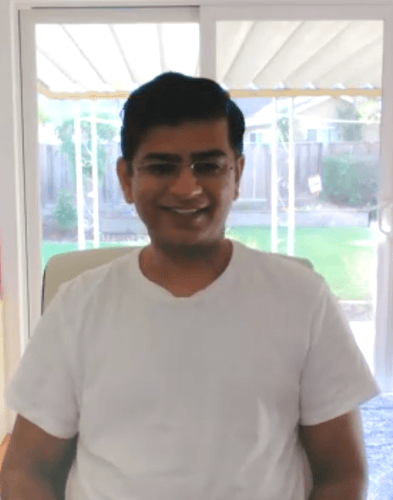
    Kapil sitting, smiling.
    Suffering with back and hip pain, Kapil recalled the upright, elegant posture he had seen in India.

    My background and posture in India

    I am a 45-year-old software engineer living in California. I grew up and lived in India until I was 37. In my mid-twenties I developed lower back pain and right hip pain, and I recollect having a series of MRIs and medical traction but obtaining nothing more than temporary relief. I also went for Indian massage therapy, which did effectively relieve the pain for some years. Like many modern desk workers, my posture had gradually deteriorated. The massage addressed the symptoms this caused but did not improve my posture.

    Kapil standing, starting to round his shoulders.
    Here I am 33 years old. I am starting to round my shoulders, sink into my chest and lift my chin.

    As Esther often says, older generations, villagers, and the manual workers in India have excellent posture, which includes a J-spine, the head back, and the shoulders back. 

    I would observe people around me with upright, elegant posture, and could see that it was healthy, but I couldn’t figure out what I should be doing to get there.

    Indian family in a line walking tall.
    Tall, elegant posture is almost universal among Indian villagers. Firstpost

    My father had very good posture and no back pain. I wondered if I had muscle weakness, or if it was just that my body was structured differently. 

    Kapil’s father standing, legs externally rotated
    In this photo my father is in his eighties and has preserved his upright bearing. Note that his feet are angled outward due to the external rotation of his legs.

    Here in the States, I continued to work with various health practitioners to see what was causing my pain. Some sessions with a chiropractor helped, but the relief, though it sometimes lasted as long as a year, was always temporary. I felt that something I was doing was making the pain reappear. 

    Getting started with the Gokhale Method®

    I found the Gokhale Method through a blogger in the Bay Area, who referred to the Gokhale Method having seen Esther’s presentation at Google. That led me to the concept of postural education. I realized that I needed guidance to restore healthy posture to my body that didn’t know what to do.

    Because poor posture is a relatively modern problem, traditional therapies like massage and yoga did not need to address it—and didn’t for me. Even though I grew up in a part of the world where healthy posture was common, I did not know how to integrate it. In many areas humanity has made huge progress, but now, with our posture, we actually need to achieve some healthy regression!

    Person receiving back massage, close-up.
    Traditional therapies such as massage may temporarily relieve the symptoms but not the root cause of back pain. Pexels

    I read Esther’s book, realized I needed a teacher and decided to take an Initial Online Consultation. It became clear my posture could be changed. I chose to take the 18-lesson Elements online course over about six weeks in the autumn. 

    Becoming pain-free and making further progress

    The earlier lessons were quite easy because each lesson focused on just one thing, so I had time to practice and adapt. They nevertheless had already helped to decrease my pain by the time we came to the later lessons. The later lessons needed finesse to coordinate everything that had been learned. Walking was the most challenging, with so many parts to consider at once.

    The course is well paced and structured, using intelligently designed stepping stones. I could see how the lessons fit together. Reflecting back, if we had started with the later material, it would have been a daunting task.

    When we got to the walking lessons, I thought about asking to spread the lessons out more, but I now recognize that the momentum of our regular schedule was important. Mastery was not expected, and I needed that additional input and tips to continue making progress. There is a saying, “without the guru I cannot gain knowledge” and I found this to be true both for the content and the teaching method.

    Kapil’s “Before” stretchsitting and stacksitting photos.
    My “Before” pictures as I embarked on the Elements course. I was trying to implement a few principles I read about in 8 Steps to a Pain-Free Back. I still had a long way to go.

    I have learned to focus on one posture tip at a time, and cycle through them to keep improving on everything I do, whether it is bending or sitting well. Ongoing practice, rewatching course videos, and referring to photographs all help keep things on my radar, reinforce good habits, and create muscle memory over time. 

    An active lifestyle is not enough

    I have always led an active life—I played racquetball at least twice or thrice a week, I did yoga almost every day, I gardened once or twice a week, and I walked (and still do, almost every day). On reflection I can see that all this exercise, without paying attention to my posture, did not prevent my back and hip pain.

    I wouldn’t be able to garden for more than 30 minutes if I hadn’t learned to hip-hinge. My pain would come back. Agricultural workers in India can work eight hours a day, day after day—because they hip-hinge! It is fascinating to see Esther point out this type of bending, in photographs and in ancient art.

    Women hip-hinge choosing pots, Odisha market
    Women hip-hinge with ease at a market in Odisha, India, while they examine pots.

    I can see that some of our modern occupational hazards arise from sedentary work—so I have always been very careful to not sit for a long duration, switching places each hour. Yet, if I don’t roll back my shoulders, glide my head back, and take care of my rib anchor, none of that matters—I would still have pain. Taking breaks is helpful, but it’s not enough. Posture is a fundamental thing that needs to be taken care of too.

    Going forward

    I am aware that I have taken Elements only recently and still have a way to go, but the posture that I have learned to recreate in my body has not only stopped my pain, but also feels very natural to me—my neck being tall and my head staying back as I sit at my desk, for example. I would still like to use the PostureTracker biofeedback tool that can help me to track my progress and monitor my posture adjustments in real time.

    I paused my yoga regime while I was taking Elements in case there was anything I was doing that was contrary to a new way of doing things. Esther then showed me a new way of doing sun salutation which I look forward to resuming shortly. When I learned to improve my posture I made no other lifestyle changes, so I have good reason to believe posture has addressed the root causes of my pain and will be sustainable. 

    I would have had many years of a pain-free life behind me if I had made these changes earlier—however, better late than never! I am very fortunate to have found something that has made such a difference to my life.

    I have a lot of respect and enthusiasm for the Gokhale Method, and my motivation with this blog post is to spread the word about it. Please share my story to inspire others who suffer unnecessarily with back pain. 

    Free Online Workshops

    If you would like to find out more about how the Gokhale Method can help support you, whether you have back pain or other musculoskeletal pain, sign up to join one of Esther’s upcoming FREE Online Workshops.

    Feet Out or Straight Ahead?

    Feet Out or Straight Ahead?

    Esther Gokhale
    Date

    When it comes to foot position, feet parallel is often regarded as the ideal in our present-day culture. Standing with the feet apart, pointing straight ahead, is also seen as the starting point of a normal and healthy gait. Walking then proceeds along two parallel lines, like being on railway tracks. 

    Parallel feet standing on road, aerial view
    In our culture today, standing with feet pointing straight ahead is regarded as normal, and the best biomechanical option. Unsplash

    From a Gokhale Method® perspective, a healthy baseline position for the feet is angled outward 5–15°, or “externally rotated.” Why is there such divergence of opinion—and angle? 

    Most people learn and then teach feet straight ahead

    Feet straight ahead is the model learned and perpetuated by most professionals who are trained in anatomy, whether they are fitness coaches, yoga teachers, Pilates instructors, physical therapists, podiatrists, family physicians, or surgeons. Training regimens, gait analysis, shoe design, and equipment such as elliptical trainers and step machines are also based on this belief. 

    There’s compelling evidence for feet out at an angle 

    The Gokhale Method approach to solving back pain and the many other musculoskeletal problems that beset our society is not based on such current assumptions, but on direct observation of biomechanically healthier populations. The Gokhale Method understanding of healthy posture draws on field research among traditional and tribal populations in many parts of the world, where despite differences in culture, age, gender, and occupation, posture remains remarkably consistent—and includes a 5°–15° foot turnout. This same turnout can also be seen in our infants, historical artifacts, and our ancestral images prior to the early twentieth century. 

    Woman in Odisha, bare feet outward, close-up from behind 
    You can see that the feet of this woman in Odisha, India, angle outward.

    Let’s look at some more examples of evidence for feet out. 

    Ancestral and antique photographs

    Victorian group outside Beauchamp Hotel, UK, mid-nineteenth century, showing foot turnout 
    This Victorian photograph decorates a table mat at a country hotel in the UK. The group on the right all clearly show significant external rotation in their legs and feet.

    Scottish soldiers, mid-twentieth, showing degrees of foot turnout
    These Scottish soldiers from the mid-twentieth century show degrees of foot turnout that would be uncommon today. Pinterest

    Contemporary traditional and tribal culture

    Indian women in Odisha, India, sweeping the floor, showing foot turnout
    These women in tribal Odisha, India, habitually stand and bend with externally rotated legs, which orients the feet outward.


    This snippet of video from a market in tribal Odisha, India, shows people walking with feet turned out.

    The ancient world

    Marble Statue of Serapis, Greece, 2nd Century BCE, showing foot turnout
    As ancient Greek statuary became ever more naturalistic, it captured the outward angle of the feet, even lifting one foot to suggest walking or a relaxed, “contrapposto” standing position. Marble Statue of Serapis, from Amorgos, 2nd Century BCE, National Archaeological Museum of Greece, Athens. Wikimedia

    Children

    Young child standing on beach, showing foot turnout
    Children naturally externally rotate their legs from the hip joint, angling the feet out.

    Young child carried by father, sitting with pelvis tucked; Young child sitting slumped in stroller, showing feet turned in
    Being held in poor positions or sitting in furniture which tucks the pelvis will counter healthy external hip rotation and cause an infant's legs and feet to roll inward.

    Extreme outward feet angles

    Some dance forms, including those based on traditional posture, have evolved an exaggerated degree of external rotation for artistic effect. Several of the base positions of ballet take natural external rotation to an extreme. Such angles also feature in Indian classical dance. These angles work in people who have been raised with them from early childhood but can be impossible or problematic for modern hips which formed while using Western furniture, including seated toilets. Squatting and sitting cross-legged in childhood encourages healthy hip socket development.

    Ballerina, showing foot turnout of 90°, feet close-up
    The “first position” in ballet requires considerable external rotation in the hips to turn the feet out at 90 degrees. Wikimedia

    Male Indian traditional dancer, showing foot turnout 90°
    There are numerous foot gestures in Bharata Natyam, a traditional Indian dance form, which require 90 degrees of outward angle in both feet. Pinterest

    Footprints that follow a central line—not parallel tracks

    Soft sand is great for capturing footprints, and those of tribal people will clearly show not only the external angle of the feet, but also how the heels touch either side of a central line. John Carter, one of our teachers in the UK, shares a telling tale: 

    It was 2010 and I was staying in a beach hotel near a fishing village in southern India. Checking my well-thumbed copy of Esther Gokhale’s book, 8 Steps to a Pain-Free Back, it was instantly obvious who had left their footprints in the sand. Local fisherman left kidney bean shaped footprints, with strong indents from the heel and big toe, and landed with the inside of each heel on either side of a central line. Tourist footprints were wider in the center, indicating lower foot arches, and were usually placed along two parallel lines.

    I was traveling with my yoga teacher friends and colleagues. We all admired the grace and poise of the locals, how beautifully they stood, walked, bent from the hips, etc. However, this was strikingly different from the posture that my yoga companions had been taught, in line with conventional yoga ideas. I was eager to discuss the differences, but my colleagues, confused by their received wisdom, continued to repeat what they had learned in training, which included sticking with parallel feet. 

    Two sets of footprints, Brazil, showing feet out and walking on a central line
    Two sets of footprints from Brazil, showing both feet out and walking on a central line. Unsplash

    Set of footprints, showing feet straight ahead making parallel tracks
    In modern Western culture it is much more common that footprints are straight ahead and run along parallel tracks. Unsplash

    Set of boot prints, UK, showing feet out and walking on a central line
    A workman stepped in paint… the prints that his boots left on the sidewalk show a healthy angle of turnout, and that he walked on a central line—this combination is relatively rare in industrialized cultures (UK).

    Why do feet point straight ahead?

    From our anthropological perspective, having feet straight ahead is actually an inward turn from a healthy norm of “external rotation.” This has come about for several reasons:

    • Weakened arches cause the foot to collapse inward (pronation), also rotating the leg inward.
    • Concave “bucket” seating, soft sofas, “sling” style footrests, and other poor furniture all lead to poor posture and a lack of healthy external hip rotation.
    • “Ergonomic” design and anatomical teaching are both based on the false paradigm that feet should be straight ahead.
    • Fashion role models, footwear, clothing, and mistaken ideas about what is healthy perpetuate parallel or even internally rotated feet.

    What are the benefits of feet out?

    • Encourages kidney-bean shaped feet with strong arches and healthy function.
    • Brings optimal alignment to the ankle, knee, and hip joints.
    • Facilitates natural pelvic anteversion and a well-supported spine.
    • Facilitates healthy deep bending (hip-hinging) as the pelvis can nestle between the thigh bones.

    Workman, Brazil, from behind, feet and legs at outward angle
    Feet pointing outward adds stability when maneuvering heavy loads, and, with a wider stance, aligns the legs and hips well for hip-hinging. This man is able to bend deeply to the ground.

    If your feet are currently straight ahead, or somewhat internally rotated, and you want to move toward external rotation, we recommend you introduce small degrees of change very gradually to allow the tissues and bones of your feet, legs, and hips time to adjust. We strongly recommend you do this in combination with other postural principles taught in 8 Steps to a Pain-Free Back, and our Gokhale Method® in-person Foundations and Pop-up courses, and our online Elements course

    If you would like guidance on any aspect of your posture, including how best to use your feet, consider scheduling an Initial Consultation, online or in person, with a Gokhale Method teacher.
    I’ll also be giving a free online workshop on Thursday September 15, 4:00pm PT, Fix your feet with the Gokhale Method. You can sign up here. I look forward to seeing you there.

    Why Keep the Body forward in Warrior I Pose?

    Why Keep the Body forward in Warrior I Pose?

    Esther Gokhale
    Date


    When doing yoga with a Gokhale Method filter, we use specific adjustments to maintain healthy posture and avoid unnecessary injury. Note the distinct lack of curvature in my lumbar spine.

    A general tenet of the Gokhale Method approach is that micro-level adjustments can lead to macro-level results. Like the world we live in, the human body is a complex, interconnected system. So it is not surprising that attainable tweaks in how we use our bodies can have beneficial effects on our function and well-being.

    Yoga is no different. If you have an established yoga practice, you’ve probably discovered for yourself that small adjustments are not so small in the aggregate!


    Even when practicing yoga, we would do well to refrain from swaying our lower backs. Image courtesy Elly Fairytale on Pexels.

    Warrior I and healthy posture
    Take Warrior I Pose (Virabhadrasana I), for example. This pose is one in which yoga models (a group that used to count me among its numbers, decades ago in India) often demonstrate a vertical upper body above their hips.


    By keeping her upper body vertical above her hips, this yogini is predisposing herself to lumbar curvature. Image courtesy Sigurdas on Wikimedia Commons under CC BY-SA 3.0.


    If you look carefully at her silhouette, you’ll see that this yogini’s lumbar sway is quite visible, putting undue pressure on her delicate spinal discs and nerves. Image courtesy Mor Shani on Unsplash.

    However, when I practice Warrior I today, I make sure to keep the upper body leaned forward rather than vertical. Why is this?

    The story connects with L5-S1 mobility. This special “saddle joint” is a cylindrical disk in quadrupeds. In bipeds (that would be us, humans!), it’s wedge-shaped. In spite of this baseline shape, the joint is actually capable of quite a lot of healthy variation in shape.


    The L5 vertebra, one of the two elements of the L5-S1 (lumbosacral) joint, as depicted in Gray’s Anatomy. Public domain image.

    B.K.S. Iyengar famously demonstrated extreme L5-S1 mobility, surely the result of his practicing yoga intensively for 8-ish hours a day over decades of his life. His remarkable L5-S1 mobility facilitated extreme (and still healthy) backbends as well as verticality in poses like Warrior I.


    Of course, we’re not all built like B.K.S. Iyengar! Most of us have limited L5-S1 mobility. One can cultivate additional mobility in this saddle joint, but it takes time, dedication, and expertise to do it safely.


    A forward-projecting upper body in Warrior I protects the lumbar spine from swaying.

    In one of our upcoming Gokhale Premium workshops this month, I’ll apply the Gokhale Method filter to all the poses of the original Sun Salutation sequence. You are invited to join me! I’ll also be offering new Free Online Workshops on topics including:

    What are some tiny posture adjustments you’ve made that have made a big difference in your life?

    My Favorite Exercises for When You Can't Visit the Gym, Part 1: Chair Pose

    My Favorite Exercises for When You Can't Visit the Gym, Part 1: Chair Pose

    Esther Gokhale
    Date

    This is the first post in our series on home exercise during shelter-in. For Part 2 on Toning the Gluteus Medius, click here!


    Making the most of shelter-in by practicing chair pose Gokhale-style in my backyard garden.

    Whether you are on the road, in a campground, or just stuck at home during quarantine, you can always exercise. In the daily lead-up to our ongoing Posture 1-2-3 Challenge for alumni subscribers, I often turn to dance as a way to process whatever baggage might have set foot in my psyche that particular morning, and also to get the group moving and warmed up for the main program. I’ve been dancing since I was a young child, so I have a very strong bias for dance as a way of exercising, but I also like to change it up with other types of exercise. It turns out that we have a lot of options, even when we can’t access the gym.

    First up is Chair Pose, from yoga. Chair Pose (Utkatasana in Sanskrit) is a great example of an at-home, equipment-free exercise which can strengthen a variety of muscles in very little time. You don’t have to spend forever and a day in Chair Pose to reap its benefits. This makes it a perfect fit for our busy lives.

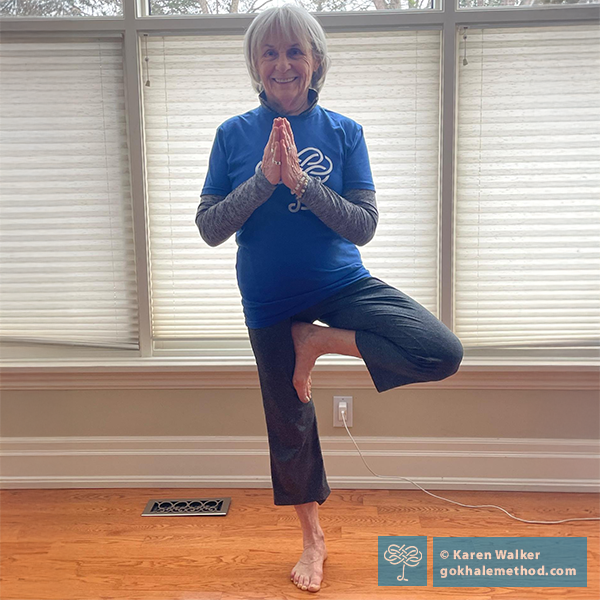
    In the image above, Cecily's behind is well behind, and her J-spine visible — both good details from a Gokhale Method perspective. The overlaid graphic conveys her Gokhale SpineTracker™ readings. Note on foot placement: in the Gokhale Method, we teach placing the feet about hip width apart and facing slightly outwards as a way of optimally supporting primal leg architecture.

    Chair pose with a Gokhale Method filter:

    1. Prepare your lower body. Start with kidney bean-shaped feet, and do a little squat, to let gravity assist in settling your pelvis between your legs. Then come back up, but not to a parked position (that is, avoid locking your hips forward and knees backward). A parked position allows the muscles to “check out” (that’s why we find ourselves drifting to this position repeatedly!), but is damaging to the joints. Rather than parking in your joints, get your body into a “ready position:” that is, a position with a little spring in it that is easy on the joints and also enables you to move on a dime.
    2. Prepare your upper body. Use the rib anchor technique, with your shoulders rolled and the back of the neck tall. Now we’re ready to begin with Chair Pose.
    3. Bending the knees slowly, go down-down-down, keeping the knees from crossing over the toes. Yes, this detail makes it harder, and you may have to grip on the floor with your feet.  This is good for your feet! The main reason for this is to minimize stress to the knees and maximize challenge to various leg muscles.
    4. Add in the inner corset. If you are able, raise your arms ahead of you or, even better, up above your head. In this case, be super-attentive to ramping up your rib anchor to not allow your back to sway. Now, you just stay there. It’s challenging, and that’s the point. Visit your boundaries, but stay on the healthy side of them.

    Let’s review: Chair Pose actively recruits your inner corset. The action of raising the arms above the head can be used to recruit the inner corset especially strongly. If you were to look at your belly (in a mirror) while in Chair Pose, you may come out looking a bit like a greyhound with a slenderized, sleeker abdomen below your full ribcage. To finish, return to a ready position with a little spring in it (again, not parked).


    This practitioner demonstrates the “greyhound look” of an activated inner corset. Note on foot placement: In the Gokhale Method, we teach placing the feet about hip width apart and facing slightly outwards as a way of optimally supporting primal leg architecture. Image courtesy Elly Fairytale on Pexels.

    I’ll be describing other favorite exercises in future blog posts — in the meantime, try “sitting” it out in Chair Pose during work breaks and as part of your exercise regimen. Consider setting your timer to go off every 20 minutes to remind you to do Chair Pose (or some other future pose) for about a minute. In this way you will make rapid progress in tone, form, and your experience of life! I look forward to teaching you Gokhale Yoga 101 and Strengthening Exercises - The Gokhale Way. Let’s make the most of our ongoing situation!

    Cultivating a J-Spine with Chair Pose (Utkatasana)

    Cultivating a J-Spine with Chair Pose (Utkatasana)

    Cecily Frederick
    Date

    As a student and teacher of yoga and practitioner of the Gokhale Method, I choose yoga poses that make good use of my time. “Chair pose” is well worth the time investment. In fact, it has become one of my favorite strength-building postures. It is useful for cultivating a J-shaped spine. It helps increase gluteal tone. It helps to pattern healthy hip movement. It is strengthening for the legs and spinal stabilizers. And, last but not least, it allows a yoga practitioner to smoothly transition between a standing forward fold and mountain pose — without compression of the intervertebral discs.


    Cecily Frederick in chair pose with J-spine visible, overlaid with SpineTracker™ snapshot.

       
    Detail of Cecily Frederick’s spinal shape in chair pose, overlaid with SpineTracker snapshot.


    SpineTracker snapshot of Cecily Frederick’s spinal shape in chair pose.

    Chair pose is also Esther Gokhale's favorite way to cultivate strength in all the muscles needed to tallstand well. She recommends it to students who tend to park in their joints (locking the knees and groin, flattening the feet, arching the back and introducing extra curves throughout the spine). After practicing chair pose, the small amount of muscular effort it takes to stand well becomes easy to access.

    To practice chair pose, stand with your feet about hip-width apart and kidney bean shape your feet. Reach your arms forward and up as you simultaneously bend your knees, hips and ankles as if you were sitting down and back into a chair. Hold for a few seconds and then press down through your feet (and especially through your heels) to come back to standing while lowering your arms.  

    A couple of practice sequences you could consider: 

    • Transition from tallstanding (“mountain pose” or Tadasana) to chair pose and back to tallstanding 4-6 times.

    • Transition from tallstanding to chair pose to an upward forward fold (Urdhva Uttanasana) to chair pose (Utkatasana) to tallstanding 4-6 times.


    Cecily Frederick in upward forward fold (Urdhva Uttanasana or hip-hinge).

    Five refinement tips

    1. Strengthen your butt / spare your knees
    To help develop gluteal strength and avoid knee strain, don’t let your knees come forward over your toes as your knees bend. Think about pulling your butt back behind you. Consider using a stool that you position in front of your shins while standing, and don’t let yourself push it forward as you move into chair pose.


    Cecily Frederick using a stool to cue chair pose, with help from a friend.

    2. Save your discs
    To help avoid swaying the back and compressing upper lumbar discs, don’t reach your arms up vertically. Instead let them reach forward. 

    3. Settle your pelvis
    To help the pelvis to settle well, you might not want the feet and knees too close together. Experiment with different widths between your feet. Remember what you learned in the Foundations Course or Pop-up Course about hip-hinging.

    4. Less is more
    Don’t force yourself into a deep knee, hip, or ankle bend. Allow your chair pose to begin where it begins. Less is often more in a yoga practice. 

    5. Break it down
    If you have an injured shoulder you can lower your arms, bring them to your hips or press the palms together in prayer position in front of the sternum.

    Subscribe to yoga