quadriceps

From Back Fracture and Knee Surgery, to Rafting and Hiking

From Back Fracture and Knee Surgery, to Rafting and Hiking

Rob Buirgy
Date

Rob Buirgy reached out having sustained a multiple fragment compression fracture of his T12 vertebra (in the middle of the back). Despite being in a body brace afterwards, having already followed the Gokhale Method for a couple of years, Rob’s instinct told him that our method would be able to help him regain an active life. More recently, he has also fully recovered from a whole knee replacement. In this blog post he explains how healthy posture set him up for success… 
—Esther Gokhale

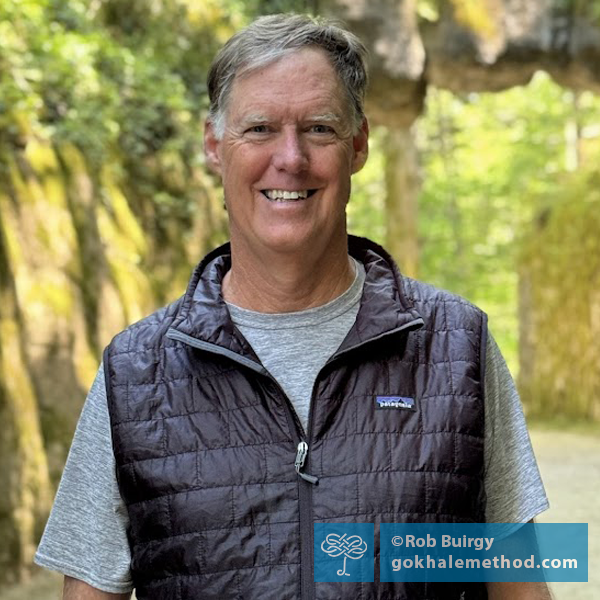
Rob Buirgy, Gokhale Method alumnus.
Meet Rob, whose passions include hiking and rafting.

Healing my back

In December 2023, during a vacation excursion to a Mexican cenote (deep water well) in the Riviera Maya region, I’d had a bad jump from a 12m high platform; thankfully, we were required to wear life jackets for this activity! I had serious pain and muscle spasms immediately when I sustained the fracture. With the life jacket, I was able to float for about 30 minutes while I figured out what to do. Later I went to a local clinic. With no x-ray, and because my function was good, the doctor had me bend to touch my toes (so dangerous!), and determined that I had only strained my back. I later realized this was far from the correct diagnosis. Once I was back home, I was diagnosed with a serious “burst” fracture at T12, and prescribed a TLSO brace for three months. I could easily have had a bone fragment cut into my spinal cord—I got lucky!

If there are any insights here for anyone who might have sustained a spinal fracture but not know for sure, I would say, get checked out immediately. I only even suspected it might be a compression fracture due to previous experience with this type of injury at L1 from a rock climbing accident back in 1977. 

I am so grateful that I was already familiar with the Gokhale Method®. I had followed the method for about two years and decided to get in touch with Esther for a personal consultation to find out what adaptations I could do during my rehab. I discovered there was a lot I could do to preserve and improve my posture and movement, even though I wouldn’t be moving my spine for a few months.

Rob Buirgy, Gokhale Method alumnus, with Esther Gokhale’s book, 8 Steps to a Pain-Free Back
I had already read 8 Steps to a Pain-Free Back, and after my consultation I was able to come back to it with much more confidence that I could make a full recovery.

Physical therapy was not an option while I was wearing the brace. However, I could take the online Gokhale Elements course, and so I was able to start and self-direct my recovery, at my pace, much earlier than expected, with approval from my medical professionals. I worked with a new level of detail on rolling my shoulders, keeping my neck tall, and preserving my foot strength while being less active than usual. As time went on, my health professionals said it was safe to engage my inner corset and bend by gently hip-hinging.

Rob Buirgy, Gokhale Method alumnus, standing in his TSLO brace.
Not much movement was possible for three months while the shattered vertebra healed. The brace had to immobilize my spine.

Just eight months after my fracture I had a prearranged wilderness raft trip with a big group of friends and family. We were running Gates of Lodore on the Green River through Colorado and Utah. This trip had been a motivating goal since my recovery started—rowing our 16-foot raft with two passengers would be a real test of my recovery! Given my compromised fitness, we planned for back-up rowers, but the frequently strong winds were overwhelming for them. I didn’t know this beforehand, but it turned out I was ready for the challenge.

Rob Buirgy, Gokhale Method alumnus, in his raft with dog.
Me preparing for rowing on the raft—with “Sister,” my extra crew member!

I managed well by focusing on hip-hinging to set up my forward stroke, knowing how to position my shoulders, neck, and head, plus keep my spine long and straight. I didn’t have the same trunk strength I had before, but I could maintain a healthy alignment to both keep my spine safe and generate the power needed. I rowed up to six hours a day for four days. Yes, I was tired and a bit achy at night, but nothing that threatened my recovery. I will continue to row this way—the biomechanics of it are much better than how I used to row; I used to allow my back and shoulders to round, and then sway as I pulled back.

Knee rehabilitation

I’m currently recovering from a total left knee replacement after many decades of soccer and coaching took their toll. I finally undertook the knee surgery I had been resisting because I thought that my healthier biomechanics would allow me to gain full advantage from my new knee. Before the operation, I prepared by focusing on movement patterns and conditioning joint-supporting muscles. During that time, even though my knee was compromised, I focused on glidewalking to best coordinate my gait, learning how to use my glutes properly, how to use my feet well, and also what to look for in a hiking shoe.

x-ray of knee replacement joint, Rob Buirgy, Gokhale Method alumnus.
My new knee joint posing for the x-ray!

Post-operatively, my experience with the Gokhale Method shines through. At this point I have met or exceeded all my recovery milestones. Getting the quadriceps muscle to work correctly, and extending the leg fully behind, are often problematic with this type of joint replacement. Three weeks in, my physical therapist determined that I did not need specific therapy to recover my gait. By applying the Gokhale Method principles, my healthy gait came back incredibly fast, and I moved on to compatible strength and balance exercises sooner than expected. As an added benefit, my upright, relaxed, and well-balanced overall posture also improves my proprioception (sense of where I am in space). This has enabled me to better adapt to my new joint and leg alignment as I tackle varying terrain and other situations. 

When I was first learning glidewalking, I would keep my hands resting on the top of my glutes to check if they were working—that was the only way I could feel them activating! My daughter is a dance instructor, and although I’m not into dance as such, experimenting with the modified Samba step that Esther teaches helped me to find that little bit of lateral hip action that I had been missing with each stride.

If I had focused only on the linear movement, I never would have found that natural glute and hip action. I have been a long-distance hiker all my adult life, and I was shocked to realize that I had been throwing my legs out to move forward, but I wasn’t taking advantage of the glute propulsion from behind and all its benefits.

Photo, rear view, of man walking  pushing wheelbarrow.
Finding appropriate activation and relaxation in the glutes and hips is part of developing a smoother  walk.

I’m so glad to be a Gokhale Method student, because all is going well and I’m on track resuming the active life that I love. Three years ago I was often focused on my knee hurting, my back hurting, and I had little optimism about future activities. Today, I’m planning my next outing!

Reflections on healing and recovery

My doctors and therapists have said I should expect to have chronic back pain—but so far, it’s getting more comfortable, not worse, as I get stronger and more active. I’ve had great success with combining healthy posture with physical exercises, and using pain medication only when necessary. When we’re recovering from injury or surgery, there is often medication in the mix, and I think we can end up going for the pain meds when it’s actually something other than physical pain we are trying to address, such as frustration or despondency. 

With healthier posture that’s more open, relaxed, and strong, my affect has changed, and my entire outlook on life has improved—overall it’s very uplifting. I think “uplifting” is a great word to describe my experience, both in body and mind. After everything I’ve gone through, if I am having a struggle on a particular day, I know that a body scan and simple adjustments will immediately improve my outlook. Now, I can’t help but notice people’s posture and how they move—there are so many people who would benefit from this method. Hopefully, sharing my story will encourage others to come on board.

Special Spring Into Action free online workshops for newcomers

We encourage newcomers to enjoy Esther’s special, free, Put a Spring in Your Step: Glidewalk your Way to Healthy, Pain-Free Movement Gokhale Method beginner workshop, on Saturday, April 26, 11:00 a.m.–12:00 p.m. (PST). Esther will be teaching glidewalking techniques you can start practicing straight away. The workshop will launch a special, free 5-Day Glidewalking challenge to which all participants will automatically be enrolled, to help you develop your walking power! Find out more, and sign up here.

Best next action steps 

If you would like help to enjoy an active life by learning healthy posture, get started by booking a consultation, online or in person, with one of our teachers. 

You can sign up below to join any one of our upcoming FREE Online Workshops…

How To Go Down Stairs (Part 2)

How To Go Down Stairs (Part 2)

Esther Gokhale
Date

Are you beginning to wonder if you will need to set up your bed in the living room? Do you think twice about visiting places with stairs? Do you have a friend or older relative facing this kind of challenge? 

Welcome to our second post on navigating steps and stairs. Our first post looked at how to power yourself up stairs—this one talks about how to come down stairs. This kind of “life exercise,” done skillfully, can be transformative and gives many benefits beyond getting you to where you want to go.

Two women descending steps.
Going down stairs is a functional exercise that doesn’t need a gym. Freepik

Walking downstairs gets you fitter than walking upstairs! 

Dr Michael Mosley, a well-known BBC health journalist, has a favorite study that had people walk either up or down the stairs of a 10-story building twice a week, using the elevator in the other direction. Both groups saw improvements in many health outcomes—but those walking down the stairs—perhaps surprisingly—did better. They were fitter, had a lower resting heart rate despite doing less cardiovascular exercise, lower insulin sensitivity, lower blood fat levels, better bone density, superior balance, and twice the improvement in muscle strength. You can read more about the benefits of eccentric rather than concentric muscle action here.

Safety first

Whatever your fitness and mobility level, follow these measures to use steps and stairs safely:

  • Use a handrail if appropriate
  • Watch out for slippery or unsound surfaces and trip hazards 
  • Wear well-fitting, non-slip shoes

Start with your stance

When descending stairs, it’s especially important to maintain a well-balanced stance from start to finish. You want to position your body in a shallow zigzag squat, or “ready position.” We teach this stance in detail in our in-person Foundations and Pop-up courses, and our online Elements course. As the name suggests, this stance makes us available for action and quick reaction.

Martina Navratilova ready for the ball, Prague Open, 2006.
A zigzag stance or “ready position” readies us for dance, sport, or stairs. Martina Navratilova ready for the ball, ECM Prague Open, 2006. Wikimedia

The benefits of a zigzag stance for walking down stairs

Having your behind behind with your torso angled forward from the hip joint while descending stairs has several benefits:

  • It keeps your center of gravity further back so you are less likely to fall. By contrast, if you tuck your pelvis, your center of gravity goes further forward, making it more likely you will slip. This is familiar to anyone who has been on a ski slope.
  • Your head aligns over your feet, allowing you to see where you are placing your feet more clearly. 
  • It makes it easier to antevert your pelvis and direct body weight through your knees in a healthy way. 
  • It is good practice for other activities like bending, sitting, squatting, and more. 

Man walking down steps with a healthy zigzag stance.
Gokhale Method teacher Eric Fernandez descends steps maintaining a zigzag stance.

Your glutes help you keep your balance

In coming down steps and stairs your glutes contribute to the important job of stabilizing your hips, pelvis, and sacroiliac joints. Together with other muscles they play a key role in keeping you balanced over your standing leg as the other one is smoothly lowered to the next step. The importance of our glutes for achieving stability through the hips and pelvis is one of the areas of convergence between conventional advice and the Gokhale Method®. Having your behind behind you in a zigzag stance enables the glutes to work optimally.

Try hovering in your zigzag stance for a while on one leg—you will soon feel your glutes working. Be sure not to tuck your pelvis, as this interferes with the glutes’ stabilizing ability.

Anatomy drawings showing gluteus maximus (left) and, underneath, gluteus medius (right). 
Knowing where your buttock muscles are situated can help you visualize them working: gluteus maximus (left) and, underneath it, gluteus medius (right). 

The quadriceps lower you down—as well as take you up

When descending stairs, the back leg quadriceps work eccentrically to lower you with control as your front foot approaches the step below.

Anatomy drawing showing the quads
The “quads” are four muscles on the front of the thigh that insert at the knee. Wikipedia


Notice the quads of the supporting back leg working to lower the body’s weight.

Externally rotated feet v. internally rotated feet

Another important ingredient in coming down stairs is external rotation of the feet and legs. This is the natural angle for the feet, and encourages optimal alignment of the knees, hips, and pelvis. 

Woman in Odisha, bare feet pointed outward, close-up from behind 
The feet of this woman in Odisha, India, have retained a healthy angle outward.

Externally rotated feet are also preferable to feet straight ahead as this enables more of your standing foot to contact the step securely while you lower your other leg. 

Feet descending steps, externally rotated, front view.
Externally rotated feet encourage healthy alignment of both the foot and leg.

Internally rotating your feet will, over time, collapse your arches, and create bunions and knee problems. You will also be more likely to trip over your toes. If you currently have this habit, adopt a mild turnout of about 5° to give your muscles and joints time to adapt to change. You can read more about foot angle here

Feet descending steps, internally rotated, front view.
Internally rotated feet are problematic for your structure, and your safety.

Best next action steps for newcomers

If you would like insight on your posture, consider scheduling an Initial Consultation, online, or in person.

You can sign up below to join one of our upcoming FREE Online Workshops. . .

Home Exercises Part 5: Squats

Home Exercises Part 5: Squats

Esther Gokhale
Date

In this blog post, the fifth in our series scrutinizing popular home exercises, we are looking at squats. Is it a beneficial exercise, and how does it stack up—or not—against the principles of healthy posture?

Squats are a popular and effective exercise designed primarily to strengthen the quads, stabilize the knee joint, tone the glutes, and also work the back muscles. 

4 stages of kettlebell snatch, man squatting
A squat is an essential baseline position for many athletic movements including this kettlebell snatch. Wikimedia

How low should they go?

Deep squats have become increasingly popular in recent decades, following a trend towards cross-training and exercise based on “natural movement.” Fitness and movement trainers have sought to emulate people in non-industrialized societies or traditional cultures who squat with ease, often for long periods.

Deep squats present challenges unless you grew up in a culture that routinely sits and squats on the ground. The challenge is not only in the muscles around the hips, knees, and ankles, but also in the bony part of the joints. When you are born your hip joint is made entirely of cartilage. By age 16, it is fully ossified. If you are not continually sitting and squatting low in your formative years the ossification pattern will not facilitate the angles necessary for squatting as an adult. It is therefore impossible for most westerners to squat low without tucking the pelvis and rounding the back, just like it is hard for them to sit crossed legged and relaxed.

Woman in heels in deep squat with rounded back.  Indian woman in deep squat with straight back.
Even though her high heeled shoes reduce the angle of bend required to squat, the woman on the left rounds her back to squat. The Indian villager (right) can squat with a straight back. Unsplash

The benefits of standing/partial squats

For this reason I highly recommend partial squats, which are a safer option and offer many of the benefits of a full squat. They are also a perfect exercise to focus on and develop healthy posture.

Anyone who has ever done a fitness or yoga class may also know this exercise as Chair Pose. In some schools of fitness training, it is regarded as a foundational exercise. In traditional yoga it is known by its Sanskrit name, Utkatasana. Utkatasana translates as intense, powerful, fierce, difficult—you get the idea. 

BKS Iyengar in Utkatasana, side view.
BKS Iyengar in Utkatasana, showing the challenge of the pose. Facebook

Squats can indeed be demanding. Lowering and raising your body weight into and out of the partial squat works the biggest muscles in the body (the leg and buttock muscles) hard, as they alternately contract (concentrically), and then release their length (eccentrically). 

When you start training with squats you don’t want to go down too far—better to do a shallow, more open zigzag squat that eases you into the exercise. This avoids the risk of injury and you can increase the intensity and demands on your body by going deeper over time, as you get stronger and more flexible. 

How to do a healthy squat

   1. Preparation

To facilitate a healthy amount of external rotation in the legs and hips, softness in the groin and nestling of the pelvis, we recommend doing the paper clip stretch or figure four as it is also known. This is a good preparatory exercise before squatting, and, done regularly over time, will encourage a healthy nestling of the pelvis and alignment of the legs.


In this video I am demonstrating the paperclip stretch, which prepares the legs and hips for healthy squatting. Clip from Gokhale Method Open University video.

   2. Start from a “Ready Stance”

A well-aligned standing posture is essential to maintain healthy form as you execute squats. The Gokhale Method teaches a position we call “Ready Stance which aligns your feet, legs, and hips for correct movement. In this stance you will find the key characteristics of a squat, but in embryonic form:

  • Stand with your feet hip width apart and pointing 10°–15° outward. Have a tiny bend at the hips and knees, as if you are about to play tennis or dance, bringing softness to the groin and back of the knees. 

Eric in ready stance, side view, hands on hips.
Gokhale Fitness teacher Eric Fernandez demonstrates the Ready Stance. It is like an ultra-mini squat.

ancient Greek statue, front and side views
This ancient Greek statue captures the softness and depth you want at the groin even in everyday standing. To get there, take the Ready Stance and then stop short of locking your joints as you straighten up.  

   3. Going into a squat

  • In the Ready Stance, rest your hands on the top of your thighs in your groin crease.
  • Initiate your squat from your hips. As you fold deeper at the hips your behind will travel further back behind you. 
  • Your knees will bend in response to your bend at the hips. Keep them wide and pointing outward and your thighs out of the way as you bend.
  • As you squat, allow your torso to angle forward at the groin as your pelvis rotates on your thigh bones. Check that your stance has a zigzag shape.
  • Focus on maintaining the straightest possible spine by using your rib anchor
  • Keep your chin down. You want your neck and head to remain in the same orientation as the rest of your torso.

Eric in partial squat, side view, hands on hips.
A healthy squat embodies all the points above.

  • When you are confident with the above you can raise your arms smoothly as you squat. Maintain your rib anchor, especially if you have stiff shoulders and are more likely to sway to lift your arms. If possible, bring your arms to the same angle as your torso.

Eric in partial squat, side view, arms up.
Raising your arms in line with your torso requires a strong rib anchor to prevent your back from swaying.

Cecily’s spinal shape in chair pose, with SpineTracker
Gokhale Method teacher Cecily Frederick in Chair Pose, overlaid with SpineTracker™ snapshot. The SpineTracker gives real time feedback on the shape of the spine. Note that Cecily’s spine remains straight in the lumbar area and the J-shaped angle at the L5-S1 junction puts her behind behind her—she does not arch her back.

   Cecily’s spinal shape in chair pose, with SpineTracker, detail
Detail of Cecily Frederick’s spinal shape in Chair Pose, overlaid with SpineTracker snapshot.

Common Mistakes: 

  • Swaying the back. Fix this by using your rib anchor to remove the sway.

Woman swaying in partial squat, side view
Swaying the back compresses the lumbar discs and nerves. Unsplash

  • Knees and/or feet collapsing inward. Fix this by angling your feet outward.

Eric in partial squat, front view, legs in internal and external rotation 
Internal rotation of the legs (left) puts pressure on the inner knees and flattens the foot arches. Feet turned outward and knees and thighs kept wide helps support your structure while allowing the pelvis to settle.

  • Lifting the chin. Avoid looking up or ahead. Fix this by softening your gaze and aligning your head and neck with the rest of your torso.

Person in partial squat from side lifting chin.

Lifting the chin risks putting pressure on the discs and nerves of the cervical spine. It is better to cultivate a long, tall neck. Wikimedia

   4. Increasing the challenge in squat

Once you have good technique and can perform squats smoothly with good form, you can increase their intensity in several ways—though not all at once!

  • Increase the number of reps.
  • Go deeper—take your thighs towards horizontal. Make sure your torso also pivots closer towards your thighs, your behind stays behind, and your knees do not go forward of your toes. 
  • Hold a squat position for a number of breaths. Maintain a strong rib anchor so as not to flare the ribs and sway with each inhalation. 

Free Online Workshops

If you would like to find out more about how the Gokhale Method can help support you, whether through exercise or posture education, sign up to join one of Esther’s upcoming FREE Online Workshops.

Subscribe to quadriceps