spinal nerves

One Year Older, Ten Years Younger

One Year Older, Ten Years Younger

Esther Gokhale
Date

It’s that time of year again—we know we’re about to get one year older and we hope we’re also going to be one year wiser! If you have applied that wisdom to progressing your posture, you may also experience that you look, and even feel, one year younger. Or if you have a long backlog of ignoring your posture, it’s not impossible that you may feel ten years younger!

Aging is not just about the numbers

Aging is not just a number, nor is it just the arrival of graying hair or wrinkles—unfortunately, for many of us, it creeps up with creaking stiffness in the joints, increasing awkwardness in movement, degeneration in the spinal discs, and a jangling of the spinal nerves.

Elderly stooped woman with shoulder bag hobbling with stick, back view.
Poor posture adds years to our appearance, and wear and tear to our joints, perpetuating further problems. Image from Pixabay

Man in his 40s with back pack and phone standing at train station.
Postural distortions usually start long before old age and can go unnoticed to the untrained eye. 

Research has shown that we are tuned to seeing facial symmetry as a way of selecting partners—I suspect a similar instinct is at play for recognizing healthy natural movement and body architecture. Over millenia, we have evolved to be captivated by elegance, strength, and symmetry in the body—because it is associated with good health, function, and longevity. Conversely, when we see severe muscle tension, limping, or marked scoliosis, we recognize it, and it causes us consternation for good reason. Especially so, when we don’t know what to do about it.

Getting older but more capable

Most of the things we do to improve our health help a little at the margins, but every now and then something comes along that has a greater magnitude. Learning to embody healthy posture is one of these pivotal things that can radically change our physical and mental way of being in the world.

The most common transformation that I hear about—a lot—is how much better people feel following an initial training in our method. The Gokhale Method® helps you to Move like you are meant to. You gradually rediscover the natural posture you likely had as an infant, and, because posture is a freeze-frame of your movement, this gives you the right biomechanical baseline for more fluent, coordinated, youthful, and efficient movement. You will learn to hip-hinge, to glidewalk, and if you like, to dance! The first step is to understand that change is possible.


Alumna Laura Goldman Weinberg speaks to fellow back pain sufferers who wonder if they will ever find a resolution of their pain… 

“Coming home” with the Gokhale Method

In our January blog posts we will be featuring alumni, including Laura, who want to share their success stories and their new-found body wisdom. They have followed either our in-person Gokhale® Foundations course, one-day Gokhale® Immersion course, or our online Gokhale® Elements course, plus our Gokhale Active program, and are feeling great and know how to exercise injury free. More times than I can count I’ve heard delighted alumni liken this journey to peeling off the layers of an onion, shedding oppressive stiffness and poor habits, and coming home to their core.

In January we will also offer two special workshops on the topic of getting older and feeling younger, and will announce more details in our next blog post, as well as sending personal invitations by email…keep a look out!

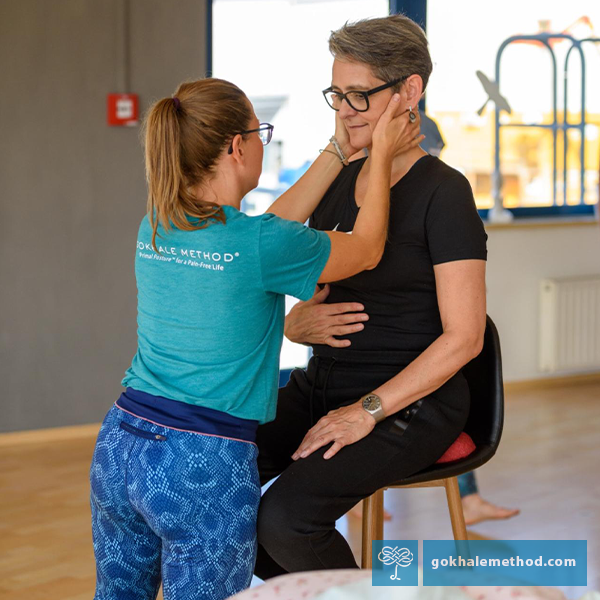
Gokhale Method Teacher Johanna Picker adjusting student’s head position.
Our students often experience a deep and welcome sense of homecoming and youthfulness in their bodies.

One thing we frequently hear from our students is that friends compliment them on their “beaming it out” and looking more vital. One such example came from our online student, Kevin Ott, who recently told his teacher how a friend he met up with said he was the only person he had not seen in many years who actually looked younger!

Kevin’s posture journey

Kevin and his wife took Gokhale Foundations with me in 2017, when Kevin was suffering with neck pain which radiated into his right shoulder and arm. Lying down was so painful that quality sleep was virtually impossible, despite having his career and a two year old daughter to take care of. Kevin has now been pain free for years, and is continuing to fine-tune his posture with a monthly online Gokhale® Consultation with his Gokhale Method teacher. This year he has used many of his sessions to support strength training regularly at home, and uses free weights, a bench, TRX® Suspension Training and pull-ups/dips apparatus. He enjoys this as a counter-balance to his sedentary job. Below you can see the age-reversing effect of the Gokhale Method time machine!

Before and After side standing photos of Gokhale® Elements student Kevin Ott.
Kevin has not only resolved his chronic neck pain but is continuing to hone his posture and improve his athletic ability. We think you will agree that he looks more youthful!

Best next action steps 

If you would like help with finding a more youthful posture, get started by booking a Gokhale® Consultation, online or in person, with one of our teachers.

You can sign up below to join any one of our upcoming FREE Online Workshops…

The Gokhale® Wedge 2.0

The Gokhale® Wedge 2.0

Esther Gokhale
Date

In Spring last year we launched the Gokhale® Wedge. For years, our students have been requesting a convenient, ready-made wedge for upright sitting without a backrest, one that doesn’t require folding blankets and other makeshift (pun intended) measures. The requests also specified an attractive item to enjoy around the home or office, and that it be of durable quality, keeping its shape and good looks with daily use.

Many sitting wedges on the market provide a shallow, even slope that simply does not help you antevert your pelvis—at no place do they offer the steep incline that it takes to tip the pelvis forward “over a cliff,” so to speak. Worse, they are often too soft, allowing the bottom, which after all transmits most of the body’s weight to the wedge, to sink in too deeply, sometimes resulting in a reverse wedge! Some commercial wedges are simply too hard to be comfortable, and at best provide only one choice of angle for tipping the pelvis forward.

Young boy stacksitting on the ground, wearing a hat.
As infants we all sat easily with our behinds behind us, and our pelvis anteverted. A wedge helps us to regain this healthy angle. Image from Pexels

To implement the Gokhale Method technique of stacksitting, students require a firm but comfortable wedge with a choice of angles to tip the pelvis just the right amount for their particular body. This is required to be able to sit upright and relaxed, rather than the common back and forth between upright and tense, and relaxed but slumped. Stacksitting enables you to avoid compression on delicate spinal nerves, discs, and tissues, and encourages healthy breathing and organ function.

Three diagrams showing upright and relaxed, slumped, and upright but tense sitting.
Your pelvis is the foundation for your spine and upper body. With the pelvis anteverted and a J-spine arising from a healthy L5-S1 angle and well-stacked vertebrae, the upper body can be upright and relaxed (a). Without a wedge, most people sit either relaxed but slumped (b), or upright but tense (c).

Simplicity can take longer

It’s astonishing to me how long it took to pare a design for a Gokhale wedge down to its essential elements. We’ve been working on this for over a decade. We’ve hired professional design consultants, graduate students in Product Design at Stanford, and discussed the matter amongst our teachers. After discarding dozens of designs that included sophisticated mechanisms for adjusting the slope of the wedge, or replicated the front edge of chairs from the period of Louis XIV, we finally came to a wedge that is beyond simple by comparison. 

Our wedge, which only saw the light of day in March last year, is the simplest of all the designs we came up with—it’s a simple piece of foam, with a simple covering, and a simple zipper to close it up. Admittedly, the foam has a special shape—though that is not immediately obvious—and is of a high quality, resilient spec. It has just the right amount of give to be comfortable yet firm. 

Meeting needs and expectations

Above all, our students need a wedge designed to translate healthy posture principles into action. And rather than being a one-size-fits-all, this posture-friendly wedge works even as the user’s J-spine and L5-S1 angle progresses. 

Based on eighteen months of user feedback, we can say that the Gokhale® Wedge is serving people extremely well. It has been a great inclusion with the online Elements course bundles, ensuring students are always best equipped to efficiently learn to stacksit. Our students don’t hesitate to let us know what is working well for them…

Amazon 5-star review for Gokhale Wedge.

…and what can still be improved. We have listened to user suggestions and recently applied a few innovations that we hope will make you like our wedge even more.

New features of the Gokhale Wedge 2.0

The original and the v.2 Gokhale Wedge, side by side.
The original wedge (left) and its updated version (right) perform the same functions, assisting your pelvis and spine to be optimally positioned in sitting. The new Gokhale® Wedge has some innovations that we think you will like even better.

Sitting on the flat side: Our wedge has both a flat and a convex, rounded side. Using it flat side up, as shown below, it behaves like a teeter totter and gives varied options for the angle of its slope. This enables lighter people, and people with less L5-S1 angle, to tilt the wedge forward only as much as they want, and to sit on it higher or lower down, to find just the right amount of angle for them. It can give a gentle introduction to pelvic anteversion for those with sciatic pain, sacroiliac joint issues, or stiffness at the L5-S1 junction. As I already have a good bit of built in wedge in my third decade of stacksitting, glidewalking, etc.), this way around also suits me just fine. 

Close-up of stacksitting, sitting on the flat side of the Gokhale Wedge.
Sitting on the flat side of your wedge gives you a wide choice of height and angle.

To make sitting on the flat side smoother and even more comfortable, we have moved the zip of the washable cover from the center of the flat side to the edge of the new wedge.

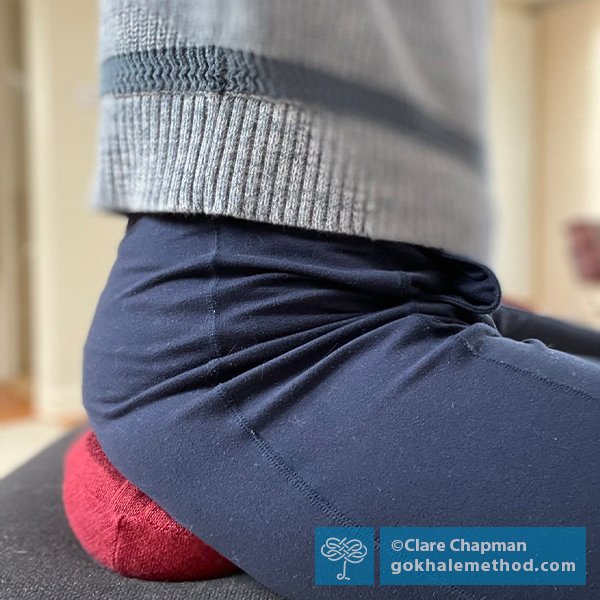
Sitting on the convex side: We have introduced a new non-slip PU leather on the flat side, giving users a non-slip base on slippery surfaces such as some wooden chairs and benches. As before, one of its rounded edges is slightly lower and less steep than the other, giving you nuanced choices of angle whichever way around you choose to use your wedge.

The Gokhale Wedge 2.0, positioned rounded side up on a chair.
This wedge is positioned ready for stacksitting, rounded side up. This way around can give the most anteversion by encouraging the pelvis to drop forward. The front edge as it is positioned here is slightly lower and has a gentler curve than the back edge. 

A change of fabric: The wedge is now in the same, slightly darker burgundy fabric that we use for our Gokhale® Head Cushion. It’s not only a nice aesthetic match, but its slightly coarser weave fabric also gives a better grip.

Photo of a woman stacksitting on a Gokhale® Wedge.
A well-designed wedge helps you to rediscover sitting comfort. It helps create healthy J-spine muscle memory for standing and walking too.

If you want to find out more about using our wedge, you can read our introductory blog post The Gokhale® Wedge for Relaxed, Upright Sitting, and view a video of me using it:


Here I am demonstrating how to sit on the Gokhale Wedge. Several postural principles combine to make stacksitting especially beneficial for our structure.

Your Gokhale® Wedge is backed up with know-how

No matter how well-designed, a wedge for sitting is best supported by training. This is true of all  our products, but perhaps especially so for our wedge, because stacksitting is a big departure from most people’s sitting form. You can learn about stacksitting in our in-person Foundations course, one-day Pop-up course, our online Elements course, plus our Gokhale Exercise program. These offerings, along with our DVD Secrets to Pain-Free Sitting, all teach the skills that enable you to enjoy your wedge optimally in daily life. 

Our students also appreciate being able to integrate using the wedge with our wearable PostureTracker™, which has settings that can track the degree of your L5-S1 angle, and the stack of your spine. Consider the Gokhale® Wedge a part of your toolkit as you improve your posture, and musculoskeletal health. 

Best next action steps for newcomers

If you would like insight on your sitting posture, consider scheduling an Initial Consultation, online, or in person.

You can sign up below to join any one of our upcoming FREE Online Workshops

Glidewalking Deep Dive

Glidewalking Deep Dive

Esther Gokhale
Date

Yesterday was midwinter day in the northern hemisphere. For many of us, this time of year means colder, shorter days, and a time when outdoor activities and social get-togethers can be more limited. 

Get out walking 

One thing we can do whatever the season is to get out on foot. Walking, done well, can significantly boost our circulation, burn calories, keep us warm, and assist our digestion—especially useful after rich and large festive meals! A good walk will also fill our lungs with fresh air and can boost our immune system to fight off winter bugs. 

Such exercise, especially in nature, is known to lift our mood. We can enjoy the company of friends and family—or go solo for some peace and introspection, as fits. All these potential benefits and more are summed up in the Latin phrase, Solvitur Ambulando, which translates as “walking solves everything.”¹

Couple in snowy distance walking, seen through tree branches.
Daylight, fresh air, nature, companionship, and good posture all contribute to walking being a healthy and holistic activity. Pixabay

Walking—a primal activity for optimal health

It’s all too easy, especially on busy days, to go without any significant period of walking. We could be at our desk, or “on our feet” all day, without getting into the rhythm that comes with sustained walking. Walking for 30 minutes or more at a time would have been much more familiar to our ancestors—going to school, to the shops, or to work—than it is to many of us today. 

In many parts of the world this is still the case, and women in particular often walk many miles to fetch water, food, and fuel. I don’t want to romanticize hard labor, but I do think that the lack of sustained walking in much of the industrialized world, especially the US, means that we miss out on an activity that has been intrinsic to our evolution and healthy functioning. 

Woman walking in market, Odisha, India.
Glidewalking describes the natural gait of our ancestors and many people living in more traditional or nonindustrialized societies—where joint and back pain are rare.

Learning to glidewalk makes walking a pleasure

Walking with the healthy gait pattern that nature intended keeps the feet, legs, and glutes strong, and the joints mobile. The Gokhale Method calls this glidewalking, and it is explained in detail in my book, 8 Steps to a Pain-Free Back. As the term suggests, it results in a smooth action which spares the joints, including the spinal discs and nerves.

The basics of glidewalking can be learned in our Gokhale Method® in-person Foundations and Pop-up courses, and our online Elements course. Students experience the most significant changes during sustained walking, as it takes some time and distance to ease any stiffness in the muscles and joints, find a harmonious rhythm with the breath, and “get into one’s stride.”

Student learning to glidewalk during a Gokhale Method course.
Students find that sustained walking embodies the changes they’ve learned to make in class.

Sustained walking also allows students to cycle through the cues they have learned, checking for details such as “back heel down,” and “land on a bent front knee.” By refining these cues with each pass, they become integrated as habits. With healthy biomechanics, students find their new walk becomes smoother, more powerful, and more pleasurable. 

The essence of glidewalking

For Alumni we offer an Essence of Glidewalking course, where you can deep dive to find out what’s possible for your walking by slowing a movement down, tracking the detail, and troubleshooting anything holding you back. You have two expert teachers, one demonstrating and the other watching you, plus the opportunity for Q&A both inside and outside the session. 

Essence of Glidewalking participant Elenore Wieler speaks about her experience of the course.

If you are one of our Alumni and would like to revisit and refine your walking, the Essence of Glidewalking is especially for you! Our next six-part course starts on January 16 at 8:00 a.m. PT time. You can sign up below:

If you would like personalized guidance on any aspect of your posture, consider scheduling an Initial Consultation, online or in person, with a Gokhale Method teacher

Find out more about how the Gokhale Method can help you with our range of upcoming FREE Online Workshops. . .… 

References

¹attributed to the Greek philosopher Diogenes or, alternatively, St. Augustine.

Sheila Bond’s Back Pain Journey

Sheila Bond’s Back Pain Journey

Sheila Bond
Date

My name is Sheila Bond, and I am the mother of four sweet kids, an artist, a knit and jewelry designer, and a private art teacher. In this blog post I would like to share with you my Gokhale Method® journey out of pain and despair.

Photo of Sheila Bond with expression of pain and despair.
Photo of me after my second disc herniation in seven years.

On May 6, 2022, I severely herniated the spinal disc between my L4/L5 vertebrae. In addition I had developed bursitis in my left hip during the previous three months, I believe from sitting improperly teaching online classes.

It happened on the Friday before Mother’s Day. By Saturday morning I could barely move and thought I might die or at the very least never recover. I ordered a TENS unit (transcutaneous electrical nerve stimulation, a mild electrical current to give pain relief) from Walgreens, and bought Salonpas patches and a walking cane. I took three Advil and two extra strength Tylenol alternating every six hours. 

I had previously herniated my L4/L5 in 2015, and had a laminectomy (a surgical operation to remove part of the back of vertebrae, usually to relieve pressure on nerves.) That surgery had left me in terrible pain. When I told the surgeon I was still in pain in my tailbone/sacrum area, he told me he could remove my tailbone. I declined. Following surgery, I also went to physical therapy for a year and a half, but it gave me more pain than it took away.

   MRI 2015 of Sheila Bond’s lower back showing first L4/L5 herniation.
My MRI from January 2015, showing my first L4/L5 herniation (red arrow).  

MRI 2022 of Sheila Bond’s lower back showing L4/L5 herniation and soft tissue damage.
My MRI from May 2022, showing my second L4/L5 herniation. I was particularly disturbed by the amount of tissue damage in the area after my first surgery (circled in blue).

It wasn’t until five years later when I discovered a traditional Chinese acupuncturist that I found any real relief in that area. During that timespan I was also diagnosed with EDS (Ehlers-Danlos Syndrome, a connective tissue disorder), and discovered that I consequently had a hypermobile sacrum that was prone to dislocation.

Returning to May 2022, I was in denial that it could be my spine and insisted it must be my hip causing the electrifying pain that ran all the way from my hip to my foot. I thought maybe it was something wrong with the joint. I just really didn’t want it to be my spine again. On Monday, May 9, I finally agreed to go to the ER after hearing that my GP could not squeeze me in.

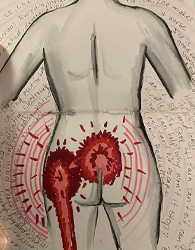
Annotated drawing by Sheila Bond indicating red areas of extreme leg pain.
The electrifying pain ran all the way from my hip to my foot.

At the ER they gave me an IV, Valium and Fentanyl. It barely touched the pain, and only for an hour, and then they’d give me more. They did an MRI of my back and an X-ray of my hip. After about four hours they sent me home with the diagnosis of a severely herniated disc and bursitis in my hip. They gave me 10 Vicodin pain pills, 30 muscle relaxants, and a package of steroids and told me to see an orthopedic surgeon or a neurosurgeon. 

Sheila Bond’s photo from her bed of bleak ER room.
The ER room looked bleak, just like my state of mind.

The pain continued. I couldn’t dress myself. I could barely move or function at all. I called the orthopedic surgeon the next day who said my hip didn’t need an operation since the problem was bursitis, and that I should see a spinal surgeon or a neurosurgeon. I did not as I was so scared by my last experience. (I didn’t take the steroids either.) Instead, on May 12, I headed three hours away with my youngest kid in tow to see an acupuncturist who specialized in chronic pain and spinal injuries.

Photo of dark sky and dust storm approaching the highway.
There was severe weather on my agonizing 3 hour drive to seek help. But I was desperate—and determined.

The acupuncturist recommended daily treatment so I checked into a hotel. She told me all my L1-L5 discs were not doing well. After five days of treatment, I experienced some pain relief, but sadly I tripped on my cane and fell into a wall, reversing any healing done. The pain then became so bad that I felt as though I was being constantly electrocuted. I couldn’t sleep. I drew and painted from my bed trying to explain what I was feeling. 

Annotated drawing by Sheila Bond indicating red areas of extreme back and hip pain.
I tried to communicate my experience visually.

I am the main breadwinner for my family and I really could not miss work. I tried to teach my private Zoom art classes, but standing and sitting were both unbearable. I forced myself to teach some of them and rescheduled others. My birthday was on the 22nd and I felt like I was on my deathbed. I am used to being the one to care for others, so this was a terrible place for me to be.

I felt so bad for all my kids. I took the youngest one, who was with me, to the zoo, but had to use an electric wheelchair. I took the prescribed Vicodin and muscle relaxants to make it through, but still had to keep changing positions, fighting the pain. Some of the time I couldn’t even hold the steering wheel to make the wheelchair go, and then my kid would offer to steer for me. We didn’t stay long.

This video shows a GIF I made from two drawings to express the pain I experienced.

My sweet sister Aileen who lived states away was worried about me. She had recovered from back pain having worked with Esther Gokhale in California, and told me Esther could help me and sent me the Gokhale Method website. From my hotel bed she and my father helped me to sign up for the 18-session online Elements course. 

Before meeting Esther Gokhale I tried. . . 

Ice
Advil
Norco
Tylenol
Tens unit
Massager
Hydration 
Electrolytes 
Arnica salve
Heating pads 
Cyclobenzaprine
Lowering my chair 
Gentle safe stretches  
B and C vitamins, zinc 
Short walks every day 
Heat wrap around calf
Gentle and slow motion 
Hot baths with Epsom salts
Trying to correct my posture myself
Hand massage of my leg muscles, daily
Inversion table—horrible, won’t do it again
Acupuncture—two weeks of daily treatment 
Herbal tea from my acupuncturist and herbalist 

I met Esther on May 24 from my hotel room over Zoom. Esther was kind and gentle, and confident that she could help me. I couldn’t sit so Esther guided me to a position lying on the floor with my feet in a chair—that relieved enough of the pain so we could talk. We set up the sessions to begin on May 31. It was so hard to take the before-course posture photos.

From the very first Elements lesson I found some relief. It was small gains at first, but I could tell the difference. I was in so much pain even the littlest movements were hard. The tiniest shifts helped a lot. I hadn’t slept well in so long.

Esther thought pain medication might be helpful to assist me though the sessions. Finally in the middle of June I went to see the neurosurgeon. I carried with me my copy of 8 Steps to a Pain Free Back. I told him I had been having private posture lessons with Esther Gokhale—I had done five at that point. He hadn’t heard of the Gokhale Method, and, as he could see that my herniation was pressing against my spinal nerves, he wanted to do surgery immediately. I told him I wanted to continue to try to heal myself, and that I wanted to try pain medication to support that. He couldn’t believe I had held on so long in my condition, and I think he realized my strength and conviction. He made an appointment for a spinal injection in two weeks’ time (which I never had) and prescribed me the second strongest Percocets available. 

I took the pain medication for only three-to-four days as they made me nauseous, but it was long enough to give me some relief and I was able to do more during our posture sessions. Each session gave me a posture gem that I needed to know. I practiced over Zoom with Esther, and by myself in between our sessions. It was amazing to me that I was learning how to heal myself and avoid pain. 

Joyful pen and wash drawing of a tree, angled skyward, by Sheila Bond.
Today I find myself returning to making joyful and more optimistic drawings like this sketch of a tree, looking skyward.

Things really began to shift for me about a third of the way through the course. When Esther taught me standing, I changed my stance by kidney-bean shaping my feet, externally rotating my legs, and relaxing my pelvis and belly, allowing my behind to be behind me. I’ve had four kids, and had gotten used to holding tension and trying not to let my belly show. I had become scared to move out of my “locked up” position for fear of more pain. After learning how to relax into a healthy standing posture, a huge percentage of the back pain dissipated. 

Around mid-July, halfway through Elements, we started learning to glidewalk. This brought another huge shift, as my searing leg pain finally started to recede. I had admired my sister’s strong, smooth way of walking since she had taken the in-person Foundations Course, and now I too was learning how to keep my back heel down, and to land on a bent front knee. Having struggled even to stand for months, getting walking again took some determination just to move a few yards. 

Sheila Bond holds a charoite and copper pendant she made.
By August I was able to return to making jewelry like this charoite and copper pendant.

By lesson 14 or 15 I was able to walk without a cane. I realized I still had to focus on anchoring my ribs as well as all the changes with my gait. I still hear Esther saying to me “heel down, ribs down. . . ” Having a teacher prompt you in real time was so helpful.

Some days were better than others, and progress ebbed and flowed. I have learned that I need to treat myself with love and patience. I had become so used to having to push through my pain to look after everybody else—to work, look after my kids, even just to get the dishes done. 

I still keep a 20-minute reminder (app) on my phone, to bring me back to mindfulness about my posture, whatever I’m doing. I realize that the pathway for the disc herniation is still there—but I feel that it isn’t going to happen again because I now have the tools to stay long, strong, and well aligned in my back.

Sheila Bond selfie, smiling out in the countryside.
I’m getting back to living again. I’m able to teach my private art classes comfortably and have hope for the future.

At the end of my 18 lessons, I actually danced to the 1-2-3 Move Gokhale Exercise program. I have always loved dance, and it was thrilling to start to do that again, at my own gentle pace. I want to share my story far and wide, so please share this post. Everyone in pain deserves to have realistic hope, and to know that they can heal.

If you would like guidance on any aspect of your posture and spine shape, consider scheduling an Initial Consultation, online or in person, with a Gokhale Method teacher.

If you would like to find out more about how the Gokhale Method can help support you, sign up to join one of our upcoming FREE Online Workshops. . . 

Home Exercises Part 4: Low Planks

Home Exercises Part 4: Low Planks

Esther Gokhale
Date

This is our fourth blog post in the series where we put popular exercises under scrutiny to examine how they stack up—or not—against the principles of healthy posture. Here we are looking at “low plank,” a whole-body exercise that particularly develops abdominal strength and trunk stability. 

Our model for the photographs is Eric Fernandez, our Gokhale Exercise teacher who teaches the Gokhale Method in the Philadelphia area.

Low plank is done on the forearms, which avoids pressure on the wrists. 


The classic version of this exercise with straight arms. Active hands and a slight bend at the elbows will likely ease strain on the wrists, but we recommend you do low plank first.

Get all the benefits of plank, avoid any risk of damage

Plank is an excellent exercise for developing the muscular strength and coordination you need to align, support, and protect your spine. While pursuing these benefits you don’t want poor form to distort your spine and risk damage to your spinal discs and nerves. The exercise guidelines that allow you to do plank safely also train your body for healthy posture in daily life.

If you are new to this exercise, or the Gokhale Method®, I recommend that you prepare your body by learning to use your inner corset. The inner corset consists of the deep muscles of the abdomen and back which support and protect the spine. This is explained in detail in my book, 8 Steps to a Pain-Free Back.


Free Chapter of 8 Steps to a Pain-Free Back

To help you on your posture journey we are delighted to offer you two gifts:

  • A subscription to our bi-weekly informative newsletter Positive Stance™
  • A pdf of the Inner Corset chapter (ab strength) from 8 Steps to a Pain-Free Back

Please enter your email address in the field below. If you aren’t already a newsletter subscriber, you may need to respond to a confirmation email.

Free Chapter of 8 Steps to a Pain-Free Back

CAUTION: If you have back pain or a diagnosis or suspicion of herniation, stenosis, osteoporosis, or other spinal deterioration, you should consult your preferred health professional before practicing plank. 

Let’s get started

Start with a baby version of low plank in which your knees remain on the floor. This creates a shorter span and requires less abdominal strength to hold you horizontal. From a kneeling position:

  • Engage your inner corset—you will maintain it throughout the exercise.
  • Roll your shoulders back, lengthen your neck, tuck your toes under. 
  • Lower yourself into your start position, elbows on the floor directly under your shoulders and forearms forward and parallel. You can also start in a baby Cobra position and lift your trunk away from the floor. 
  • Bring your trunk to horizontal. Maintain your torso, neck, and head in this straight, horizontal line. 
  • Initially, aim to hold baby plank for 5-10 seconds at a time. Repeat 5-10 times.
  • Breathe steadily throughout. 


Baby plank develops healthy muscular strength, endurance, and coordination.

Full low plank

When doing plank on your knees is easy and you can breathe evenly, you can progress to doing the exercise with your legs straight and your weight on your toes. 


Full low plank. You may need to drop back on the duration or repetitions initially, and then build up again. 

Common Mistakes:

Neck tension:

Keep your neck lengthened with your head parallel to the floor; do not crane to look up. Tension in the back of the neck should not be attempting to lift you up. Neither do you want to drop your head down—rather, you want the deep muscles at the front of the cervical spine (longus colli) to support your neck, along with the inner corset.


Do not tense the back of your neck and pull your head up. 

Swaying the back:

It is important to not sag in the middle. Without a strong inner corset, the abdominal contents will hang downward, which will sway your lumbar spine and compress your discs and nerves. Practice the inner corset exercises consistently and you will soon be able to maintain a horizontal position.


The lower back is dipping into a sway, with tell-tale shirt creases in the lumbar area.

Tucking the pelvis, rounding the back and shoulders:

You may find yourself tucking your pelvis, especially if you have been trained to do this when working your abdominals. You may also be working your glutes inappropriately—you want your inner corset to brace you, not clenched buttocks. Work with a more relaxed feeling in your pelvis and hips and allow your behind to remain behind you. 


Rectus abdominis is flexing the spine and tucking the pelvis. Rounding the back and shoulders are also misguided efforts to push or lift up. 

It can be tempting to push away as you take your weight in plank, rounding your shoulders. Resist this habit and allow your chest to remain closer to the ground. Drawing your shoulder blades together may help.

Make sure you are not tucking your pelvis or pushing your chest away from the ground, both of which will likely result in rounding your back.

If you would like to practice this great exercise for your back health, join Eric for a “low plank” Gokhale Exercise class on Friday, November 26 at 9:45 a.m. (Pacific Time). If you have not yet subscribed to the 1-2-3 Move program, sign up now for your 7-day Gokhale Exercise Free Trial.


1-2-3 Move happens daily with Esther or guest teachers at 9:45 a.m. 
Gokhale Fitness with Eric runs Mondays, Wednesdays, Fridays from 7–7:25 a.m.
(Pacific Time), and Tuesdays, Thursdays, Saturdays from 3–3:25 p.m. (Pacific Time)
Gokhale Moving Meditation with Roberta is Mondays at 2 p.m. and with Kathleen is Wednesdays at 12 p.m. (Pacific Time)

Subscribe to spinal nerves